T3-B T6-B Maintenance 17. Calibration
130 T-B series Maintenance Manual Rev.1
17.2 Calibration Procedure
EPSON RC+ has a wizard for calibration.
This section indicates the calibration using the calibration wizard of EPSON RC+.
The way of calibration for each joint is the same expect for some parts.
The follow the steps below are calibration using Joint #1. Follow the steps below to calibrate
other joints.
When coordinates for the Manipulator working point require calculation, it is important for
Joint #2 to be calibrated accurately. Execute the procedure in “Calibration Using Right /
Left Arm Orientations” to accurately calibrate Joint #2. For details, refer to “17.3
Accurate Calibration of Joint #2”.
You cannot calibrate Joint #4 alone because of the structure of the Manipulator. When
calibrating Joint #4, you must calibrate Joint #3 and #4 at the same time.
If Err9716 or 5016 (Power supply failure of the absolute encoder. Replace the battery.
Check the robot internal wiring) occurs, apply the procedure of “17.4 Reference:
Calibration Procedure Without Using Calibration Wizard - 3. Encoder Initialization” and
then, start the calibration wizard.
The reference point (a point to check the accuracy) needs to be specified for calibration.
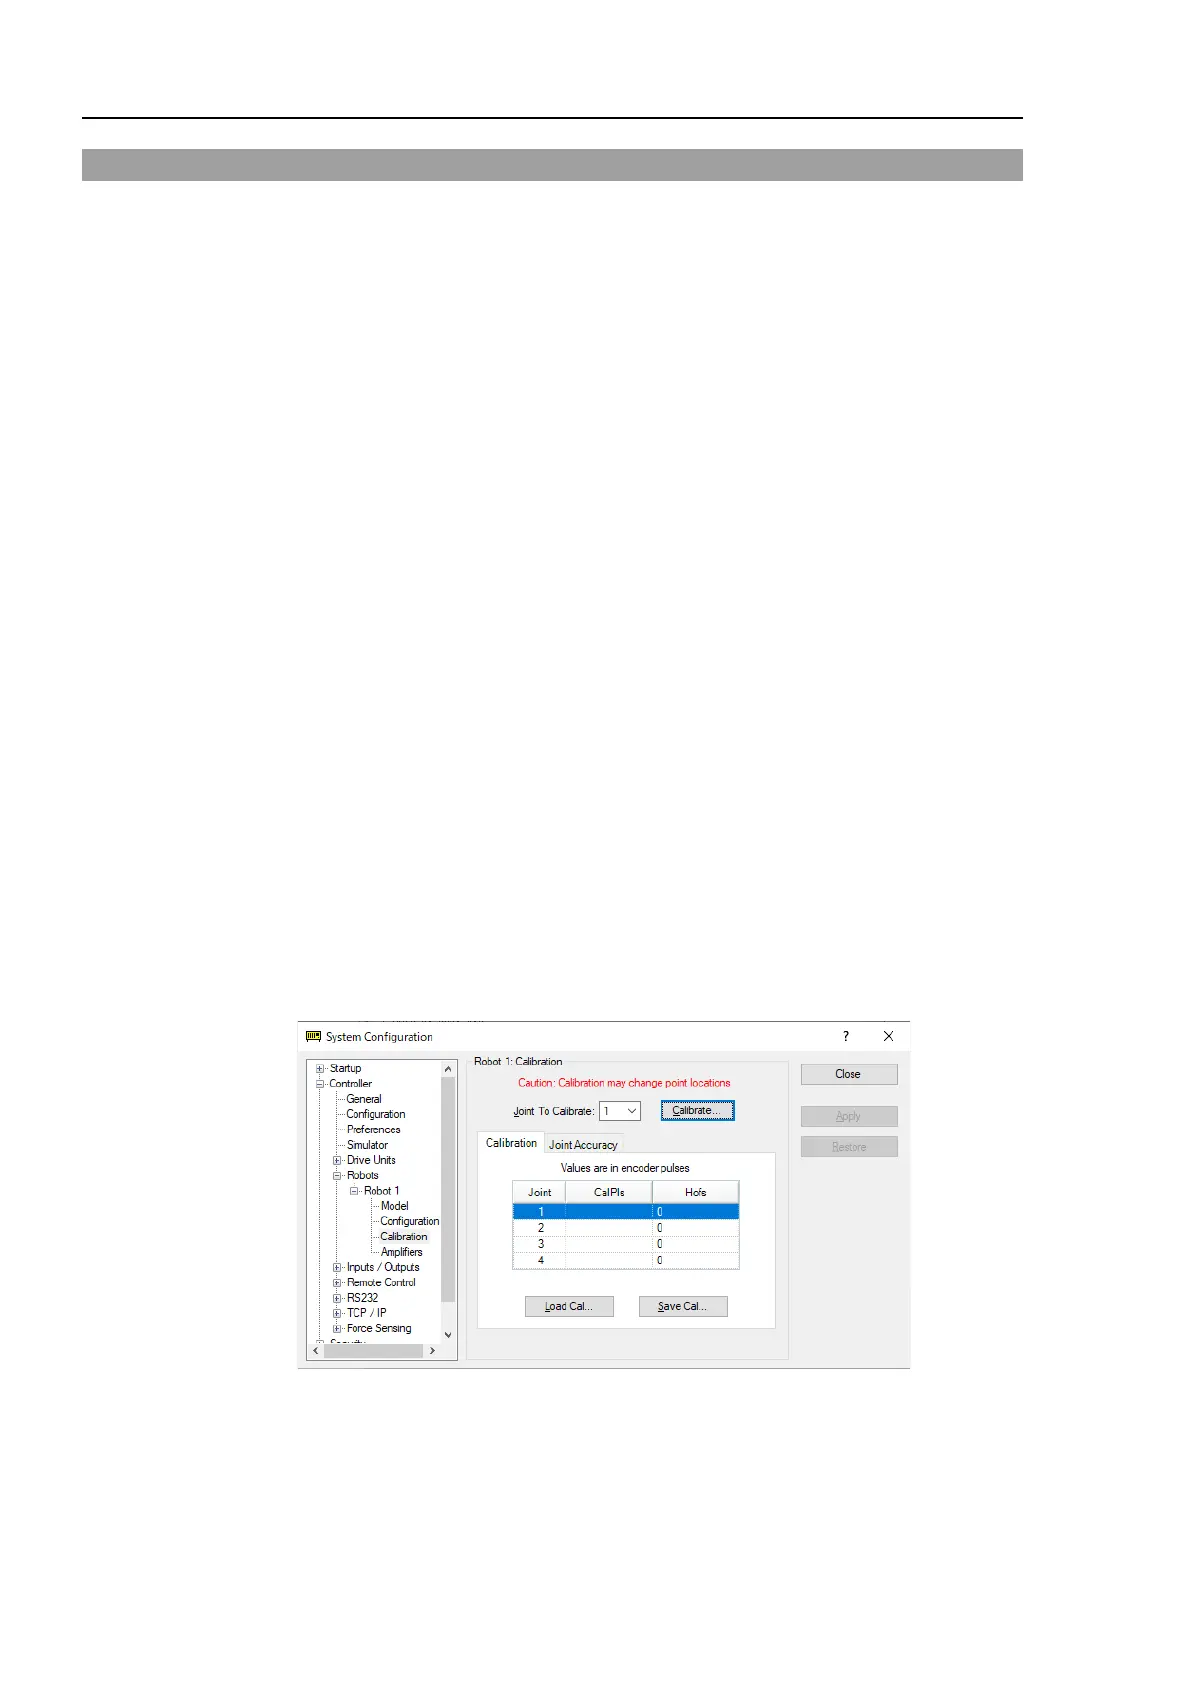
(1) Start the calibration wizard.
i. Select EPSON RC+ 7.0 menu-[Setup]-[System Configuration] to display the
[System Configuration] dialog.
ii. Select [Robot]-[Robot**]-[Calibration] to display [Robot**: Calibration].
iii. Select the joint and click the <Calibrate…> button.
 Loading...


