S2E-17-0208_OM_WR2120_C
27
2.6. Radar Adjustment
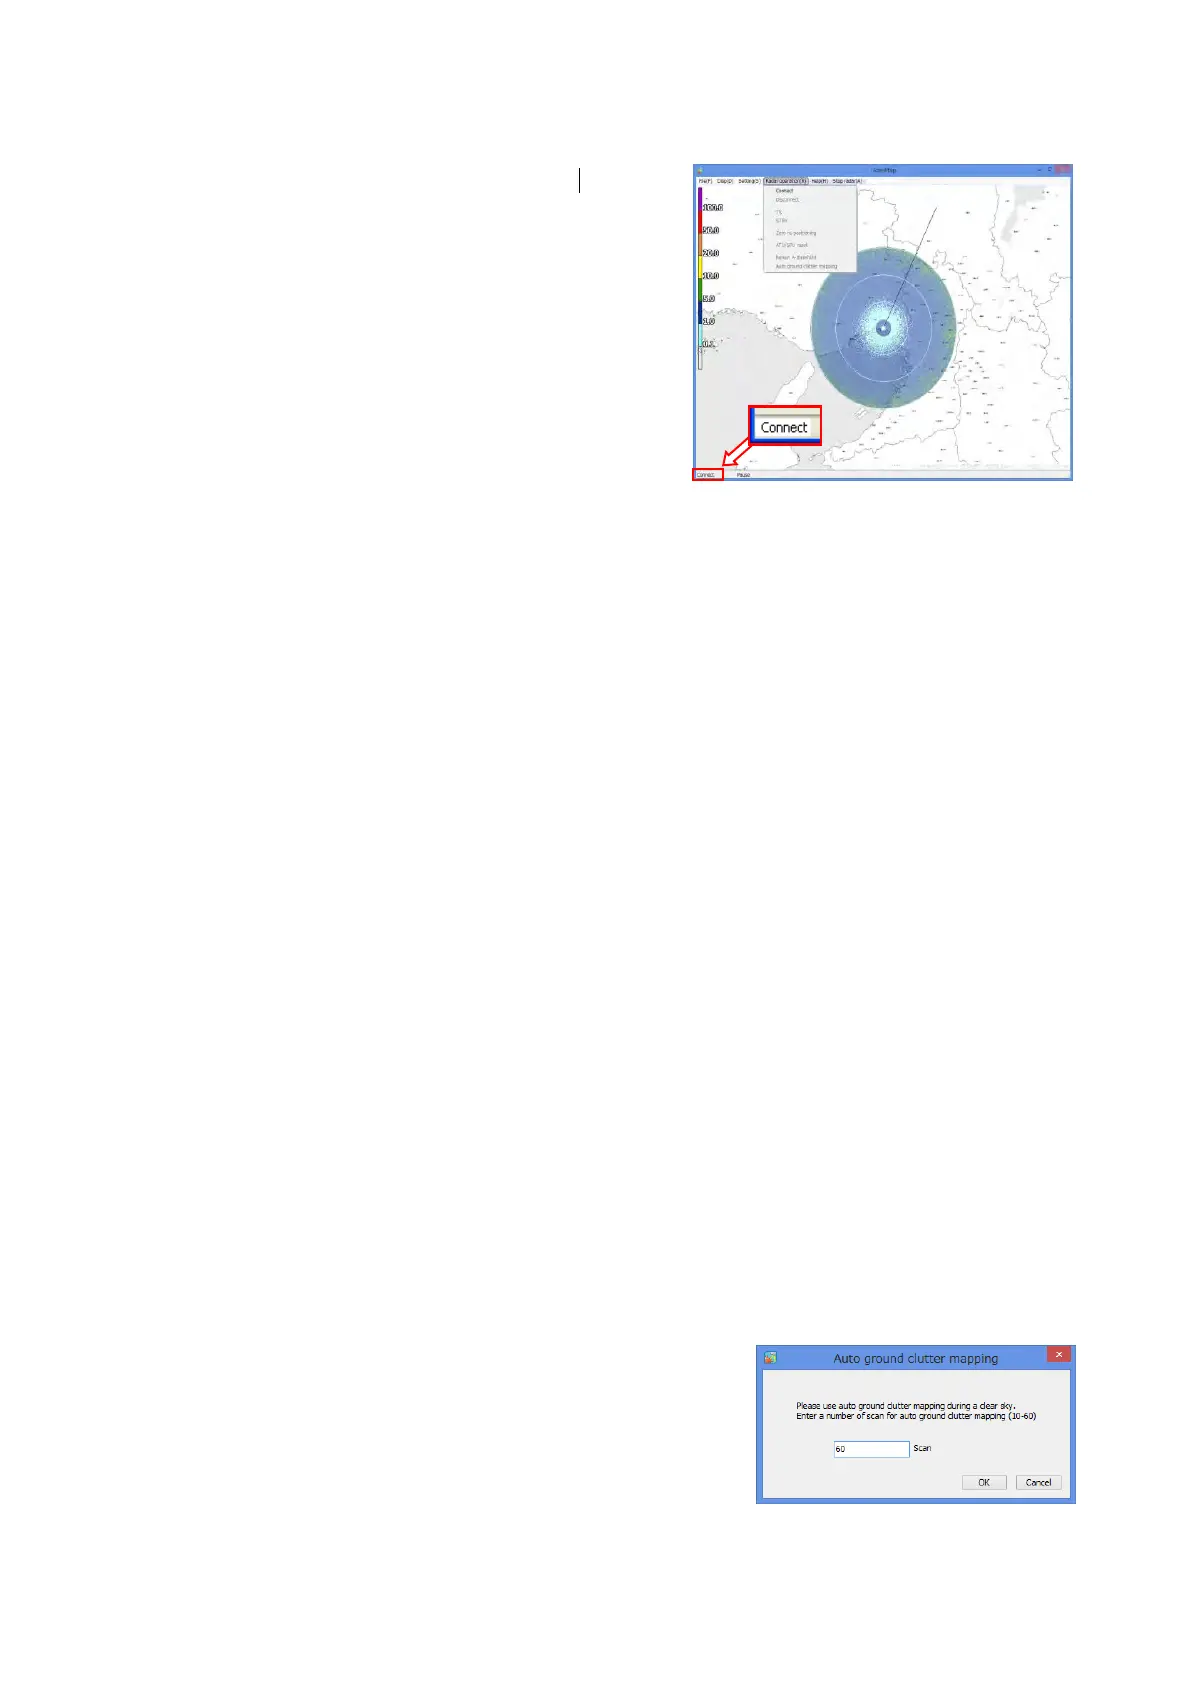
Press [Ctrl] + [Alt] + [Radar Operation] simultaneously to display the adjustment menu in the menu bar.
1) Turn on the power of Data Processing Unit.
2) Software will start automatically.
3) Click [Connect] button to start radar operation.
[Connect] will be displayed in the left bottom.
4) Click [TX] button to start observation.
5) Radar echoes will display with rotate scanning line after
on-screen message “[Initializing]”.
6) Click [STBY] button to stop observation.
7) Click [Disconnect] button to disconnect from radar.
Notice:
The following commands will not operate without
connecting radar:
- Radar operation (Connect/Disconnect, TX/STBY).
- Screen capture.
Starting radar in cold weather:
If initialization of transmit [TX] fails after turning on the ATU power in cold weather, wait for a
period of time with the power on and then try [TX] again.
1. Zero re-positioning
It forces the radar antenna to re-acquire the origin (zero point) direction if an elevation failure occurs.
2. ATU/SPU reset
It forces ATU to reboot. Only use when error occurs during normal operations.
3. Renew A-threshold
Notice: A-threshold has been adjusted at factory, therefore it uses only when really necessary but it
still have to adjust by [Pulse spec.] in [TX] setting menu (Refer to section 2.2.1) 7) after this
operation.
Click [Renew A-threshold] to adjust the noise level after clicking [Connect]. It will start receiving radar
and then stop automatically after adjustment. Also it will overwrite to A-threshold.
Caution: DO NOT engage function arbitrarily or current optimized data may be erased.
4. Auto ground clutter mapping
This ground clutter mapping is using the function of volume scan mode.
When possible it should only be measured during a sunny and cloudless day.
Please setup the following:
- Setting -> Advanced setting -> Ground clutter rejection -> GCR: 1
Pressing [Ctrl] + [Alt] + [Radar operation] simultaneously, and click [Auto ground clutter mapping] to
start measurement after above setup is completed.
32 elevations are possible and can be setup by Volume scan mode to measure up to 32 elevations
automatically.
(1) Setup the number of times to run scenario: Setup a
number of times to scan from 10 to 60 (Large scan
number can produce higher accuracy).
(2) Confirm start of measurement: Click [OK] to begin
when ready. Click [Cancel] to quit measurement.

 Loading...