4GTN 750: USING FLIGHT PLANS
Using a Flight Plan to Navigate
For anything other than a short ight to a nearby airport, cre-
ating a ight plan improves your situational awareness and lets
you take full advantage of the GTN’s features. When you create
a new ight plan, it’s best to save it in the catalog. Flight plans in
the catalog are available the next time you power up the GTN.
You can store 99 ight plans with up to 100 waypoints each.
Create a new flight plan and save it in the catalog
1. On the Home page, TOUCH Flight Plan.
2. On the Active Flight Plan page, TOUCH Add Waypoint.
3. Use the keypad or the Large and Small knobs to enter the
rst waypoint (usually the departure airport)
4. TOUCH Enter or PRESS the Small knob.
5. Repeat steps 2–4 to add more waypoints.
6. Aer adding the last waypoint (usually the destination
airport), TOUCH Menu at the bottom of the screen.
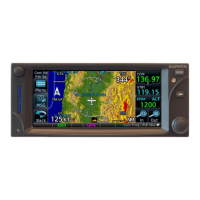
7. On the Active Flight Plan Menu page, TOUCH Store.
Activate a stored flight plan
1. On the Home page, TOUCH Flight Plan.
2. On the Active Flight Plan page, TOUCH Menu at the
bottom of the screen.
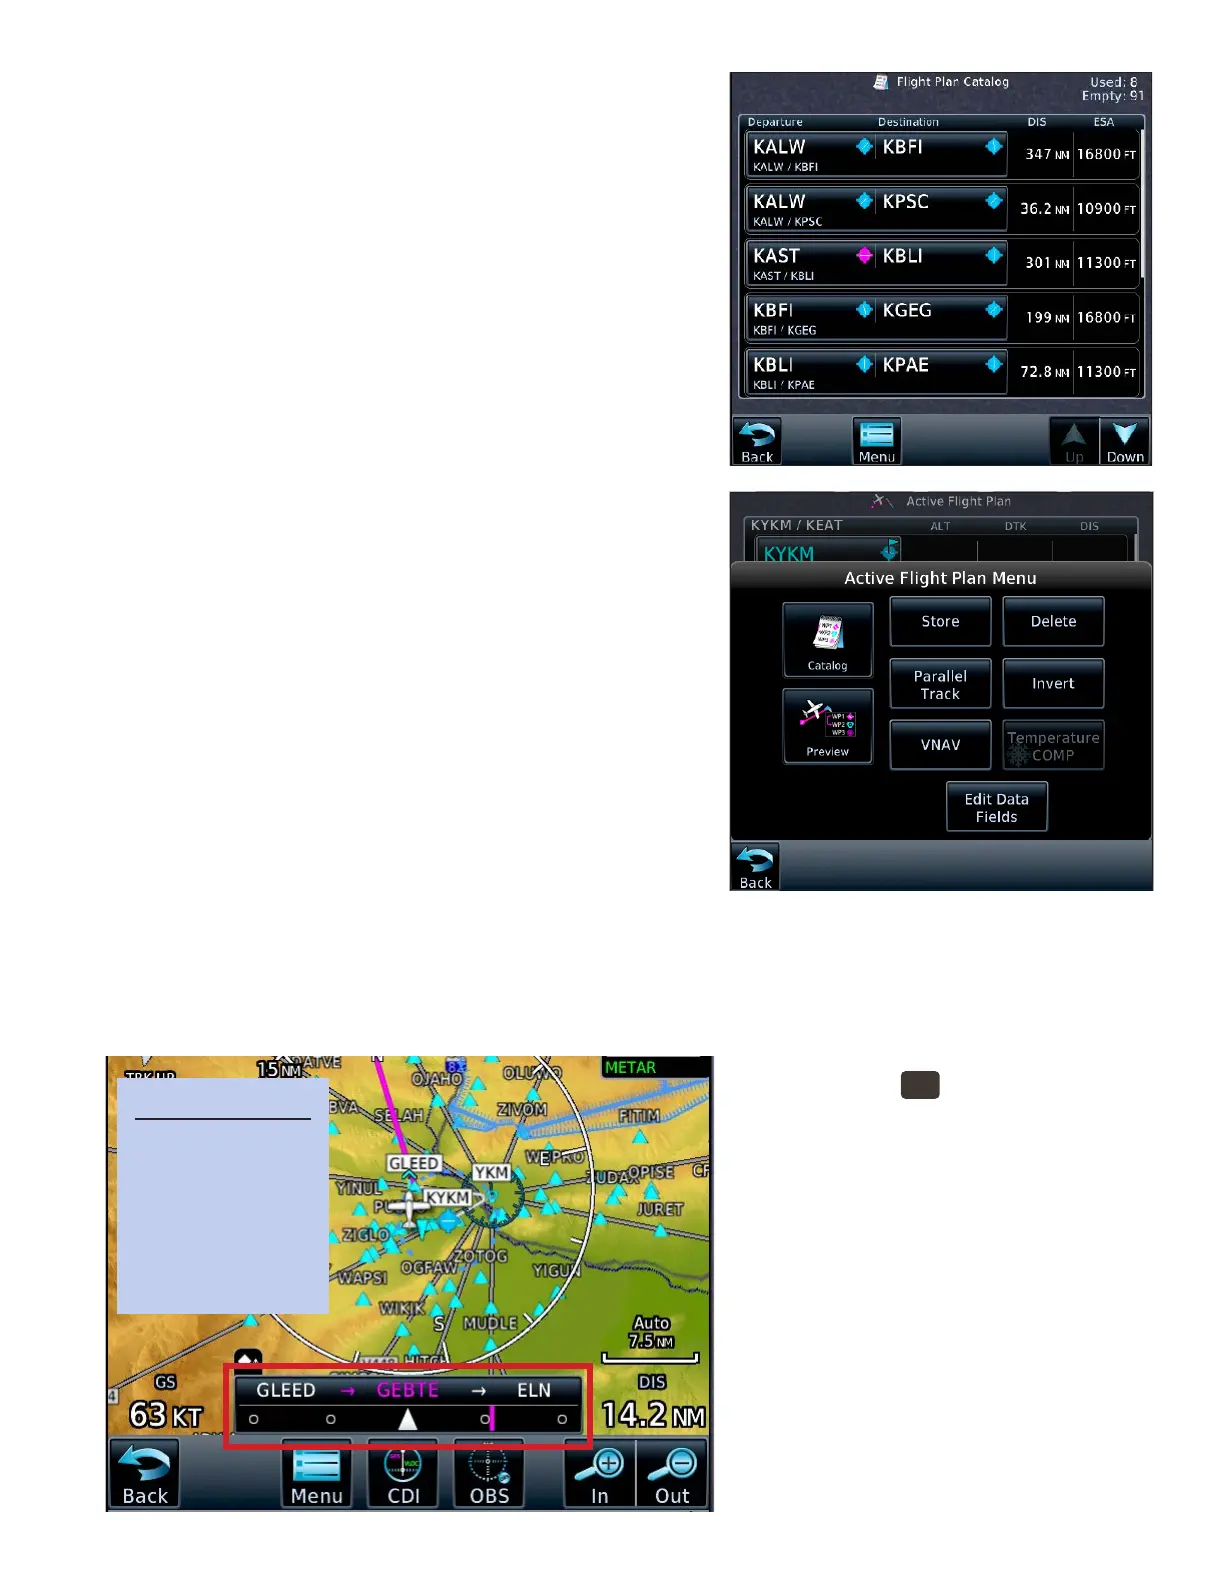
3. On the Active Flight Plan Menu page, TOUCH Catalog.
4. On the Flight Plan Catalog page, TOUCH the name of
the ight plan that you want to y. To see all the ight
plans stored in the catalog, TOUCH the Up and Down
arrows in the lower-right.
5. In Route Options, TOUCH Activate. If another ight plan is active, the message “Replace current active
route?” appears.
6. TOUCH OK.
Show the active flight plan
1. PRESS the
HOME
button.
2. On the Home page, TOUCH Flight
Plan.
Delete the active flight plan
1. On the Active Flight Plan page,
TOUCH Menu.
2. On the Active Flight Plan Menu page,
TOUCH Delete.
3. At the “Delete all waypoints in ight
plan?” prompt, TOUCH OK.
Note: If this ight plan was stored in the
catalog, a copy remains in the catalog.
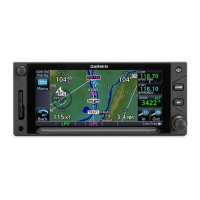
TIP
On the Map page,
TOUCH the past
active and subse-
quent waypoints
bar to view the
flight plan.