4. General Product Information
PNEG-750-G2 16" Series II Sweep 131' and 135' Diameter 21
To Remove
1. Remove all screws.
2. Insert screws in hole or holes indicated on
Figure 4A on Page 20
. Loosen the bushing by tightening
the screw(s).
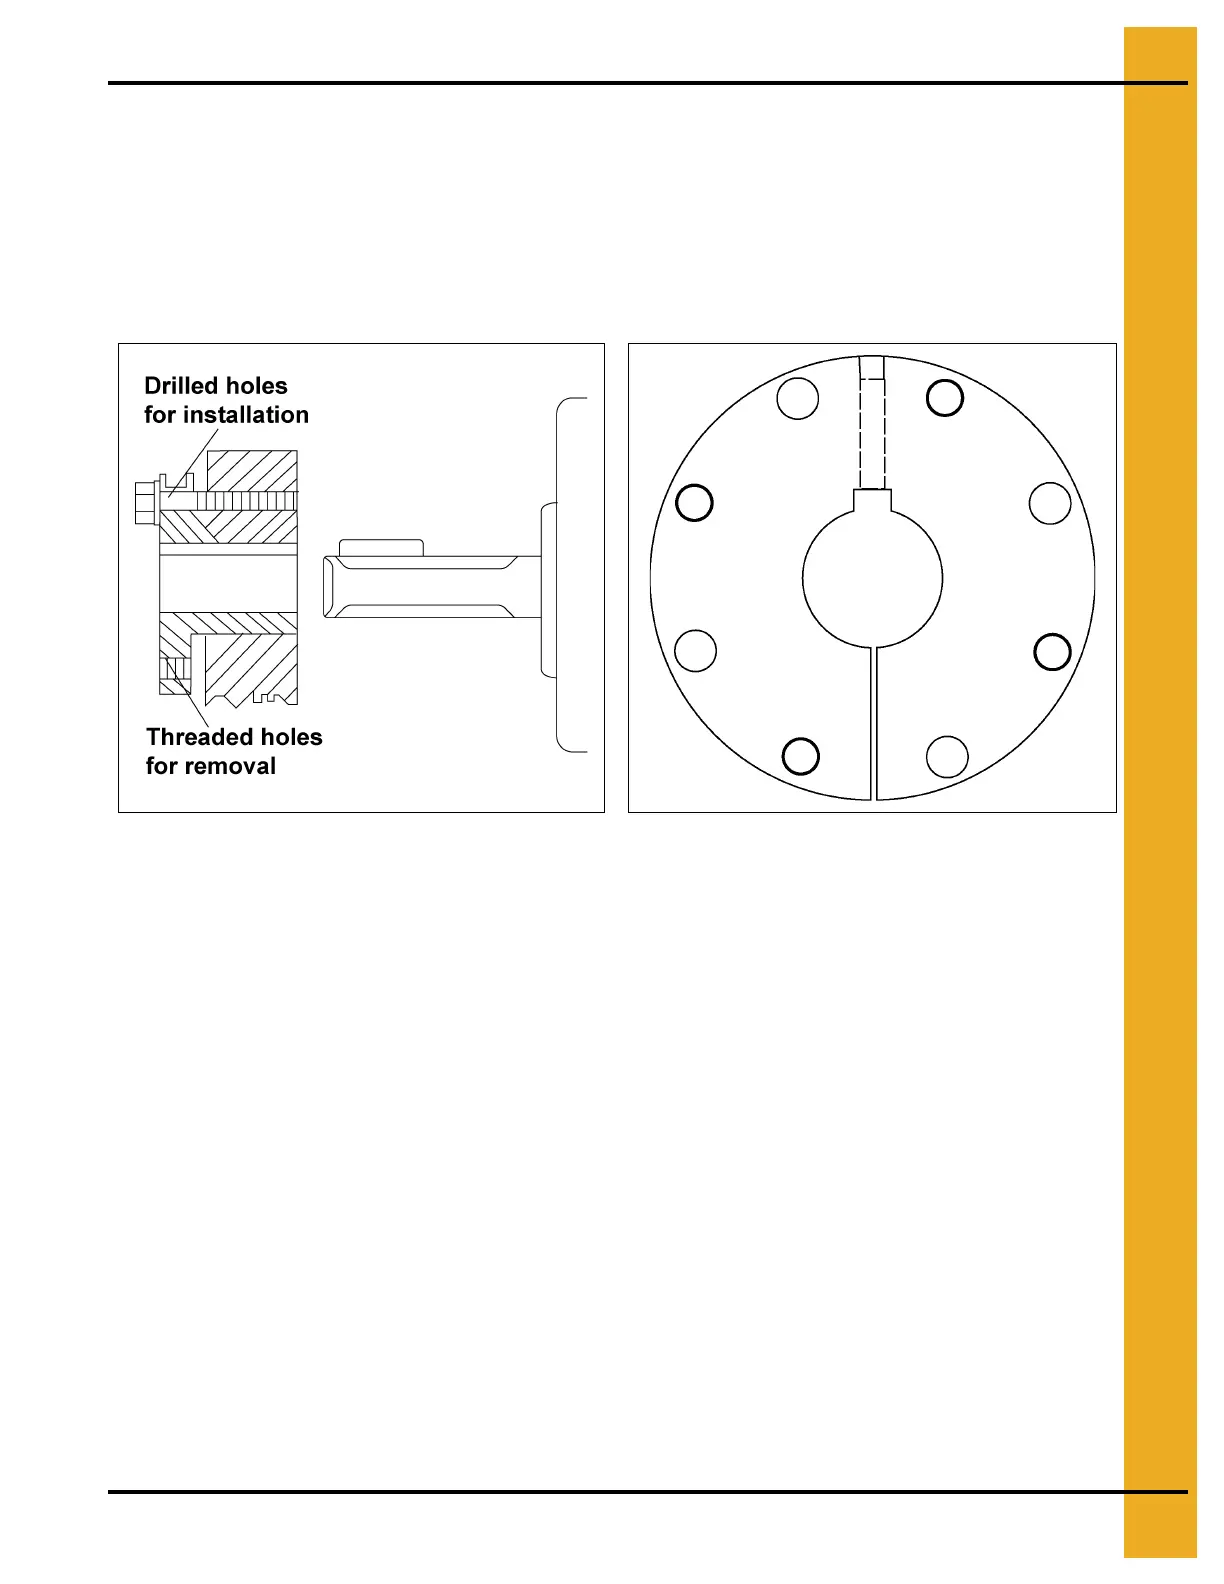
Q-D Bushings - Reverse Mounting
Figure 4B
Figure 4C Overhead View of Q-D Bushing
To Install
1. Clean shaft, bore of bushing, outside of bushing and hub bore of all oil, paint and dirt. File
away burrs.
2. Reverse mounting: Place the bushing in hub and insert the cap screws through the drilled holes in
the bushing flange. Tighten the cap screws, finger tight into threaded holes in the hub.
3. With the key on the shaft, slide the loosely assembled unit onto the shaft so that the cap screw
heads are on the outside. Place the unit in the desired position on the shaft.
4. Tighten the cap screws alternately and evenly to the wrench torque specified in the
Chart on Page 22
.
NOTE: When tightened, there will be a gap of 1/8" to 1/4" between the bushing flange and the hub.
Should this gap be less, either undersize shafting or the wrong bushing shaft size was used.
5. Tighten the set screw (if supplied) over the key to the torque value listed in the Chart on Page 22.
 Loading...