Digital Video Recorder User Manual
155
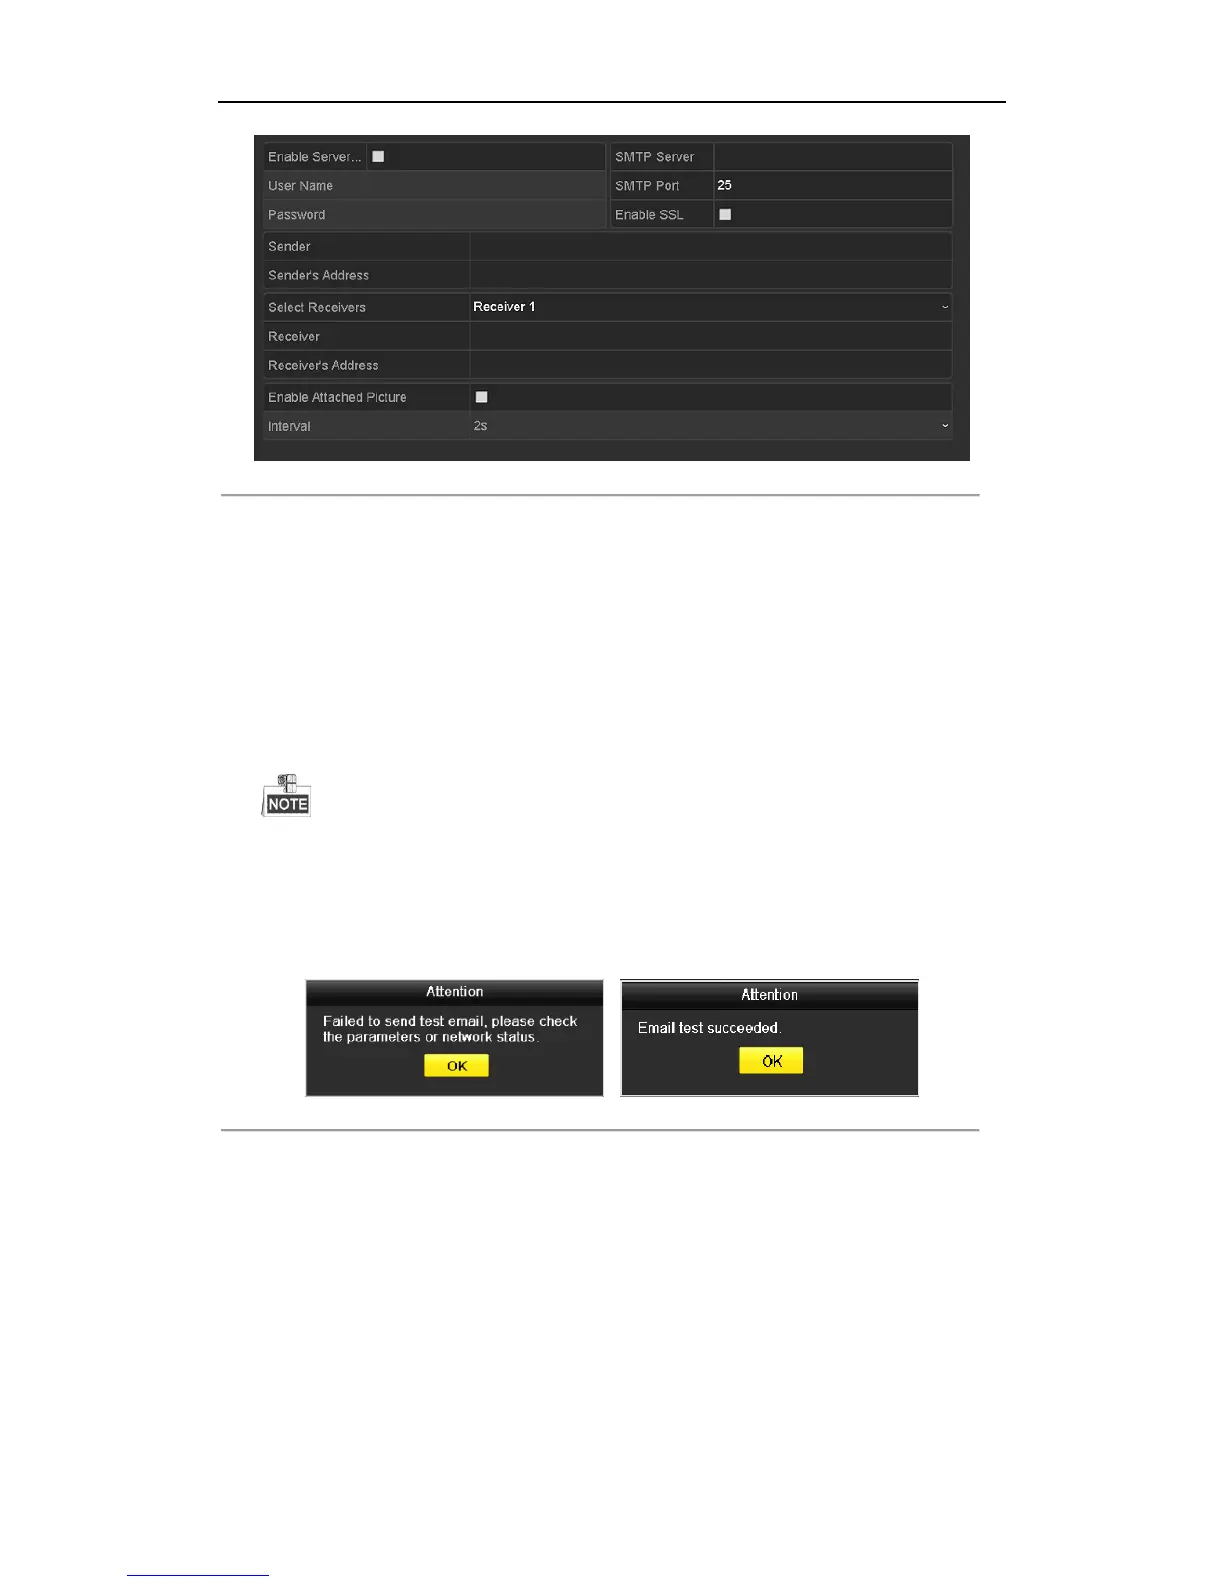
Figure 12. 23 Email Settings Interface
3. Configure the following Email settings:
Enable Server Authentication (optional): Check the checkbox to enable the server authentication feature.
User Name: The user account of sender’s Email for SMTP server authentication.
Password: The password of sender’s Email for SMTP server authentication.
SMTP Server: The SMTP Server IP address or host name (e.g., smtp.263xmail.com).
SMTP Port: The SMTP port. The default TCP/IP port used for SMTP is 25.
Enable SSL (optional): Click the checkbox to enable SSL if required by the SMTP server.
Sender: The name of sender.
Sender’s Address: The Email address of sender.
Select Receivers: Select the receiver. Up to 3 receivers can be configured.
Receiver: The name of the receiver of the Email.
Receiver’s Address: The Email address of the receiver.
Enable Attached Pictures: Check the checkbox if you want to send email with attached alarm images. The
interval is the time between two captures of the alarm images.
• For the IP cameras, the alarm images are directly sent as the attached pictures by Email. Up to one
picture can be sent for one IP camera. The attached pictures of the linked cameras cannot be sent.
• For analog cameras, 3 attached pictures can be sent for one analog camera when the alarm is triggered.
Interval: The interval refers to the time between two actions of sending attached pictures.
E-mail Test: Sends a test message to verify that the SMTP server can be reached.
4. Click the Apply button to save the Email settings.
5. You can click the Test button to test whether your Email settings work. The corresponding Attention
message box pops up.
Figure 12. 24 Email Testing Attention
12.3 Checking Network Traffic
Purpose:
You can check the network traffic to obtain real-time information of DVR such as linking status, MTU,
sending/receiving rate, etc.
Steps:
1. Enter the Network Traffic interface.
Menu > Maintenance > Net Detect
 Loading...