LYNX Touch Installation and Setup Guide
- 25 -
Programming the Control
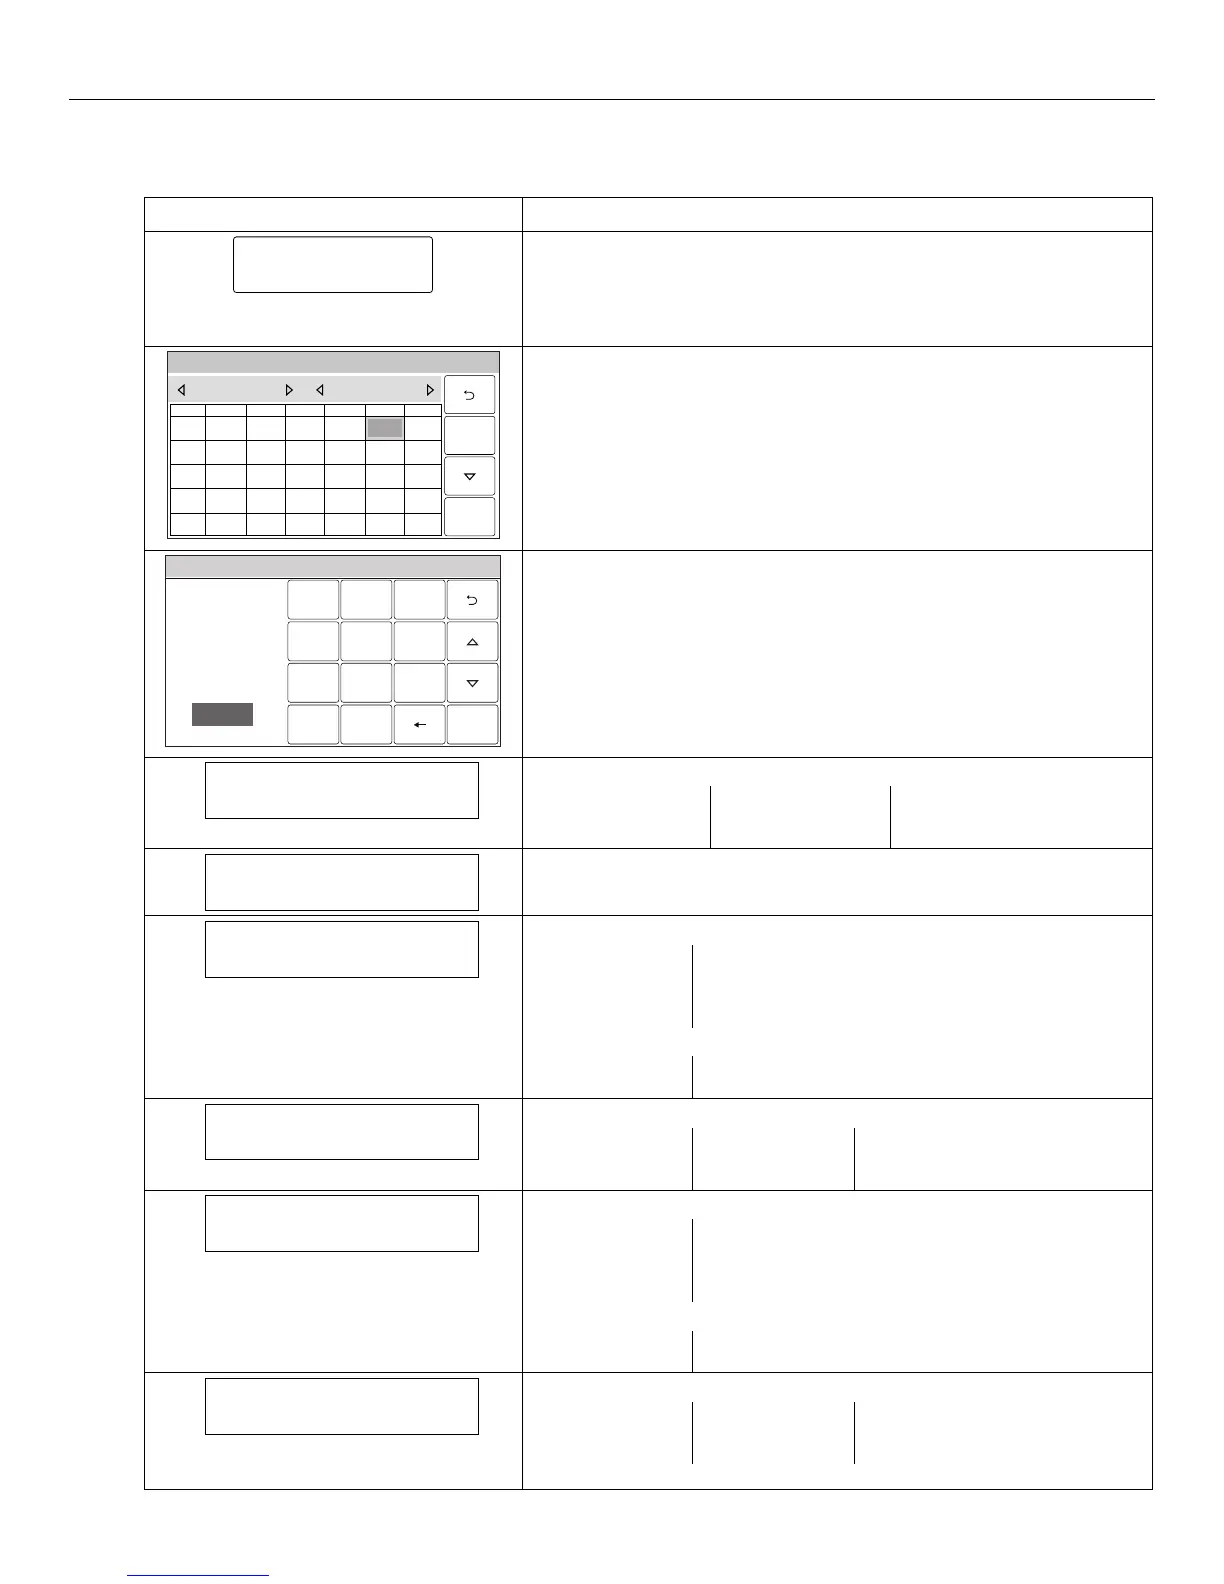
Program Date and Time
Note: If applicable, preprogrammed defaults for the LYNX Touch Control are shown on the screen unless otherwise noted.
SCREEN ACTION
5000-100-131-V0
Date Time
Note: If you are installing a GSMVLP5-4G/GSMVLP5CN4G or ILP5
Communication Module, the time and date will be programmed and
updated automatically via Central Station. You must still program the
correct Time Zone below.
1. Select “Date Time”.
System Programming...
5000-100-016-V0
THUSUN WED
32
SAT
6
FRI
5
TUEMON
1
1817
20
191614 15
2524
27
262321 22
3028 29
1110
13
129
7
8
June 2010
4
Save
2. Using the left W and right X arrows select the Month and Year then
select the date. Select the T key to advance to the next screen.
System Programming ...
231
5
64
0
8
97
Clear
5000-100-010-V0
AM / PM
Enter Time
10:21 AM
Save
3. To set the correct time, touch the “Clear” button.
4. Enter the correct time and then select AM or PM. Select the T key to
advance to the next screen or select “Save” to return to the System
Programming Screen.
Time Zone
Eastern (EST)
5. Select “Time Zone”. The system scrolls between the following options:
Eastern (EST) Mountain (MST) Atlantic (AST)
Central (CST) Pacific (PST) Newfoundland (NT)
Hawaii (HAST) Alaska (AKST)
Day Light Savings Time
Yes
6. Select “Day Light Savings Time”. The system toggles between “Yes” and
“No”. If “Yes” is selected the following options will become active.
Start Month
March
7. Select “Start Month”. The system displays the following options.
January February
March April
May June
July August
Use the down T arrow to scroll to the next page of options.
September October
November December
Start Week
Second
8. Select “Start Week”. The system scrolls between the following options.
First Fourth 3rd from Last
Second Last
Third Next to Last
End Month
November
9. Select “End Month”. The system displays the following options.
January February
March April
May June
July August
Use the down T arrow to scroll to the next page of options.
September October
November December
End Week
First
10. Select “End Week”. The system will scrolls through the available weeks.
First Fourth 3rd from Last
Second Last
Third Next to Last
11. After programming these options, select the “Save” key.
 Loading...