26
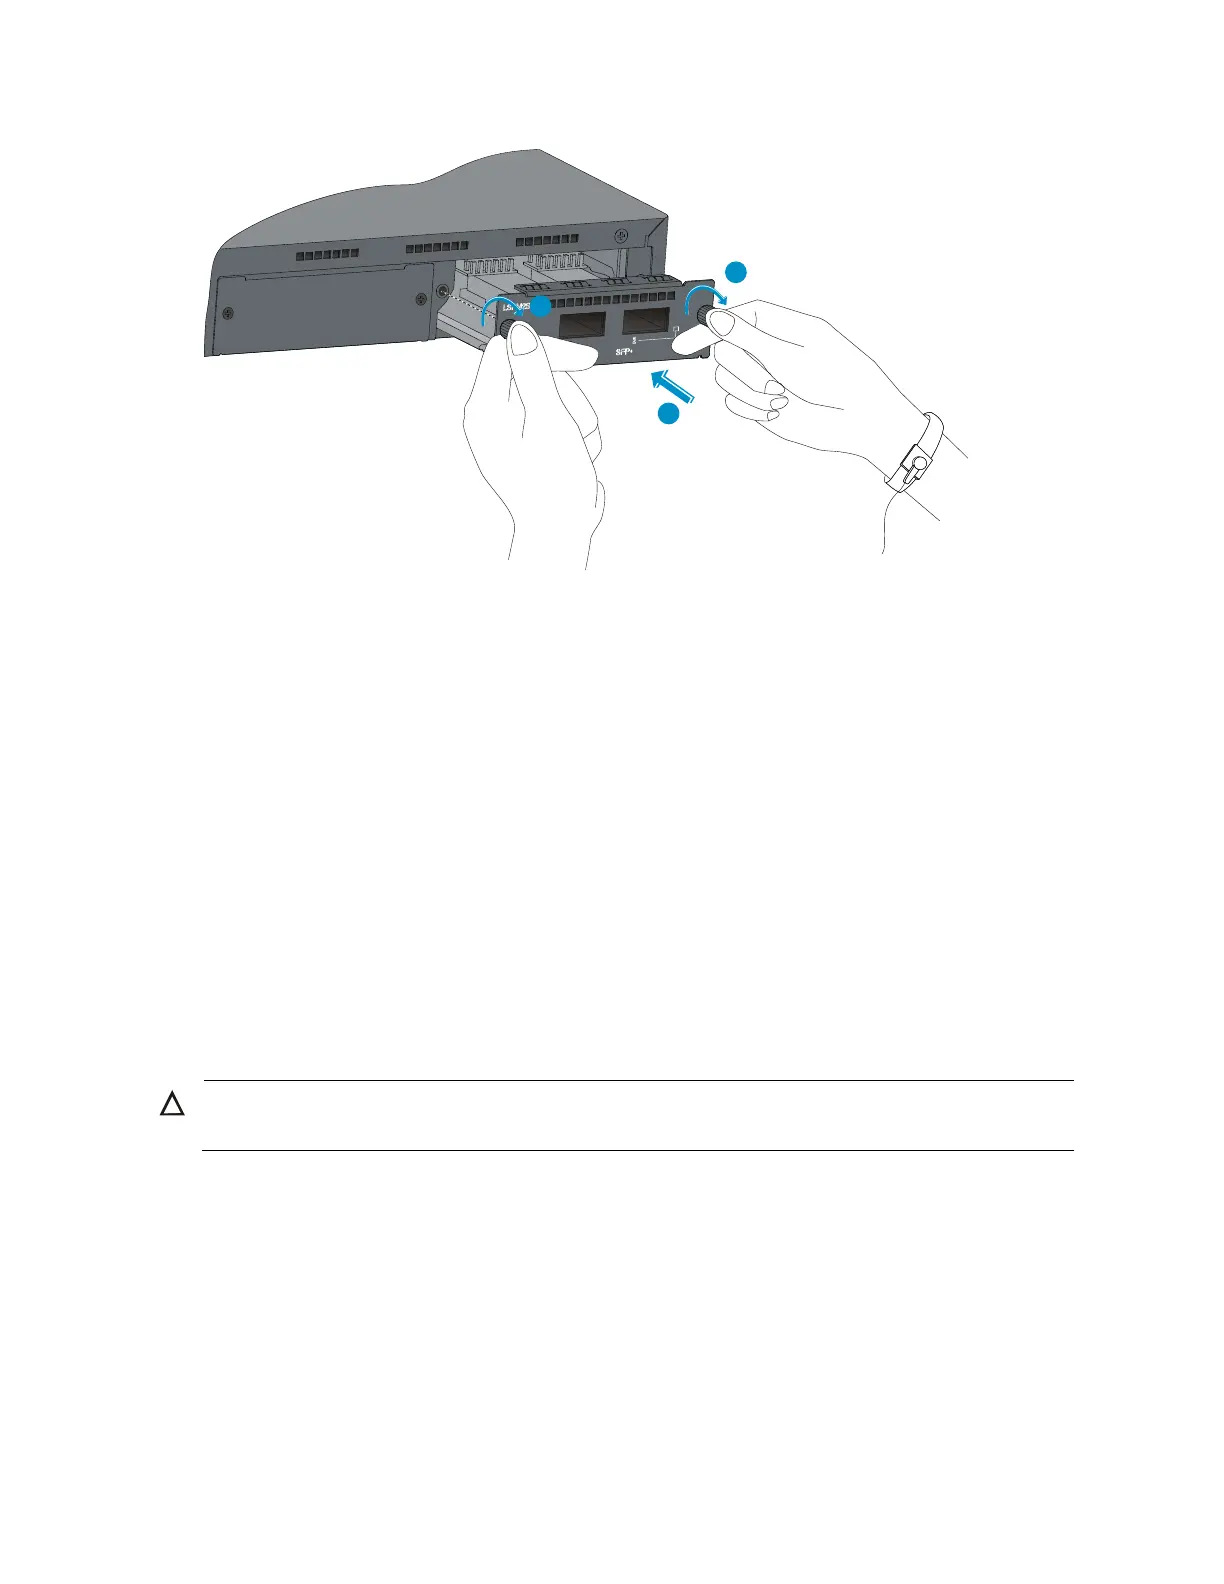
Figure 30 Install an interface card (II)
Removing an interface card
To remove an interface card:
1. Wear an ESD-preventive wrist strap and make sure it makes good skin contact and is properly
grounded.
2. Use a Phillips screwdriver to completely loosen the captive screws at both sides of the interface
card.
3. Pull the interface card out along the guide rails and remove it.
4. If no new card is to be installed, install the filler panel to prevent dust buildup and ensure good
ventilation inside the switch.
Installing/removing a dedicated CX4/SFP+ cable
The dedicated CX4 and SFP+ cables for the A5120 EI switches are hot swappable.
Installing a dedicated CX4/SFP+ cable
CAUTION:
The cable bending radius must be at least eight times the cable diameter.
To connect a CX4 or SFP+ cable to a port on a CX4/SFP+ interface card:
1. Wear an ESD-preventive wrist strap and make sure it makes good skin contact is properly
grounded.
2. Correctly orient one connector of the cable with the port and insert the cable connector into the
port.
Removing a dedicated CX4/SFP+ cable
To remove a CX4 or SFP+ cable from a port on a CX4/SFP+ interface card:
1. Wear an ESD-preventive wrist strap and make sure it makes good skin contact and is properly
grounded.
 Loading...