Heat sink
IMPORTANT: HP oers models with either integrated UMA graphics or discrete graphics. The heat sink on
models with discrete graphics includes two extra screws.
To remove the heat sink:
1. Prepare the computer for disassembly (see Preparation for disassembly on page 23).
2. Remove the rear port cover (see Removing the rear port cover on page 23).
3. Remove the stand (see Stands on page 24).
4. Remove the access panel (see Access panel on page 25).
5. If a discrete heat sink is installed, remove the VESA mounting bracket/fan assembly (see VESA mounting
bracket/fan assembly on page 48).
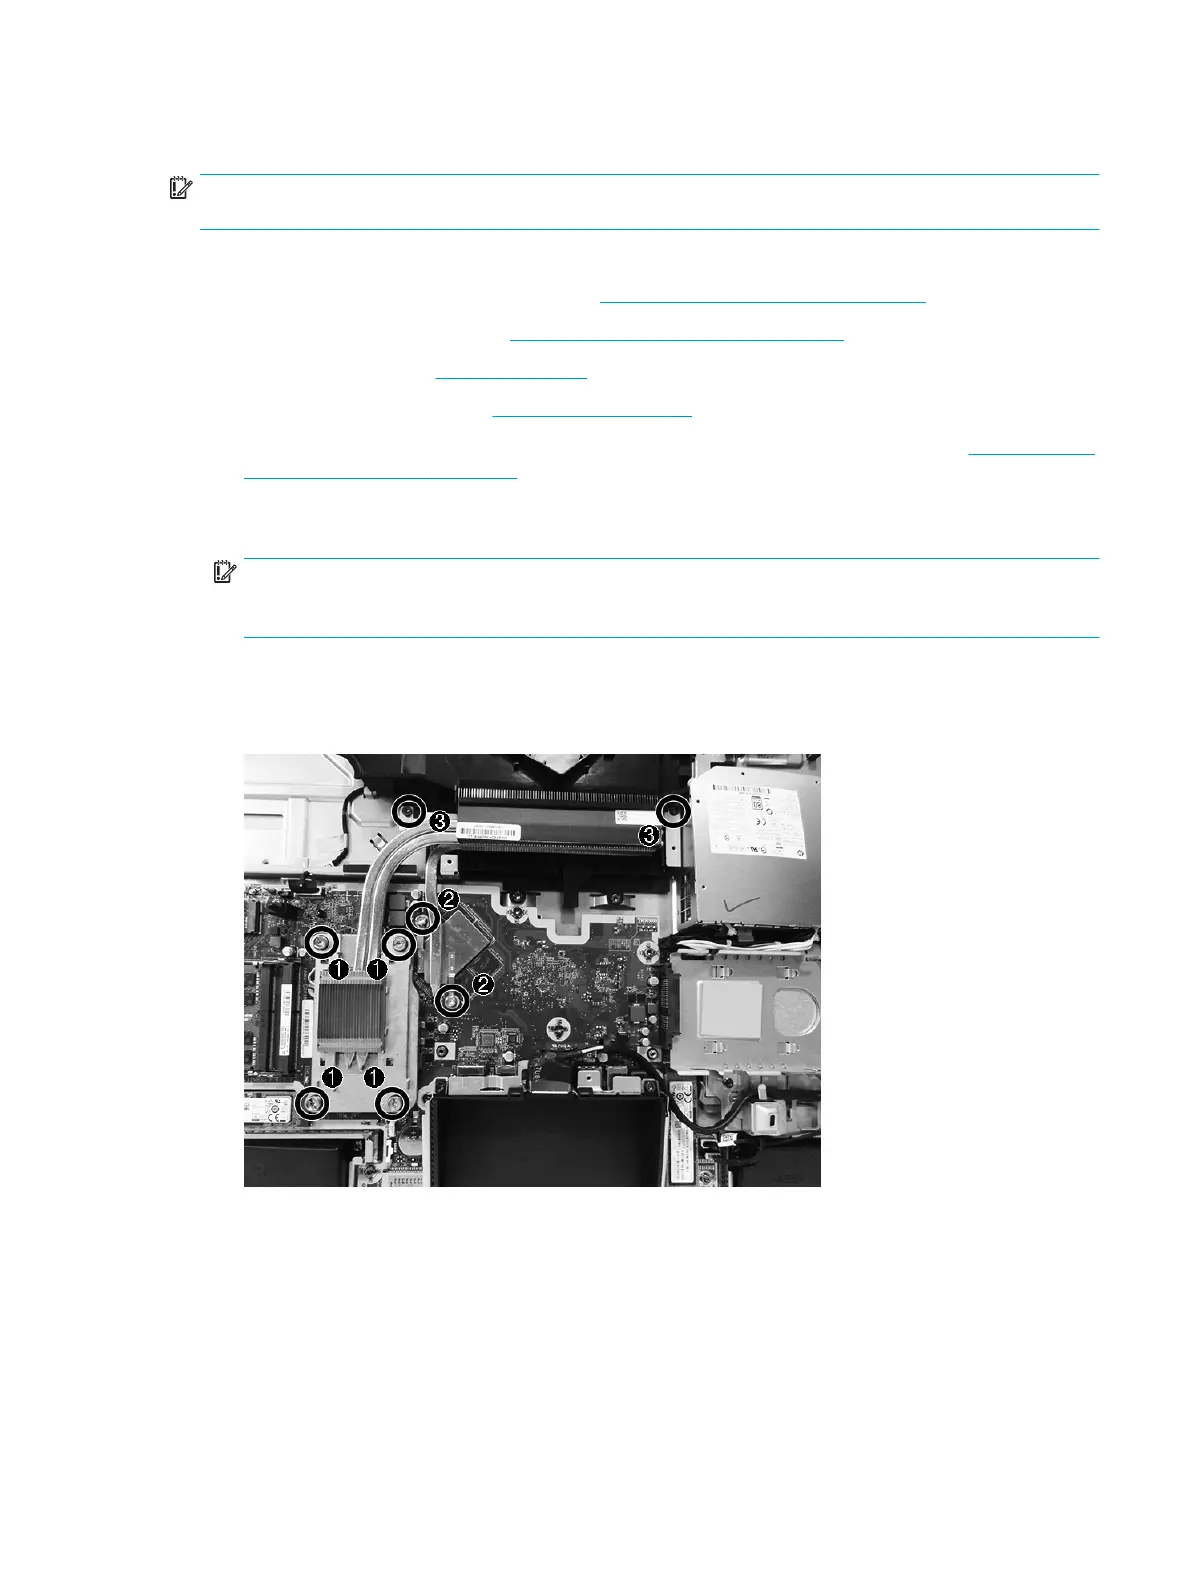
6. In the order indicated on the heat sink, loosen the captive Torx screws (1) from the heat sink component
that services the main processor.
IMPORTANT: Remove heat sink retaining screws in diagonally opposite pairs (as in an X) to even the
downward forces on the processor. This is especially important as the pins on the socket are very fragile,
and any damage to them could require replacing the system board.
7. (Models with discrete graphics only) Remove the non-captive Torx screws (2) from the heat sink
component that services the graphics processor.
8. Remove the non-captive Torx screws from the brackets at the top of the heat sink (3).
Heat sink 41
 Loading...