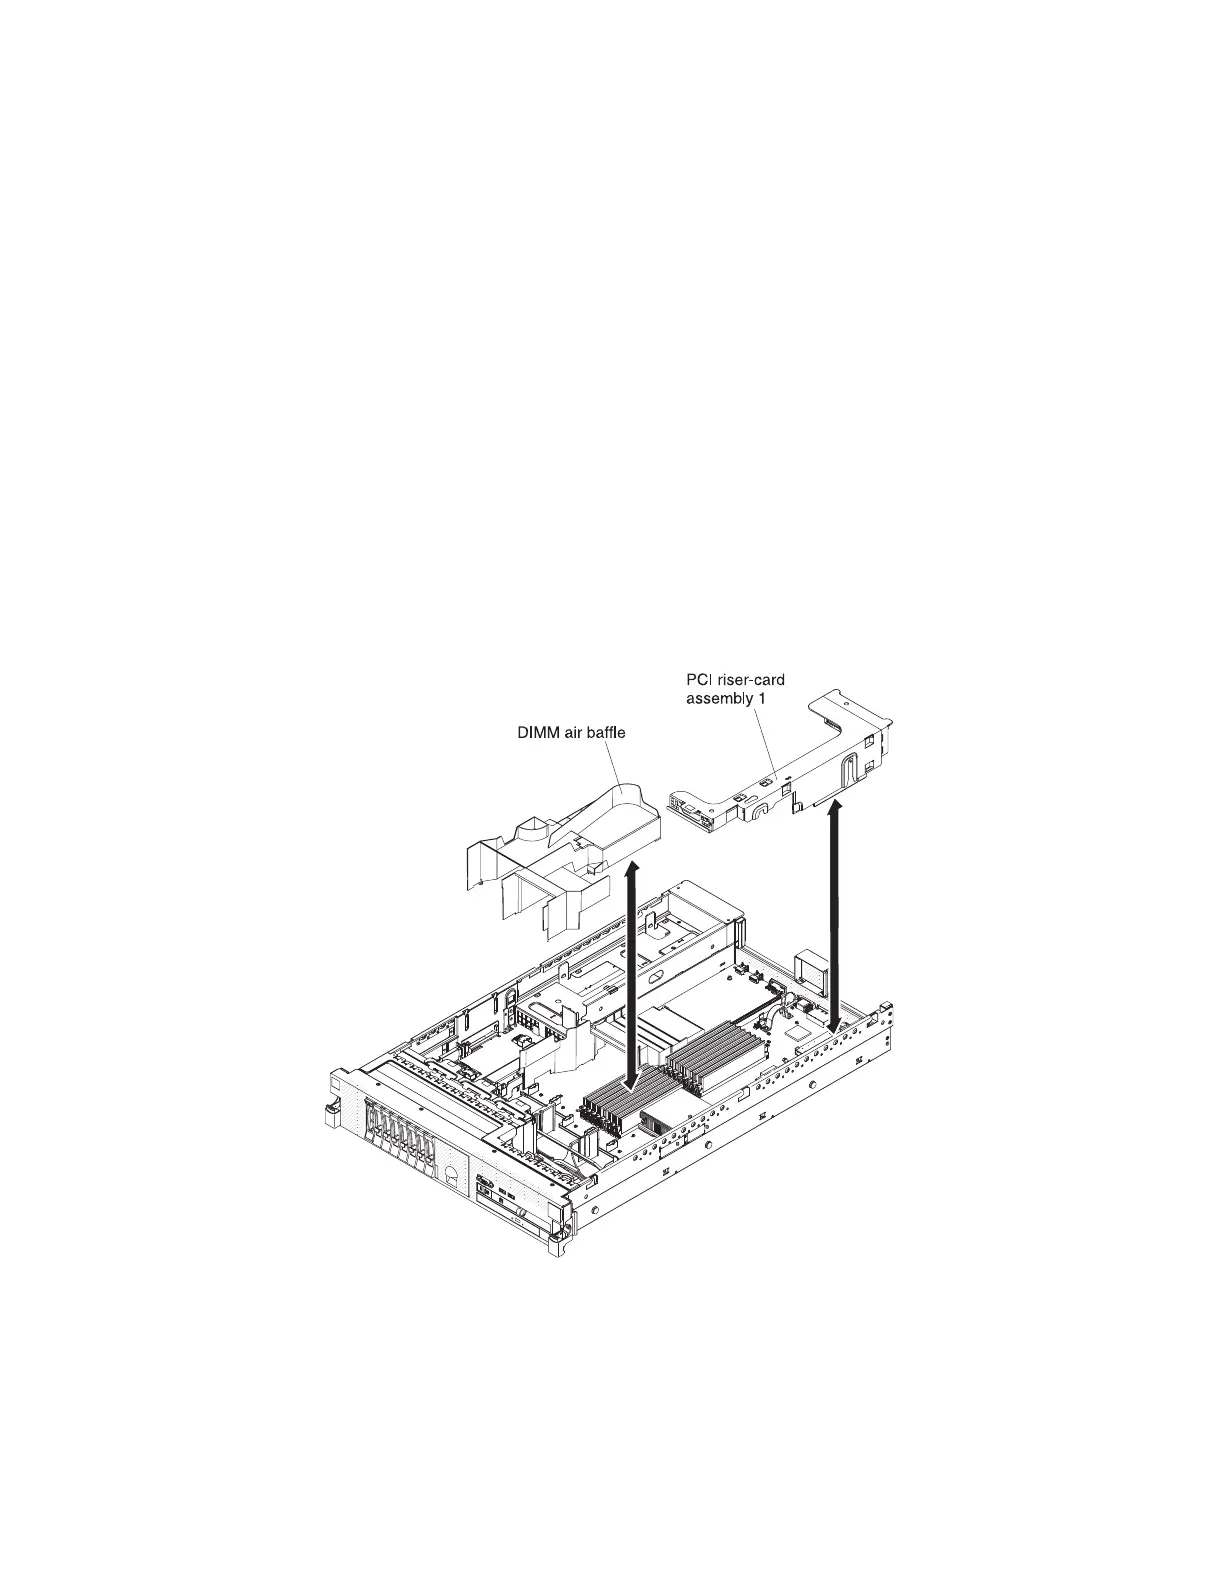
6. Place your fingers under the front and back of the top of the air baffle; then, lift
the air baffle out of the server.
Note: If two microprocessors are installed, you must remove PCI riser card
assembly 2 and microprocessor 2 air baffle first, as described in “Removing a
PCI riser-card assembly” on page 99 and “Removing the microprocessor 2 air
baffle” on page 90.
Attention: For proper cooling and airflow, replace all the air baffles before
you turn on the server. Operating the server with any air baffle removed might
damage server components.
7. If you are instructed to return the DIMM air baffle, follow all packaging
instructions, and use any packaging materials for shipping that are supplied to
you.
Installing the DIMM air baffle
The following procedure is for a Tier 1 customer replaceable unit (CRU).
Replacement of Tier 1 CRUs is your responsibility. If IBM installs a Tier 1 CRU at
your request, you will be charged for the installation. Service agreements can be
purchased so that you can ask IBM to replace these units.
To install the DIMM air baffle, complete the following steps.
1. To help you work safely with Storwize V7000 Unified file modules, read the
safety information in “Safety” on page xi, “Safety statements” on page xiii, and
“Installation guidelines” on page 54.
2. Align the DIMM air baffle with the DIMMs and the back of the fans.
3. Lower the air baffle into place.
4. If necessary, replace PCI riser-card assembly 1, as described in “Installing a PCI
riser-card assembly” on page 100.
94 Storwize V7000 Unified: Problem Determination Guide Version
 Loading...