− 11 −
1) Assemble the thread stand unit and set it to the
hole located on the upper right side of the table.
2) Tighten lock nut 1 so that the thread stand unit
does not move.
3) When ceiling wiring is possible, pass the power
cable through the inside of thread stand rod 2.
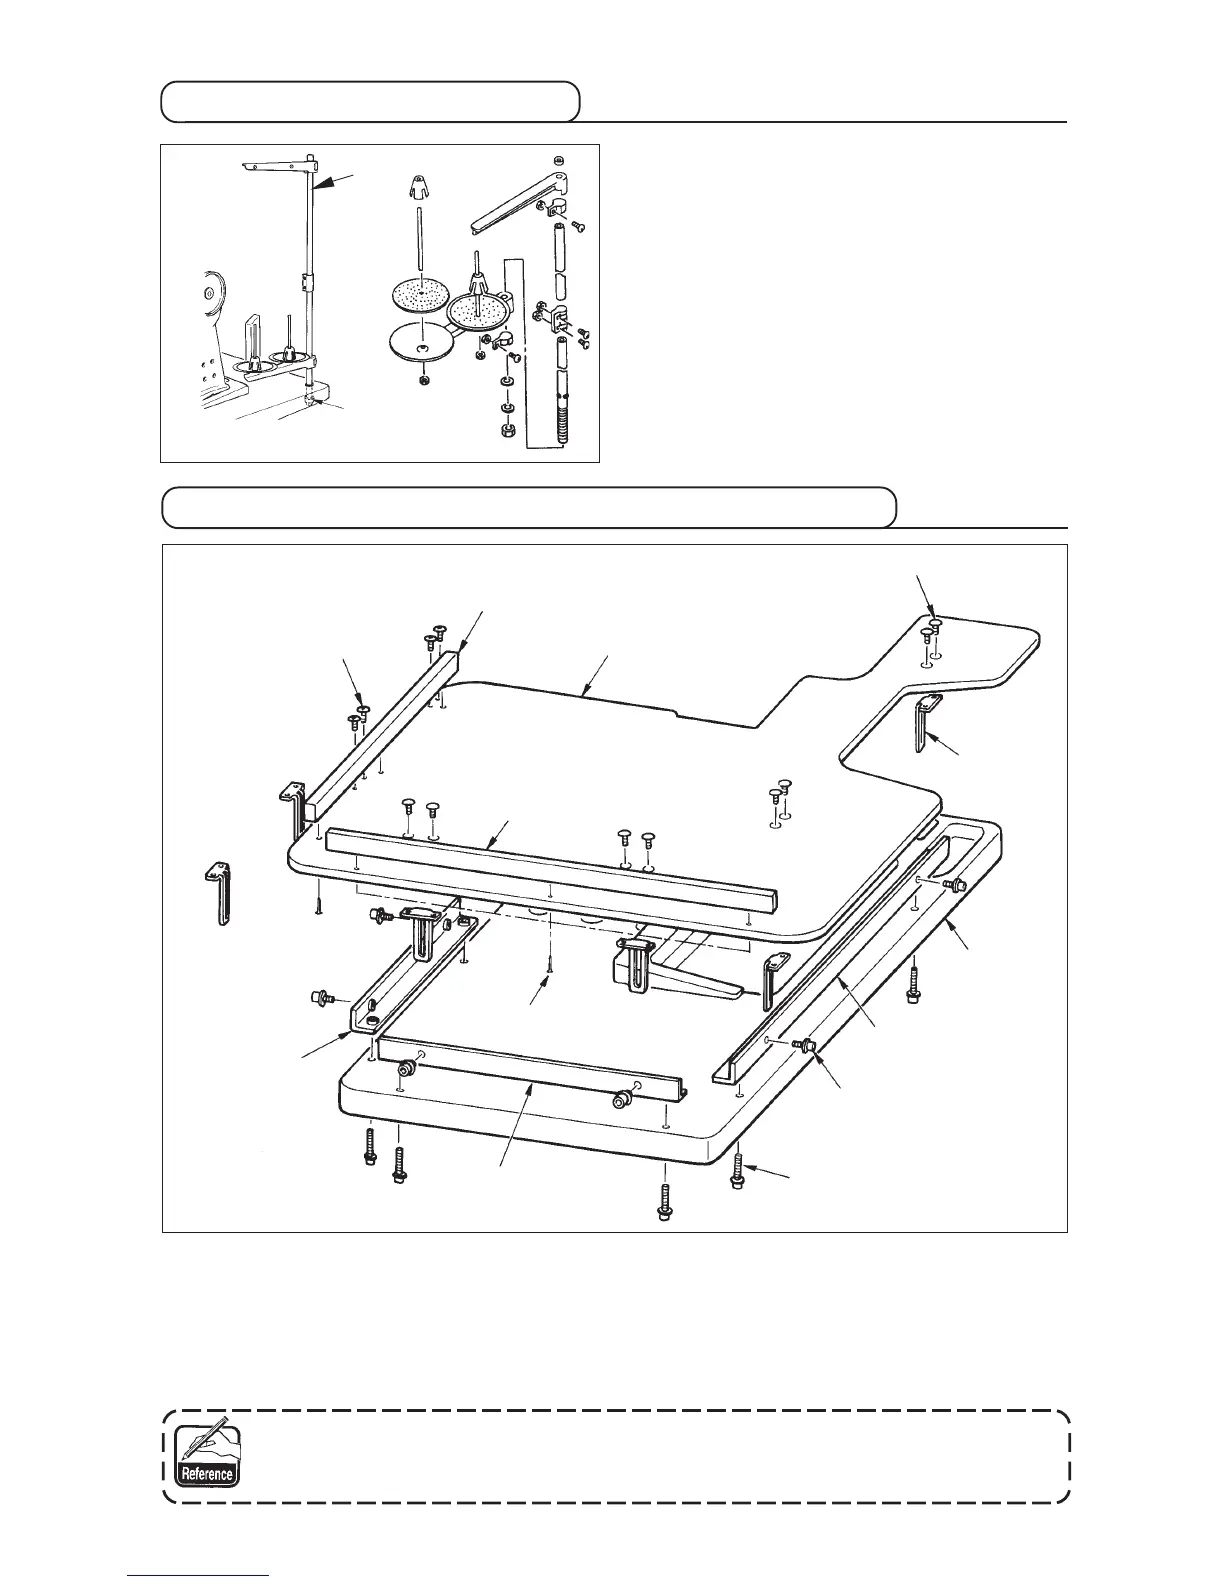
3-13 Assembling the table for work (WORK TOP TABLE)
1
2
5
4
3
6
7
8
6
!0
!1
Table
9
1) Install edge guide A 2 and B 3 on table for work 1 with 3 pcs. each of wood screw 7.
2) Temporarily tighten base A 5 and base B 6 on the table with screws !0.
3) Temporarily tighten adjusting plate 4 with 8 screws 8 and 4 screws 9.
4) Place table for work 1 on the base and temporarily tighten it with screw !1.
5) Tighten screws 8, 9 and !0 while checking the whole position.
6) Loosen screw !1 and tighten it in accordance with the height you desire.
There are the standard size and the long one for the adjusting plate.
When you desire to make the table for work higher, replace the standard size plate with the
long size one.
1
2
3-12 Installing the thread stand

 Loading...