− 12 −
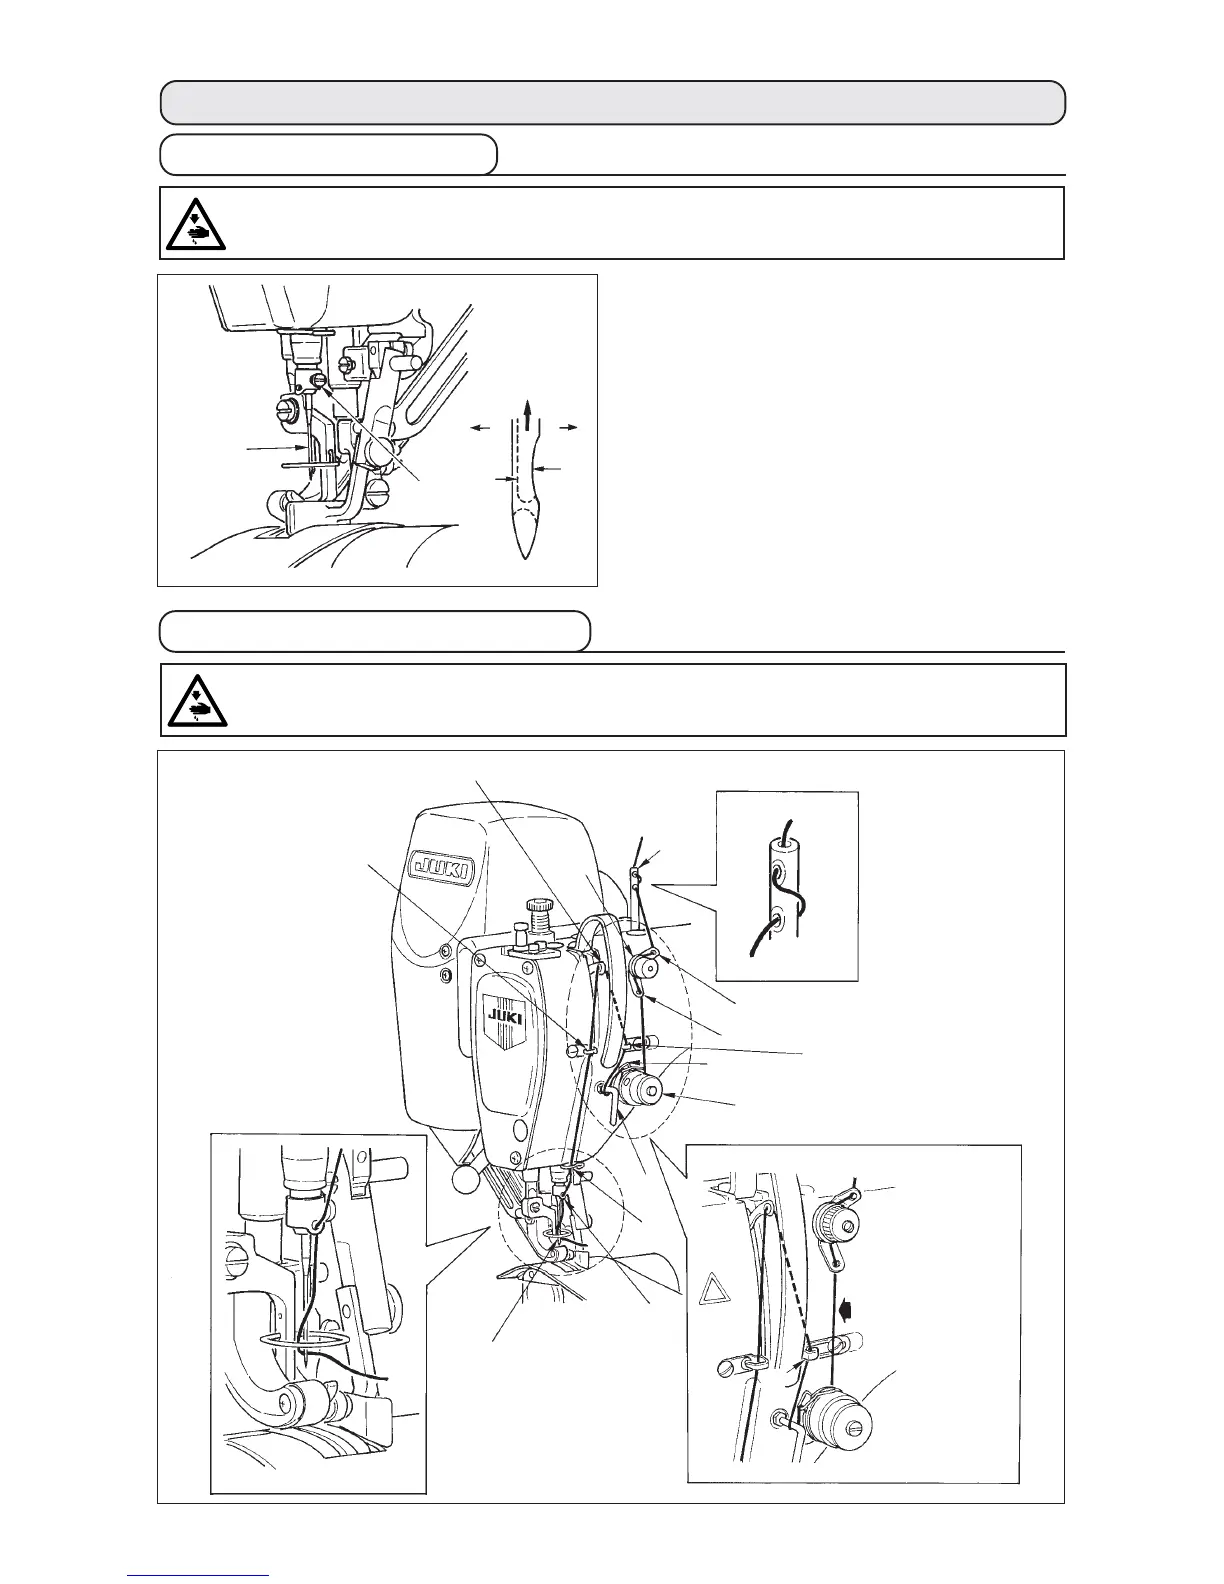
1) Turn the handwheel until the needle bar reaches
the highest point of its stroke.
2) Loosen screw 2, and hold needle 1 with its
indented part Afacing exactly to the right in
direction B.
3) Insert the needle fully into the hole in the needle
bar in the direction of the arrow until the end of
hole is reached.
4) Securely tighten screw 2.
5) Check that long groove C of the needle is facing
exactly to the left in direction D.
4. PREPARATION BEFORE OPERATION
4-1 Attaching the needle
4-2 Threading the needle-thread
1
2
5
4
3
6
7
8
9
!0
!1
!2
!3
Note) Do not pass
this part to
section A.
A
* Pass thread in the order of
1 through !3 as shown in
the illustration.
WARNING :
Turn OFF the power before starting the work so as to prevent accidents caused by abrupt start of the
sewing machine.
1
2
D
B
C
A
WARNING :
Turn OFF the power before starting the work so as to prevent accidents caused by abrupt start of the
sewing machine.
 Loading...