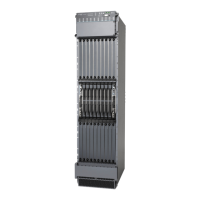
Step 7: Connect Power Cables
Depending on your configuration, your router uses either AC or DC power distribution
modules (PDMs). Perform the appropriate procedures for each PDM in your router. For
more information about PDMs, see the MX2020 3D Universal Edge Router Hardware Guide.
CAUTION: Do not mix AC and DC power modules within the same router.
•
Connect Power to a Three-Phase Delta AC Power Distribution Module on page 47
•
Connect Power to a Three-Phase Wye AC Power Distribution Module on page 51
•
Connect AC Power Supply Modules on page 55
•
Connect Power to a DC Power Distribution Module on page 58
•
Connect DC Power Supply Modules on page 60
Connect Power to a Three-Phase Delta AC Power Distribution Module
1. Attach an electrostatic discharge (ESD) grounding strap to your bare wrist, and connect
the strap to an approved site ESD grounding point. See the instructions for your site.
2. Switch off the dedicated customer-site circuit breakers. Ensure that the voltage across
the AC power source cable leads is 0 V and that there is no chance that the cable
leads might become active during installation.
3. Detach the ESD grounding strap from the approved site ESD grounding point, and
connect the strap to one of the ESD points on the chassis.
4. Switch off (O) the AC power supply modules (PSMs) and disengage all AC PSMs.
5. Very that the correct three-phase delta AC PDMs are installed and secured in the
chassis before connecting power cables.
NOTE: The power cables must be uninstalled and removed from the PDM
before the PDM is removed from the chassis.
6. Using a number 2 Phillips (+) screwdriver, unscrew the four captive screws located
on the either side of the metal AC wiring compartment (four screws total per PDM).
7. Remove the cover of the metal AC wiring compartment.
8. Unscrew the retaining nut from the AC power cord.
9. Put the wires of the AC power cord through the hole of the retaining nut and rubber
grommet.
10. Put the wires of the AC power cord through the hole of the metal wiring compartment.
11. Connect the wires to the AC terminal block on the three-phase delta AC PDM (see
Figure 32 on page 48). Figure 33 on page 49 shows the three-phase delta AC power
cord and connector. Loosen the input terminal or grounding point screw, insert each
47Copyright © 2015, Juniper Networks, Inc.
Step 7: Connect Power Cables

 Loading...