TP-7070 7/1844 Section 2 Operation
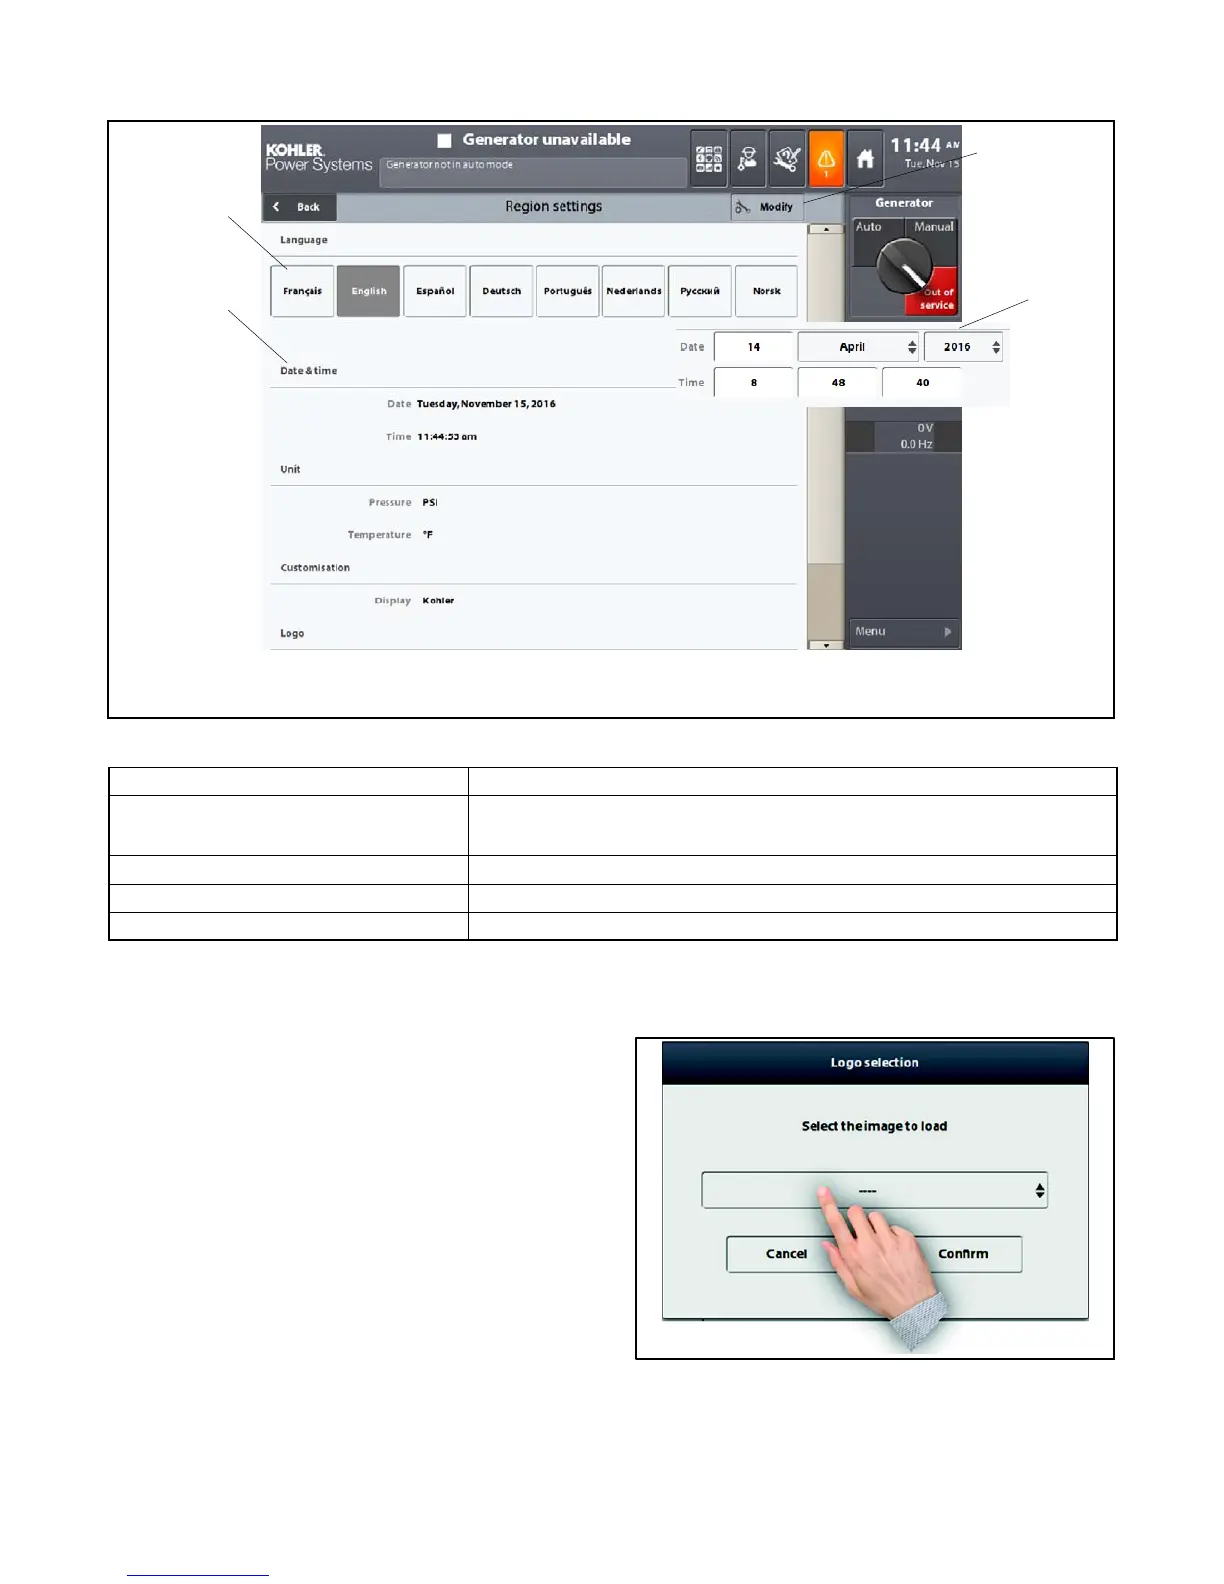
2.11.2 Region Settings
1
1. Select user language
2. Set the date and time
3. Modify
4. Date and time adjustment window
appears after touching the Modify key
2
4
3
Figure 2-41 Region Settings Screen
Title Description and Possible Settings (or selections)
Pressure
Temperature
Selection of the pressure display: bar, PSI
Selection of the temperature display: _C,_F
Customization
Display Selection of the logo at the top left of the screen
Logo Upload an image in JPEG or PNG format (see below)
Adding a logo
1. Press the Modify button. An additional Upload key
appears.
2. On a USB key, create a directory called
E:\apm802\icon and copy the logo* to be inserted
into the main screen of the HMI.
3. Insert the USB key into the appropriate port and
press the Load key.
4. In the window shown in Figure 2-42, press the
central field, select the desired image and confirm.
5. The image appears next to the Upload key (a
Delete key also appears to delete or replace the
image on the screen).
6. Press on Apply. The logo then appears under the
4--position switch.
The Region settings screen can also be accessed by
touching in the date/time area of the top bar.
Figure 2-42 Selecting the Logo Image File
* The ideal image size for the logo is 170 x 100 pixels.
 Loading...