111
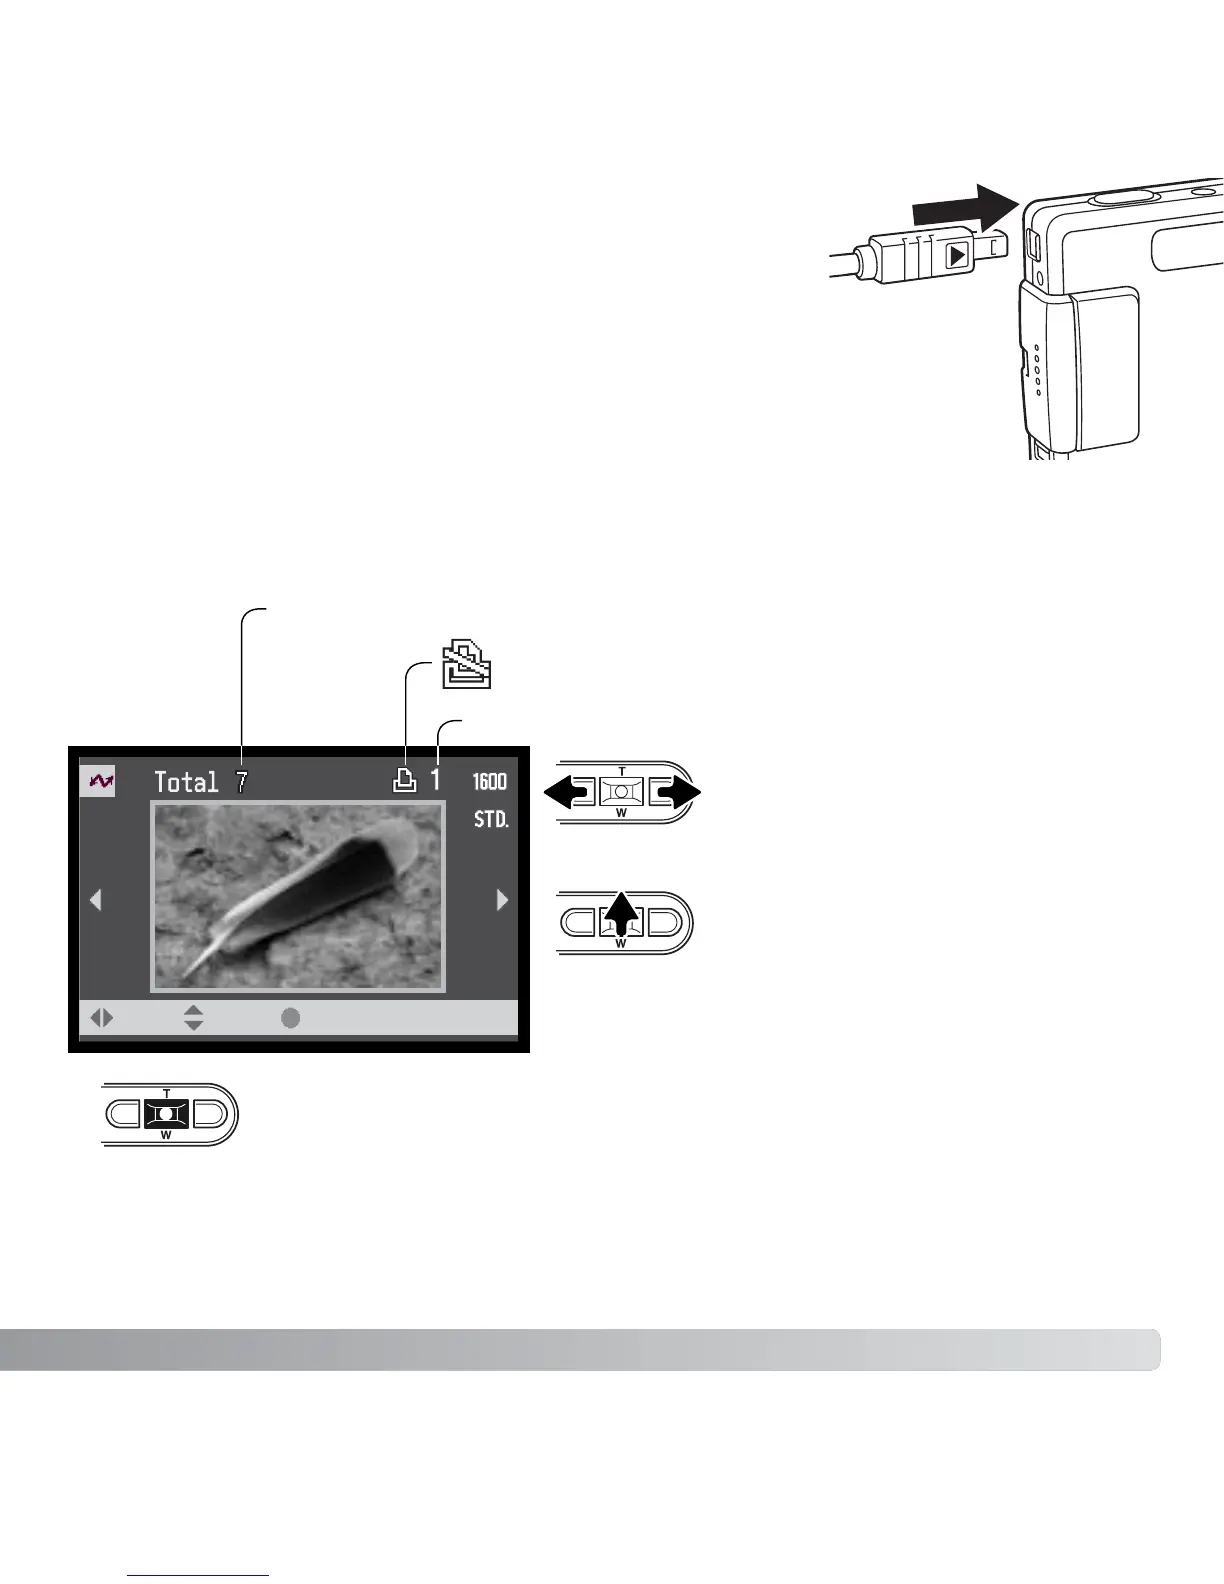
Connect the camera to a PictBridge compatible printer using
the camera’s USB cable. The larger plug on the cable is
connected to the printer. Slide open the USB-port cover and
insert the smaller plug of the cable into the camera. Turn the
camera on; the PictBridge screen will be displayed
automatically.
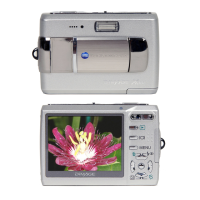
SELECTING PRINT IMAGES
Individual still images can be selected for printing on the PictBridge screen. For other
printing options, see the menu navigation section (p. 113).
Use the left/right keys of the
controller to display the image to
be printed.
Number of prints in the print run.
Number of copies of the displayed image.
Strike through indicates
unprintable file type.
Repeat the previous steps until all the images to be printed are selected.
Press the central button of the controller to continue.
Press the up key to select the
number of copies to be printed. To
deselect an image for printing,
press the down key until the
number of copies reaches zero.
:move :sel. :print
 Loading...