98
KMHA 500-000099
Revision D
KDR
TM
AU-DDR Advanced U-Arm System with
Dynamic Digital Radiography (KDR AU DDR)
3. Select USB options as needed. When saving images, you can include the Opal viewer, remove patient demo-
graphics, or compress the images.
4. If more than one USB drive is inserted, click the ... button to navigate to the appropriate USB drive.
5. Click Start to begin copying the patient study and exam images to the USB drive. The progress indicator is dis-
played in the top left corner.
6. You can remove the USB drive once the progress indicator displays “Done.”
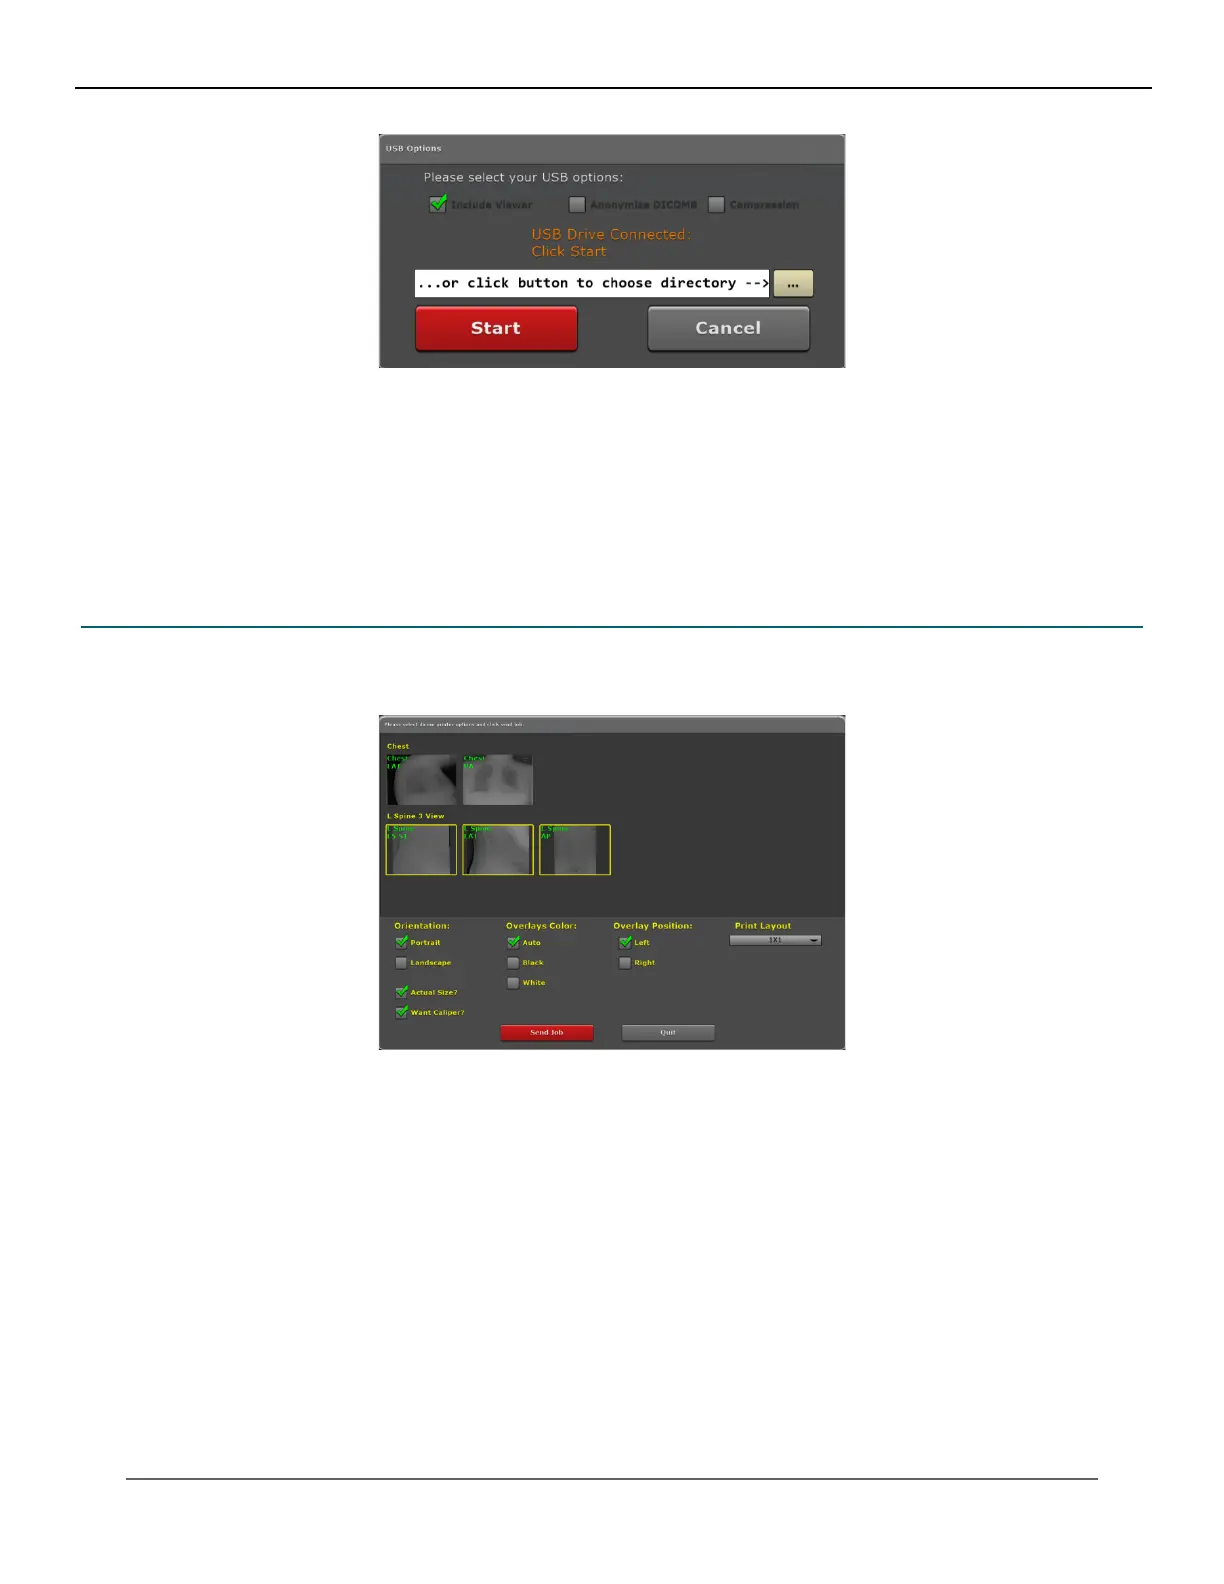
21.5 Printing a Study to a DICOM Printer
1. Click Print button from the More menu.
2. Click on the image(s) you want to send to a DICOM printer. A yellow border will surround each selected image.
3. Select Print Options as needed.
• Orientation – portrait or landscape. Portrait is selected by default.
• Overlays Color – auto, black or white. Auto is selected by default.
• Overlay Position – left or right. Left is selected by default.
• Print Layout – number of rows and columns. 1x1 is selected by default.
• Actual Size? – prints the actual size of the image. Deselecting this option utilizes the Print to Fit feature which
is selected by default.
• Want Caliper? – includes the measurement tool in the images which is selected by default.
4. Click Send Job to print the image(s). The progress indicator is displayed in the top left corner.
IV. SOFTWARE

 Loading...


