18. LIGHTS/INSTRUMENTS/SWITCHES/HORN
FUEL UNIT
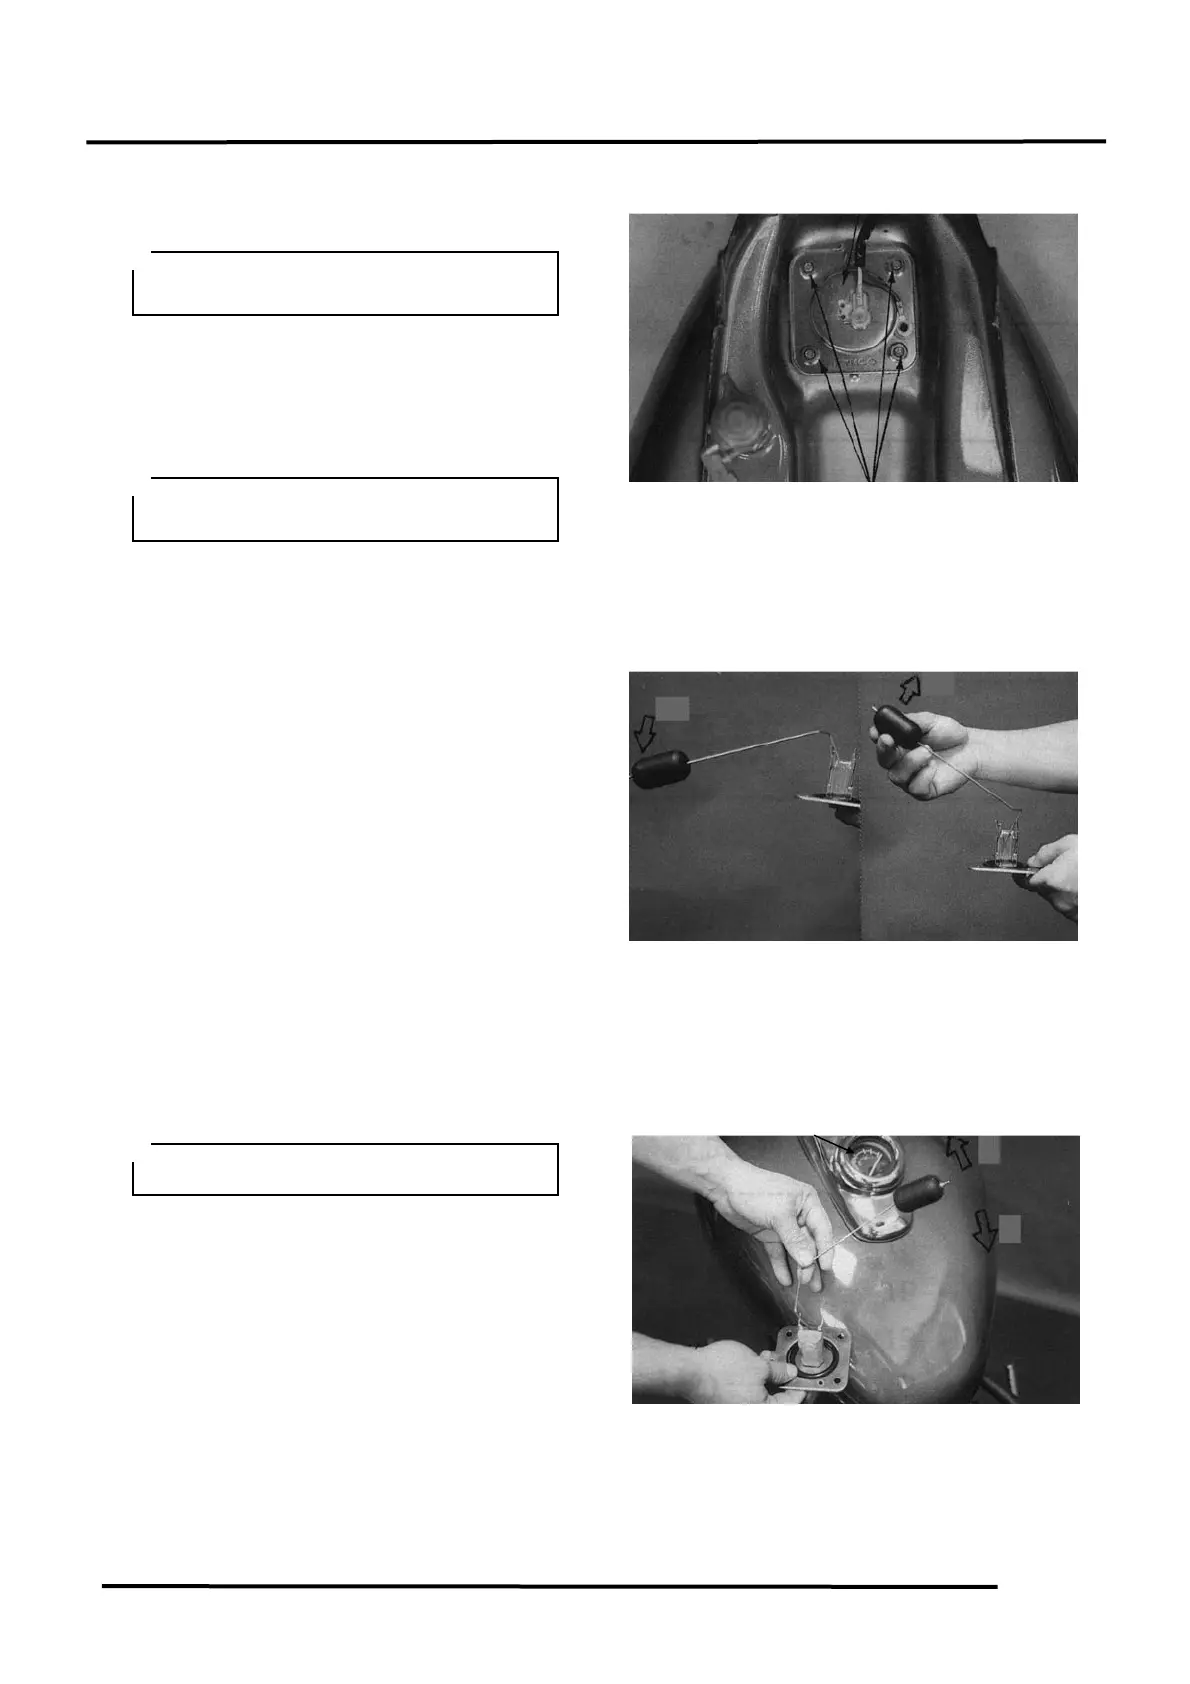
REMOVAL
Remove the seat and fuel tank. (Refer to
4-10.)
Remove the four fuel unit attaching nuts.
Remove the fuel unit.
INSPECTION
Check the fuel unit O-ring for wear, damage
or deformation. Replace if necessary.
Measure the resistances between the fuel unit
wire terminals with the float at the upper
(Full) and lower (Empty) positions.
Resistances: Upper (Full): 9~25Ω
Lower (Empty): 70~100Ω
Connect the fuel unit wire coupler to the wire
harness and turn the ignition switch ON.
Check the fuel gauge needle for correct
indication by moving the float up and down.
If the needle does not move to “F” or “E”,
the fuel gauge is faulty and replace it with a
new one.
If the needle swings, the fuel unit is faulty
and replace it with a new one.
INSTALLATION
Install the fuel unit in the reverse of removal.
Be careful not to bend or damage the fuel
unit float arm.
Keep flames and sparks away from the
working area.
Check for fuel leakage after installation.
 Loading...