EasyManuals Logo
Home>Kyocera>All in One Printer>ECOSYS M3540dn

Kyocera ECOSYS M3540dn Service Manual

Kyocera ECOSYS M3540dn
483 pages
To Next Page IconTo Next Page
To Previous Page IconTo Previous Page
Page #416 background imageLoading...
Page #416 background image
2NM/2NX/2NY/2NZ/2P0/2P6
2-2-22
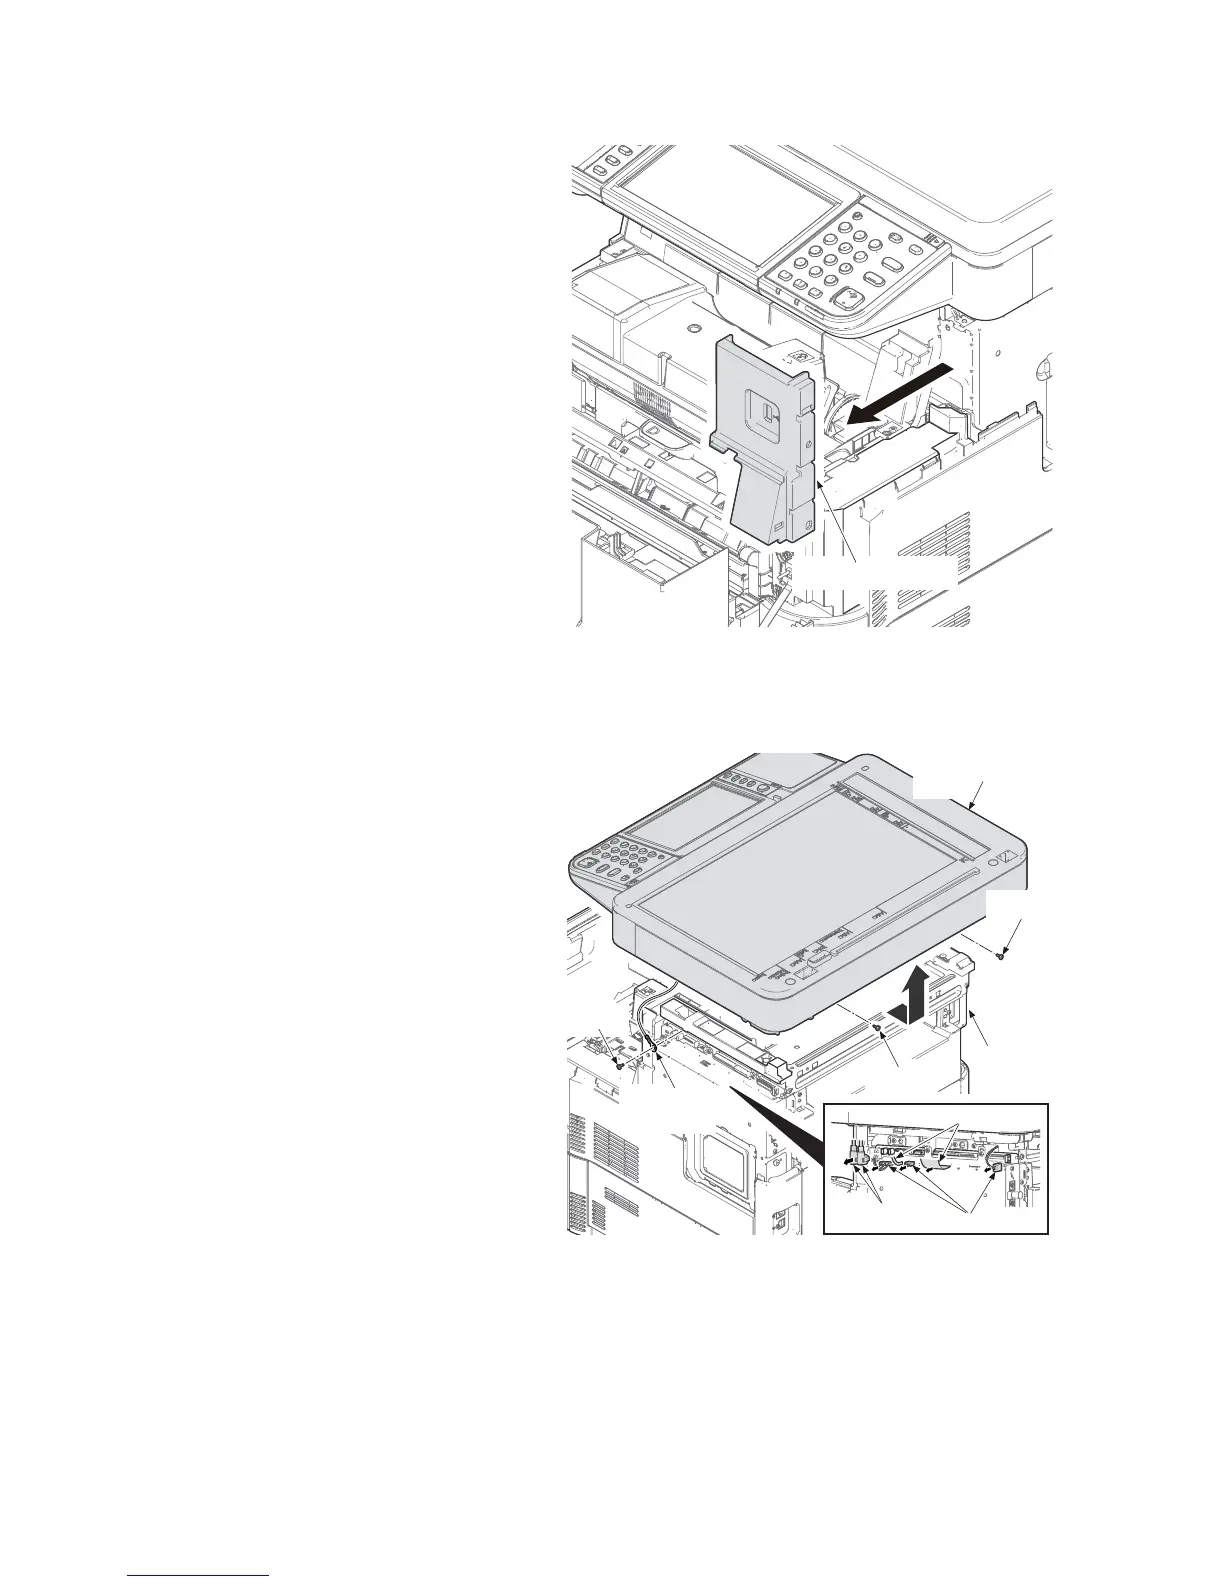
10. Remove the front right cover forward.
Figure 2-2-19
11. Remove three connectors, two FFCs
and two USB connectors from the Con-
trol PWB.
12. Remove three screws and grounding
terminal from the image scanner unit.
13. Remove it by sliding the image scanner
unit backward and then takeing upward.
Figure 2-2-20
Front right cover
Screw
Image scanner
unit
Main unit
Screw
Connectors
FFCs
USB
connectors
Screw
Grounding
terminal

Table of Contents

Other manuals for Kyocera ECOSYS M3540dn

Questions and Answers:

Question and Answer IconNeed help?

Do you have a question about the Kyocera ECOSYS M3540dn and is the answer not in the manual?

Kyocera ECOSYS M3540dn Specifications

General IconGeneral
BrandKyocera
ModelECOSYS M3540dn
CategoryAll in One Printer
LanguageEnglish

Related product manuals