MMX4x2 series – User's Manual 39
Establishing the Connection
Step 1. Connect the device to a computer via Ethernet or RS-232.
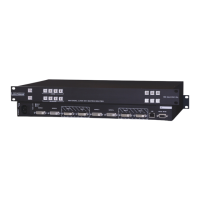
Step 2. Run the controller software; the Device discovery window appears automatically. There are three tabs
for the different types of interfaces; Ethernet, Serial and USB.
Step 3. Select the desired unit and click on the green Connect button (or just double-click on the device).
Device discovery window in LDC
Ethernet Tab
The Ethernet tab consists of two lists. All devices
as you can expand the list of Favorite devices with
of the following ways:
▪ Mark the desired device with the symbol in the All Devices list,
▪ Press the Add button and add the device in the appearing window, or
▪ Import the list of favorite devices that was exported previously.
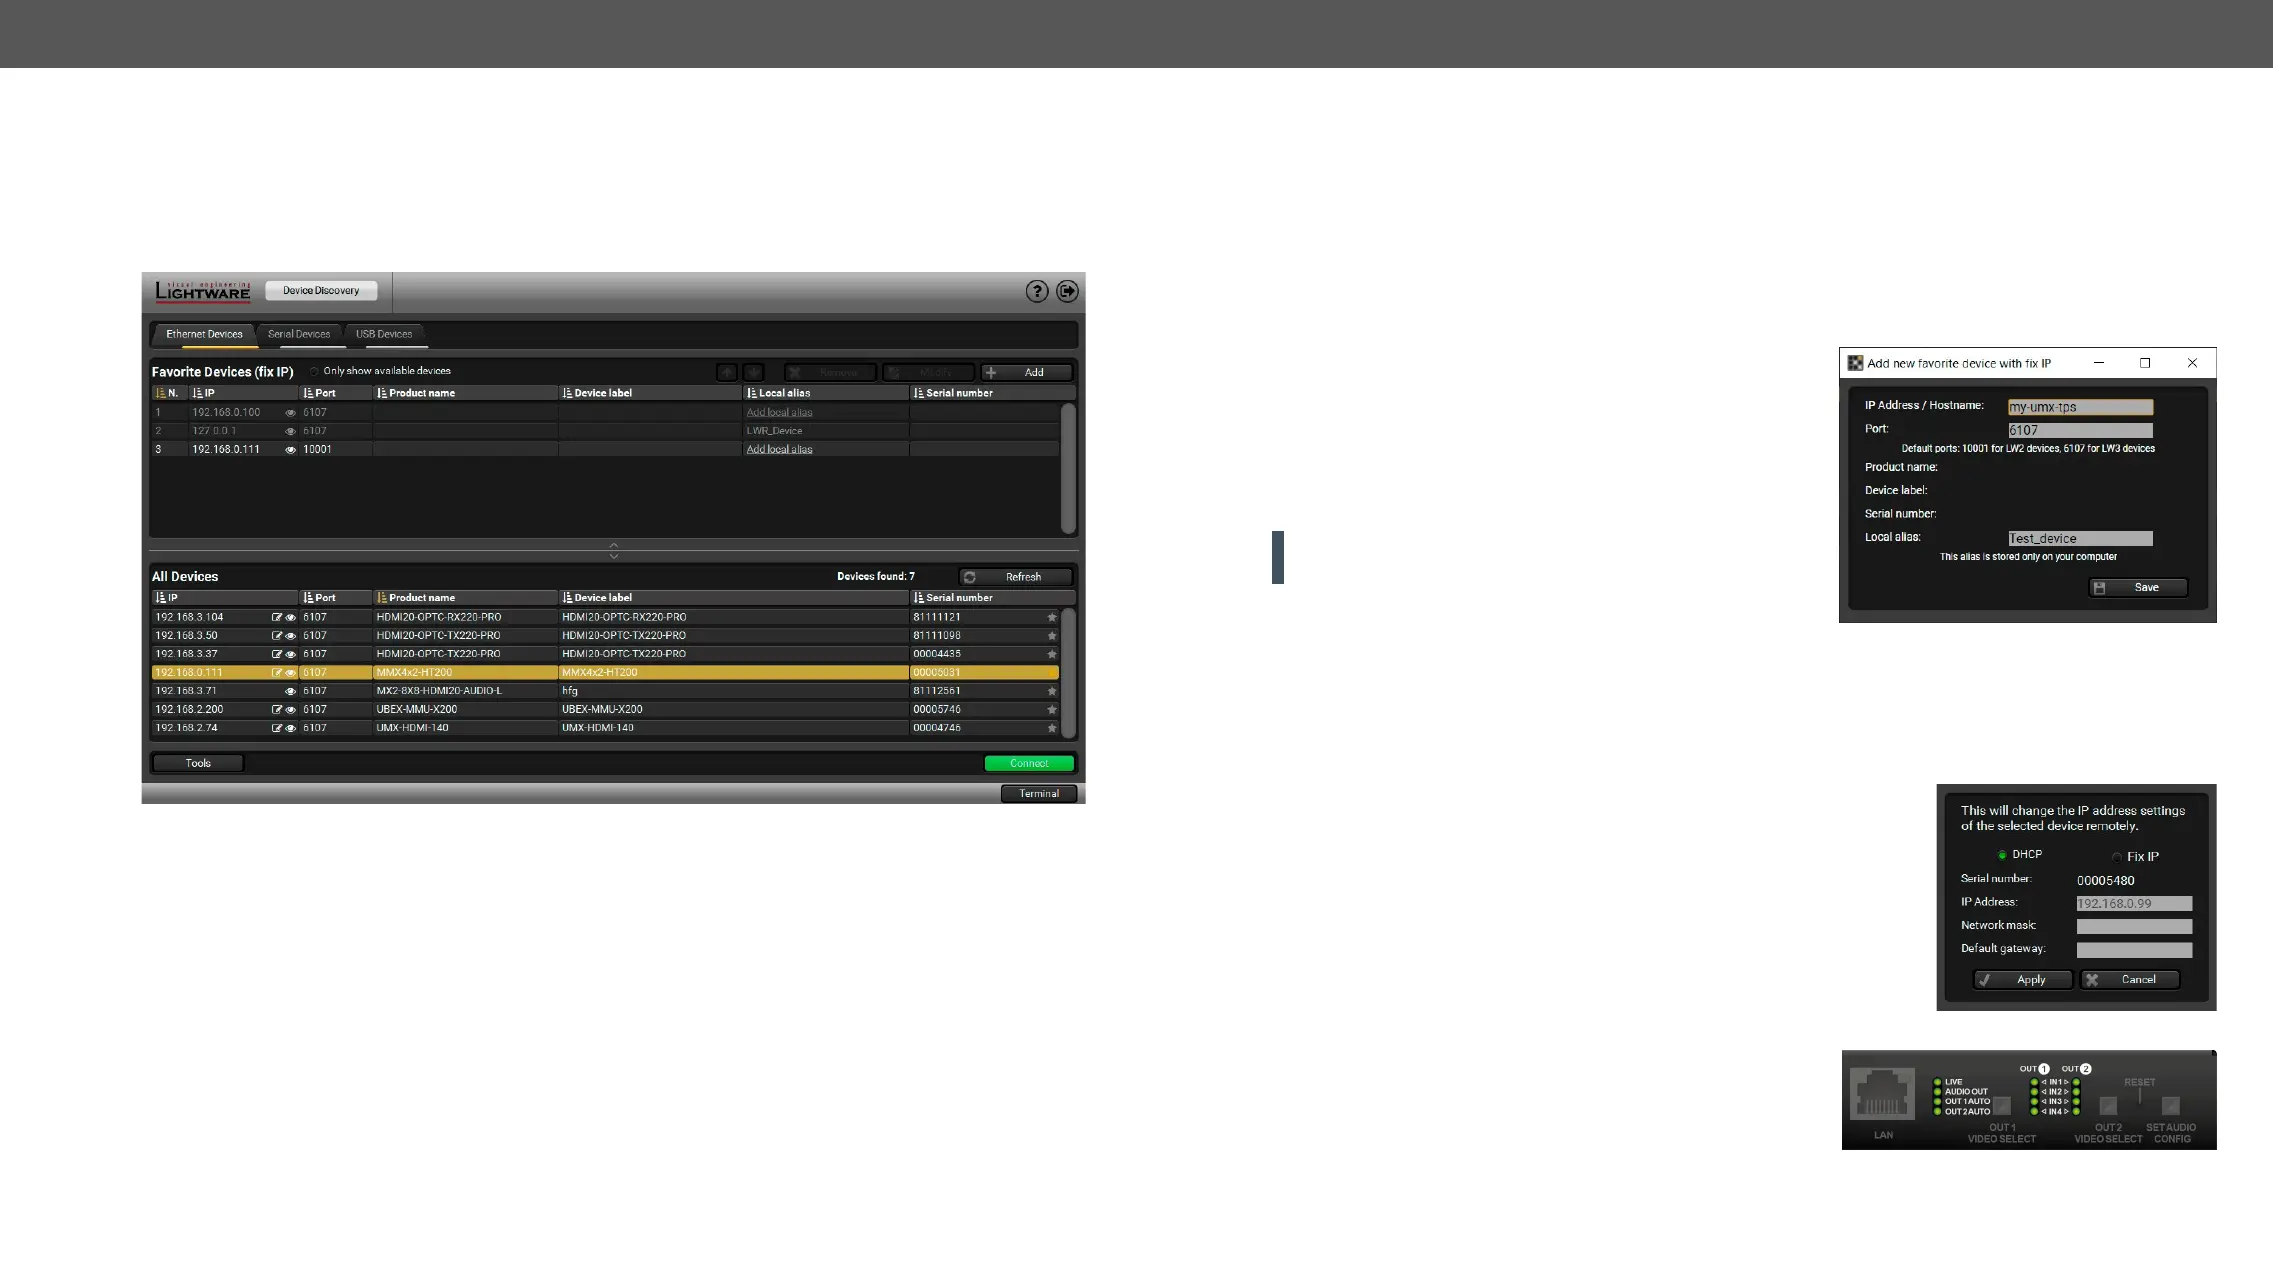
Add New Favorite Device
Press the Add button; in the appearing window you can enter
the IP address. The hostname of the desired device can be used
instead, if it is supported. That allows setting a unique name
to identify the device in a network. If the host name is saved
in this window and the IP address is changing, the device will
still be available and connectible.
ATTENTION! The host name connection-feature does not
See more information about the host name property in the
Setting the Host Name section.
list can be imported later (in another computer, too), but please note that the current list will be overwritten
by the imported list.
Changing the IP Address
To modify the IP address settings quickly, it is not necessary to enter
pencil icon beside the IP address.
You can see the new settings only in this window. The device needs a few
seconds to apply the new settings.
Identifying the Device
physically.
#identifyme

 Loading...