Rev:11.08.19 Page 141 CCD-0001573-08
One-Valve Systems
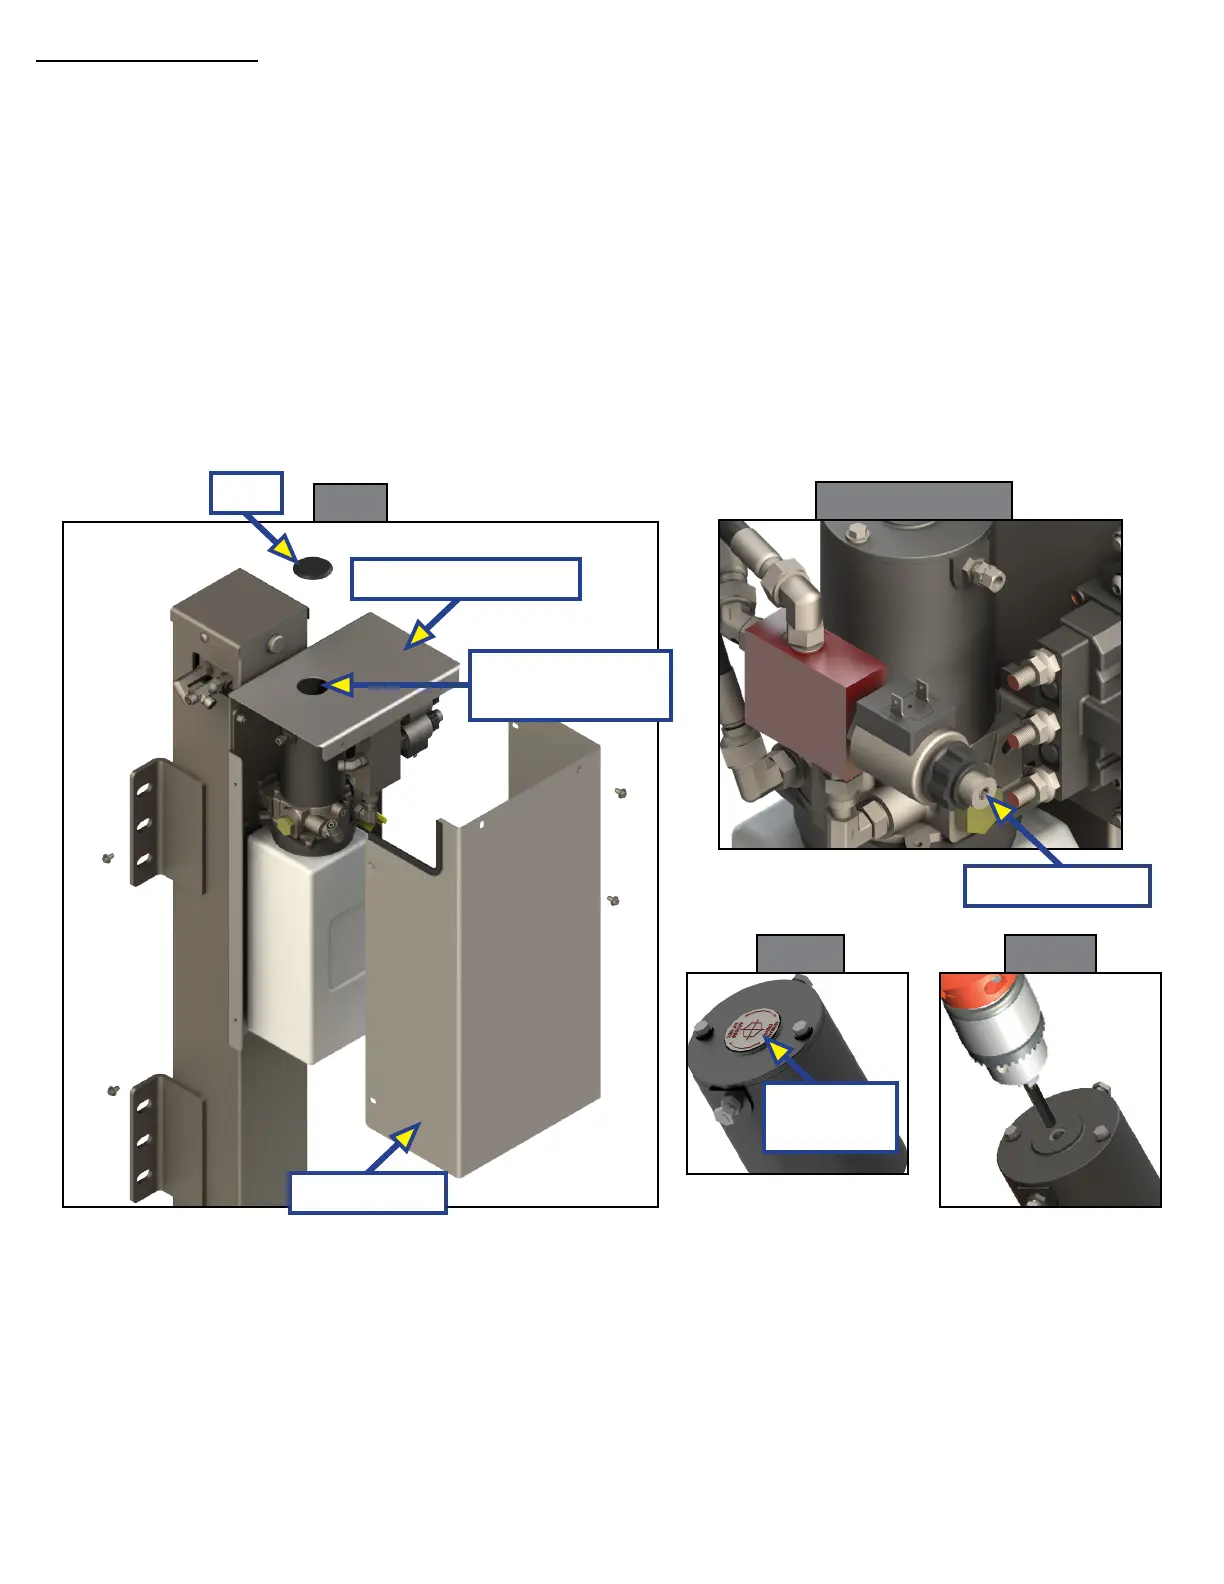
1. Remove six screws around the perimeter of the motor cover and remove cover (Fig. 8).
2. Using a
⁄"
hex wrench, open the valve by turning the manual override screw clockwise until it stops
(Fig. 9).
3. Remove plug from top of motor cover (Fig. 8).
4. Remove protective label from power unit to reveal the manual override coupler (Fig. 10).
NOTE: Top of motor cover and wiring removed for clarity in Figs. 9, 10 and 11.
5. Using a drill with a
¼"
hex bit, insert the hex bit into the manual override coupler (Fig. 11).
A. Run the drill clockwise to retract the jack(s).
B. Run the drill counterclockwise to extend the jack(s).
6. After extending or retracting the jack(s), make sure to turn the override screw counterclockwise until it
stops.
7. Reinstall motor cover and plug.
Fig. 9 One Valve
Override Screw
Fig.10
Fig. 11
Fig.8
Protective
Label
Plug
Motor Cover
Manual Override
Coupler Access
Top of Motor Cover
 Loading...