1
2
3
4
Removing and installing pistons with conrods
112
Removing piston with connecting rod
D Remove oil pan and oil suction pipe,
see Page 62
D Removing cylinder heads, see page 85
Fig. 1
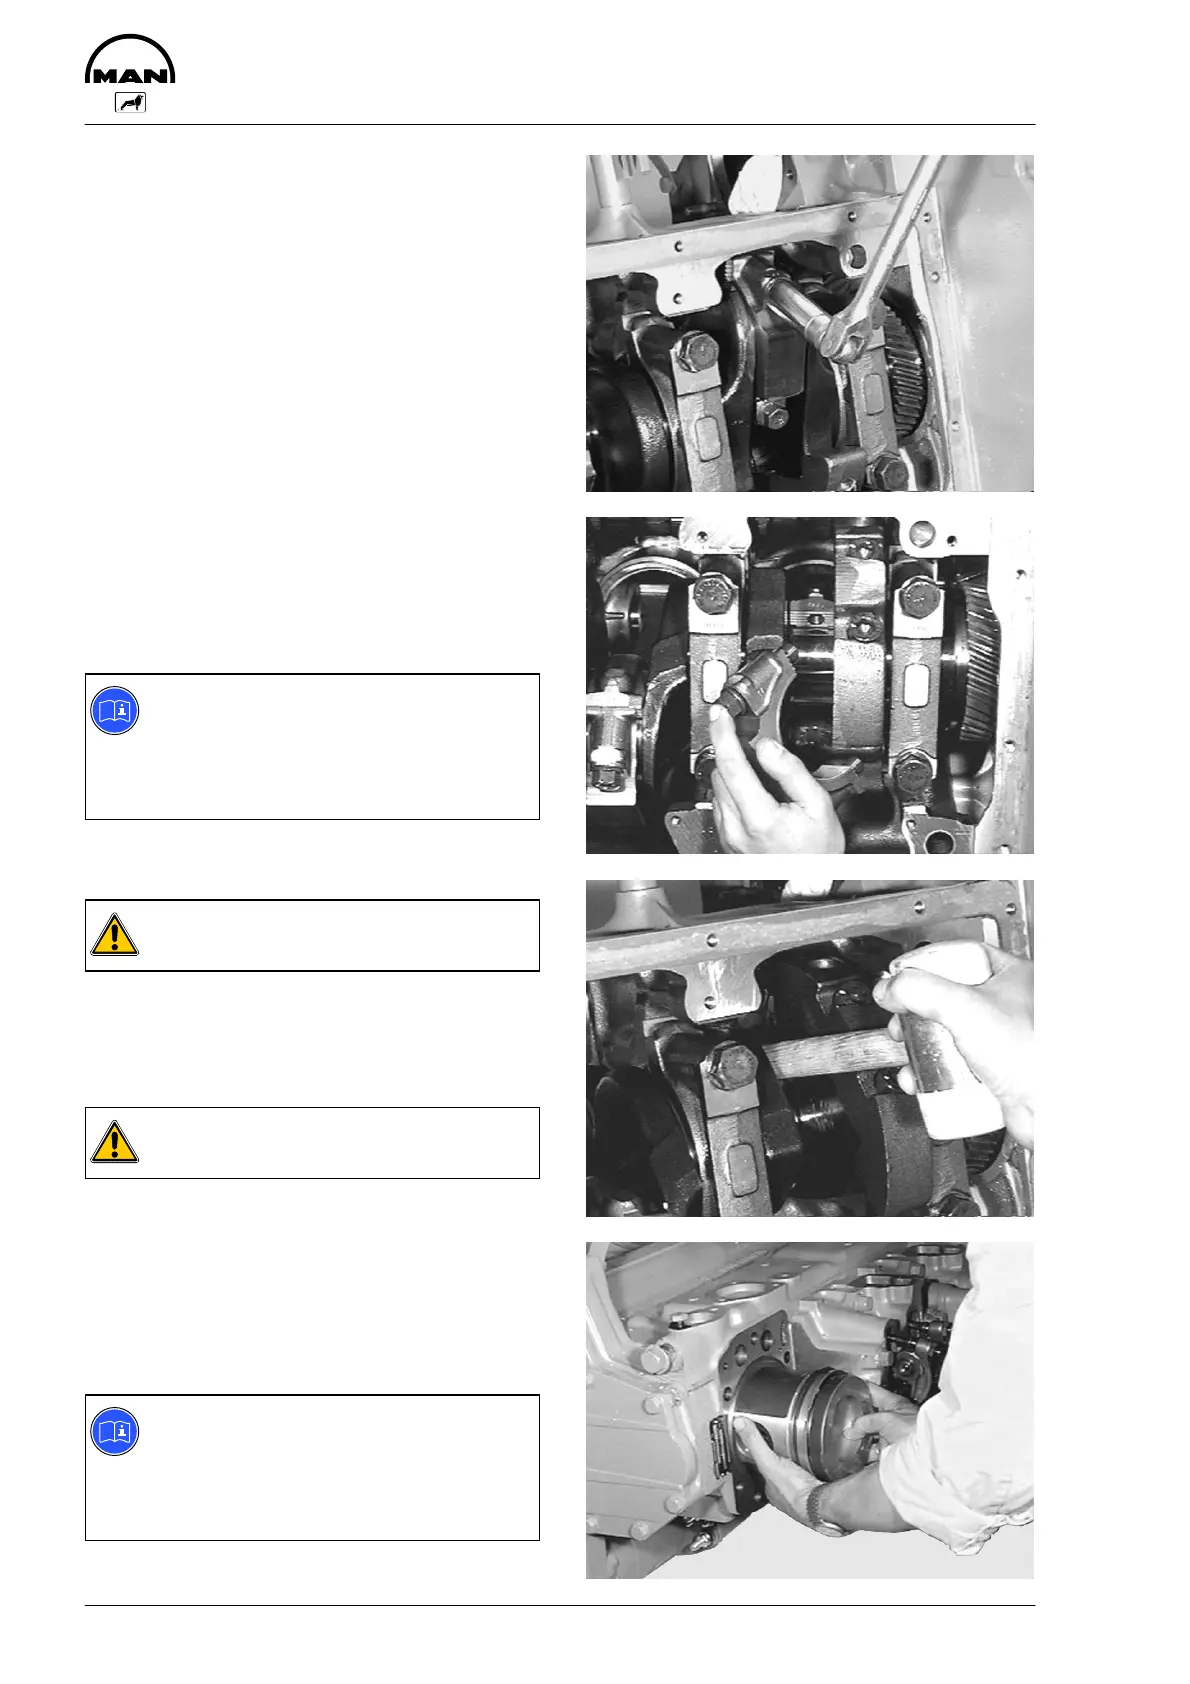
Loosen and remove conrod bearing cover bolts.
Fig. 2
Remove conrod bearing covers with bearing bus-
hes; if necessary, assist with light blows from a
plastic hammer. expediting the procedure by
means of light strokes with a synthetic hammer if
necessary.
Note:
The conrod bearing covers are numbered
at the conrod foot; place to one side ac-
cordingly. arrage them in corresponding
order.
Remove combustion residues (oil carbon) from top
cylinder edge using a piece of hard wood.
Caution:
Do not damage the cylinder liners!
Fig. 3
Press out the conrod with piston upwards.
Caution:
Do not damage the oil injection nozzles!
Fig. 4
Place the piston with conrod beside the relevant
conrod bearing cover; if available, use storage faci-
lity. use deposit rack if available.
Perform visual check of piston and piston rings.
Note:
For remachined crankcase sealing surfa-
ces, there are repair pistons with 0.2, 0.4
and 0.6 mm lower dimension in compres-
sion height (see “Service Data”).
 Loading...