HYDRAULIC SYSTEM CD3340B/YB4411
4-44
Published 04/07/2015 Control # 569-00
NOTE: Do not stretch the seal too far. The seal will not
return to its original shape. If the seal diameter is
too large, damage to the seal will occur when the
spool is installed into the housing.
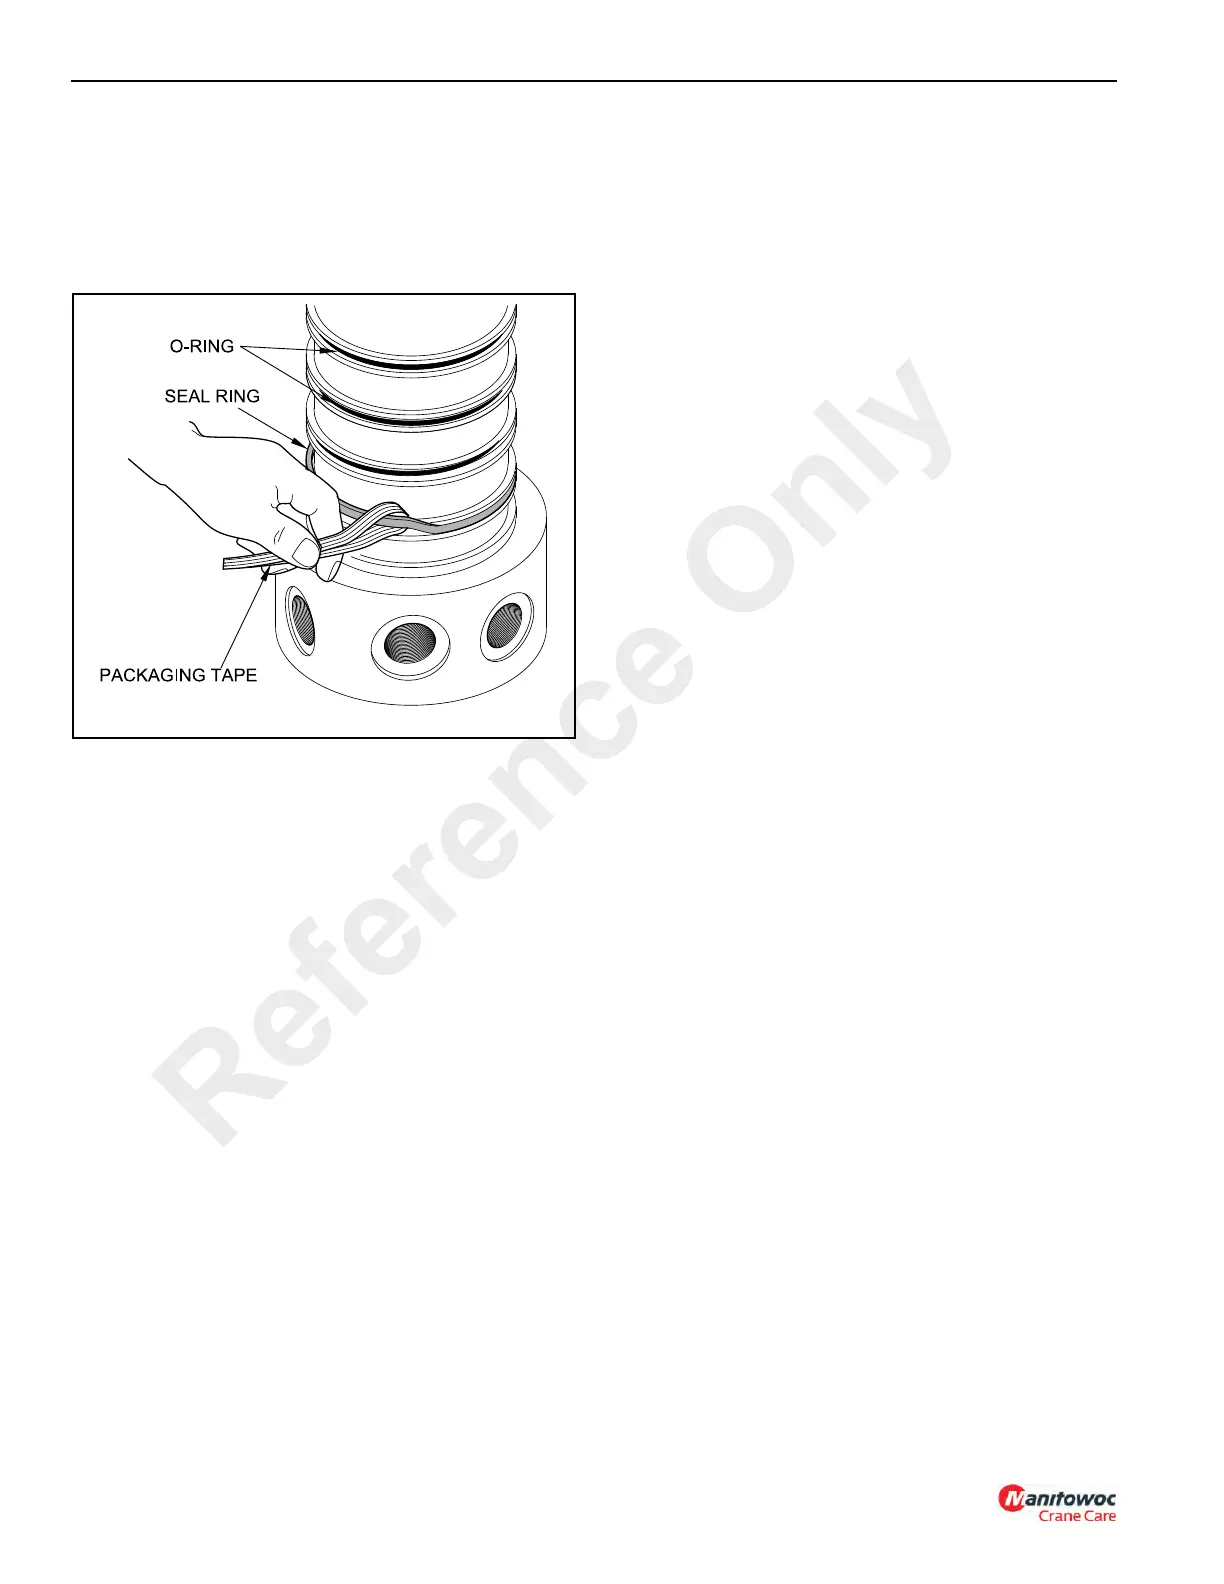
9. Slowly pull the tape from the seal ring, being careful not
to damage the seal.
10. Repeat steps 5 through 8 for the remaining seal
grooves.
11. Install the top seal (6, Figure 4-36) to stem (7).
12. Place the swivel housing (5) on the work bench with
bottom of the housing up. Lubricate the lower 1/4 of the
bore of the swivel housing with hydraulic oil.
13. Insert the assembled stem into the housing and then
push the stem into the housing bore until it is seated.
14. Install thrust washer (4), O-ring (3) and plate (2).
15. Install three hex socket flat head capscrews (1) and
tighten to a torque of 41 Nm (30 lb-ft).
Test
Pressure test the hydraulic swivel at 24,132 kPa (3500 psi).
Test each port individually for approximately 1 minute while
rotating the swivel stem 360°. No leakage past the seals is
permitted.
If internal bypass should occur, rotate the swivel stem and
then back pressure the port that the oil was leaking into. If
bypass persists, disassemble the swivel and examine for
damaged seals. If external leakage occurs, disassemble the
swivel, identify the defective component, and replace.
Installation
1. Put the hydraulic swivel in place on the machine. Fasten
the hydraulic swivel to the brackets in the mast using
three bolts and lockwashers.
2. Install the swivel stop to the bottom of the hydraulic
swivel using three bolts and lockwashers.
3. Connect the hydraulic lines to the lower ports of the
hydraulic swivel.
4. Fill the lower hydraulic system by adding recommended
hydraulic oil through the upper ports of the hydraulic
swivel.
5. Connect the hydraulic lines to the upper ports.
6. Start the engine and move the hydraulic oil through the
swivel by actuating all functions. Visually, check for
leaks.
NOTE: Do not rotate the mast until the oil has moved
through the hydraulic swivel for several minutes.
Hydraulic Cylinders
Removal
NOTE: The following removal instructions are general and
should be modified to suit the cylinder being
removed. Telescope cylinder and outrigger cylinder
removal instructions will be found in SECTION 11.
Steering cylinder removal instructions can be found
in SECTION 10.
1. Put a support under the component to which the cylinder
is fastened. Make sure the component will not fall after
the cylinder is removed.
2. Stop the engine. If the lift cylinder is being removed,
before disconnecting any lines or hoses from the
cylinder, let the system bleed down for approximately 10
minutes. Even then slowly disconnect any hose to allow
any pressure still in the circuit to release.
3. Disconnect the hydraulic lines from the cylinder. Put
caps on the hydraulic lines and plugs on the cylinder
ports to keep dirt out of the system.
4. Connect a hoist to lift the weight off the cylinder.
5. Remove the cylinder mounting pins. Remove the
cylinder.
Disassembly
NOTE: The following procedures gives general
instructions for repair of the hydraulic cylinders.
See illustrations for relation of the component
parts. Steering cylinder repair instructions can be
found in Steering System, page 10-1.
Reference Only

 Loading...


