HYDRAULIC SYSTEM CD3340B/YB4411
4-34
Published 04/07/2015 Control # 569-00
should be smooth and free of nicks, scratches or grooves.
Examine O-rings and backup washers for any damage and
replace if necessary. All moving parts should slide freely, with
oil seal friction being present.
After inspecting and cleaning, immerse all parts in hydraulic
oil and reassemble. Since the pressure setting was not
disturbed, the relief valve can be tested for proper function
under actual working conditions.
If operating difficulties indicate that the pilot poppet is leaking
or sticking, remove internal parts of the pilot section, and
follow the same procedure as above. After assembly, adjust
the relief valve pressure per instructions in this section.
If the relief valve still does not function properly, replace the
relief valve.
Relief Valve Troubleshooting
Table 4-9
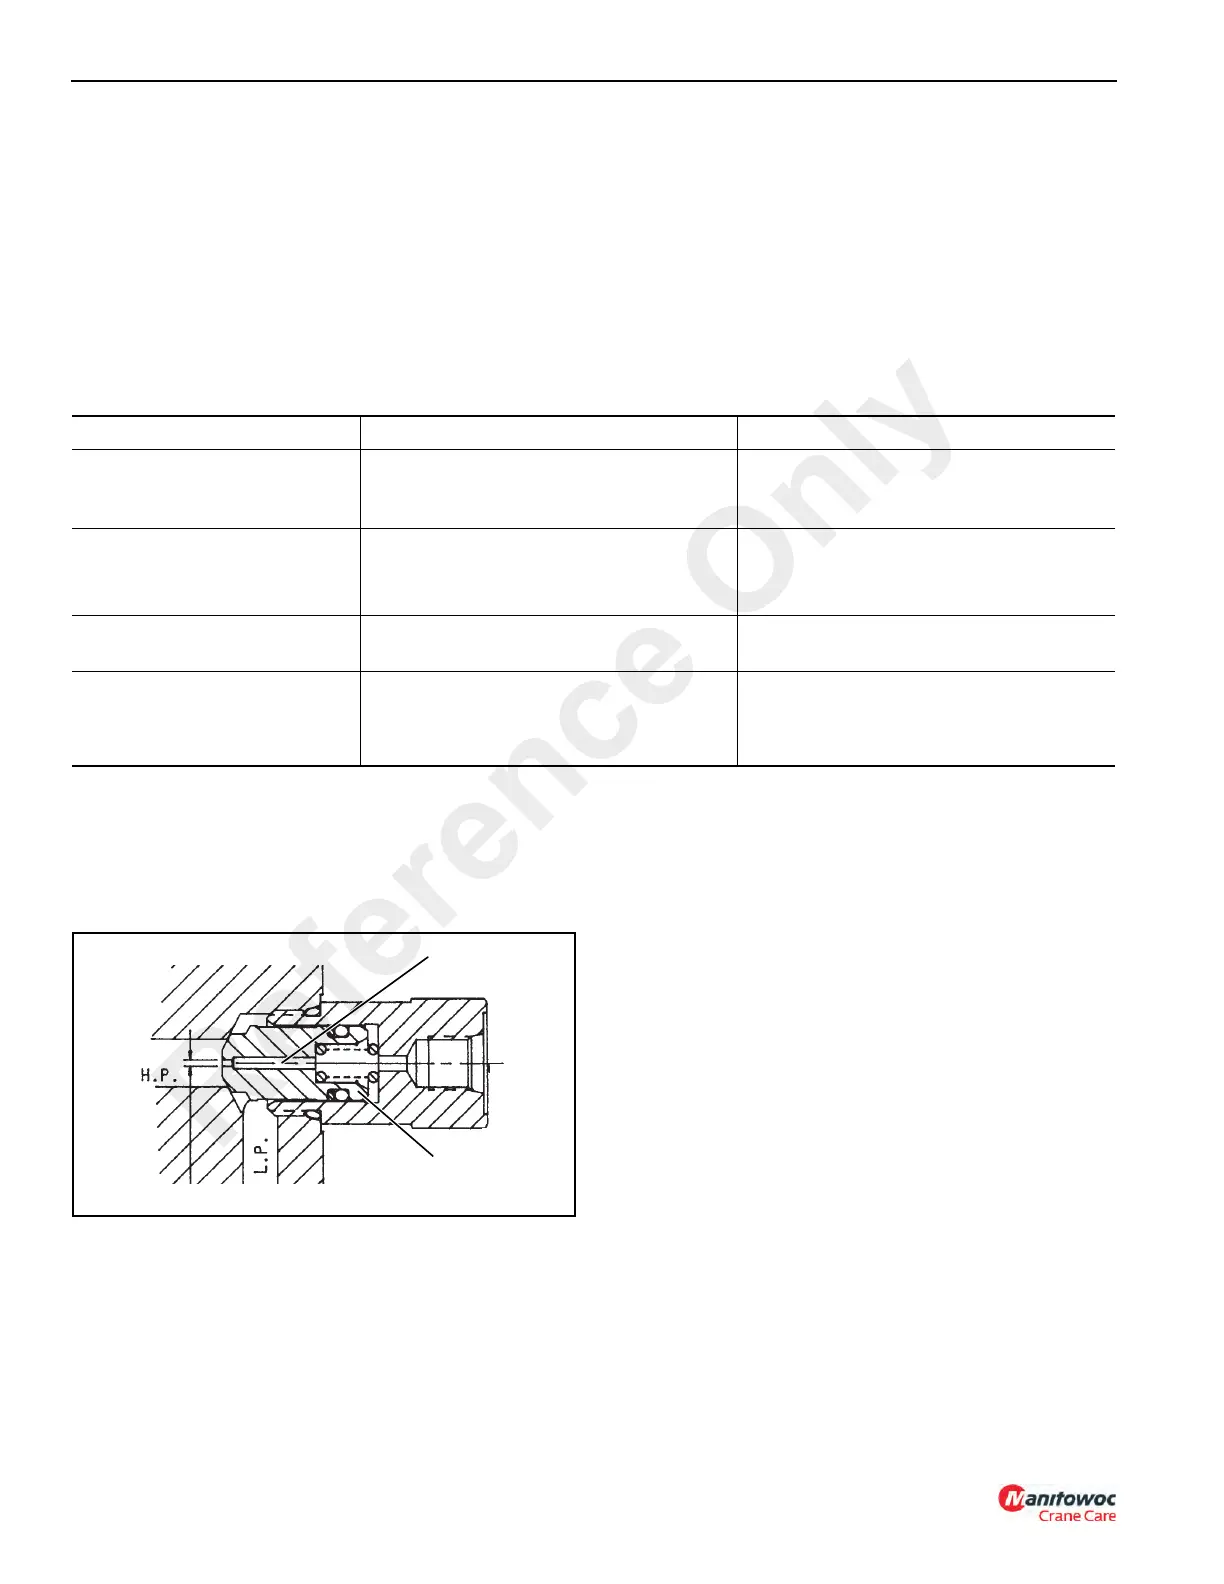
Anti-Void Troubleshooting
Trouble resulting in a malfunctioning anti-void valve can
usually be traced back to foreign matter plugging the sensing
hole or preventing free movement of the poppet. Also, check
seat for scratches, nicks or other marks.
If operating difficulties indicate that the pilot poppet is leaking
or sticking, remove internal parts of the pilot section, and
follow the same procedure as above. After assembly, adjust
the relief valve pressure per instructions in this section.
If the relief valve still does not function properly, replace the
relief valve.
Installation
1. Install fittings into valve.
2. Position the valve assembly on the mounting plate and
secure with three capscrews, washers and nuts.
3. Connect all hoses to the control valve.
4. Start the engine and release the air in the hydraulic lines
by operating each hydraulic function several times in
both directions.
5. Check for leaks and fill the reservoir, if required.
Outrigger Control Valve
Removal
NOTE: On units with standard outriggers, one outrigger
valve is used. On units with independent
outriggers, two outrigger valves are used. Removal
instructions for both valves are the same except
where noted.
1. Stop the engine and engage the parking brake. Place
chocks under the wheels.
2. Disconnect the battery cables from the battery. For
safety, disconnect the negative (-) cable first.
Problem Probable Cause Remedy
Can’t get pressure
Poppet D, E, or K stuck open or
contamination under seat. (Figure 4-20).
Check for foreign matter between poppets
D, E, or K and their mating parts. Parts
must slide freely.
Erratic Pressure
Pilot poppet seat damaged.
Poppet C sticking in D. (Figure 4-20)
Replace the relief valve.
Clean and remove surface marks for free
movement.
Pressure setting not correct
Normal wear. Lock nut & adjusting screw
loose.
Adjust pressure.
Leaks
Damaged seats.
Worn O-ring.
Parts sticking due to contamination.
Replace relief valve.
Replace relief valve.
Replace relief valve.
FIGURE 4-19
a0973
Sensing Hole
Poppet
Reference Only

 Loading...


