National Crane Published 8-01-2017 Control # 287-11 5-7
NBT40 SERVICE MANUAL HOIST
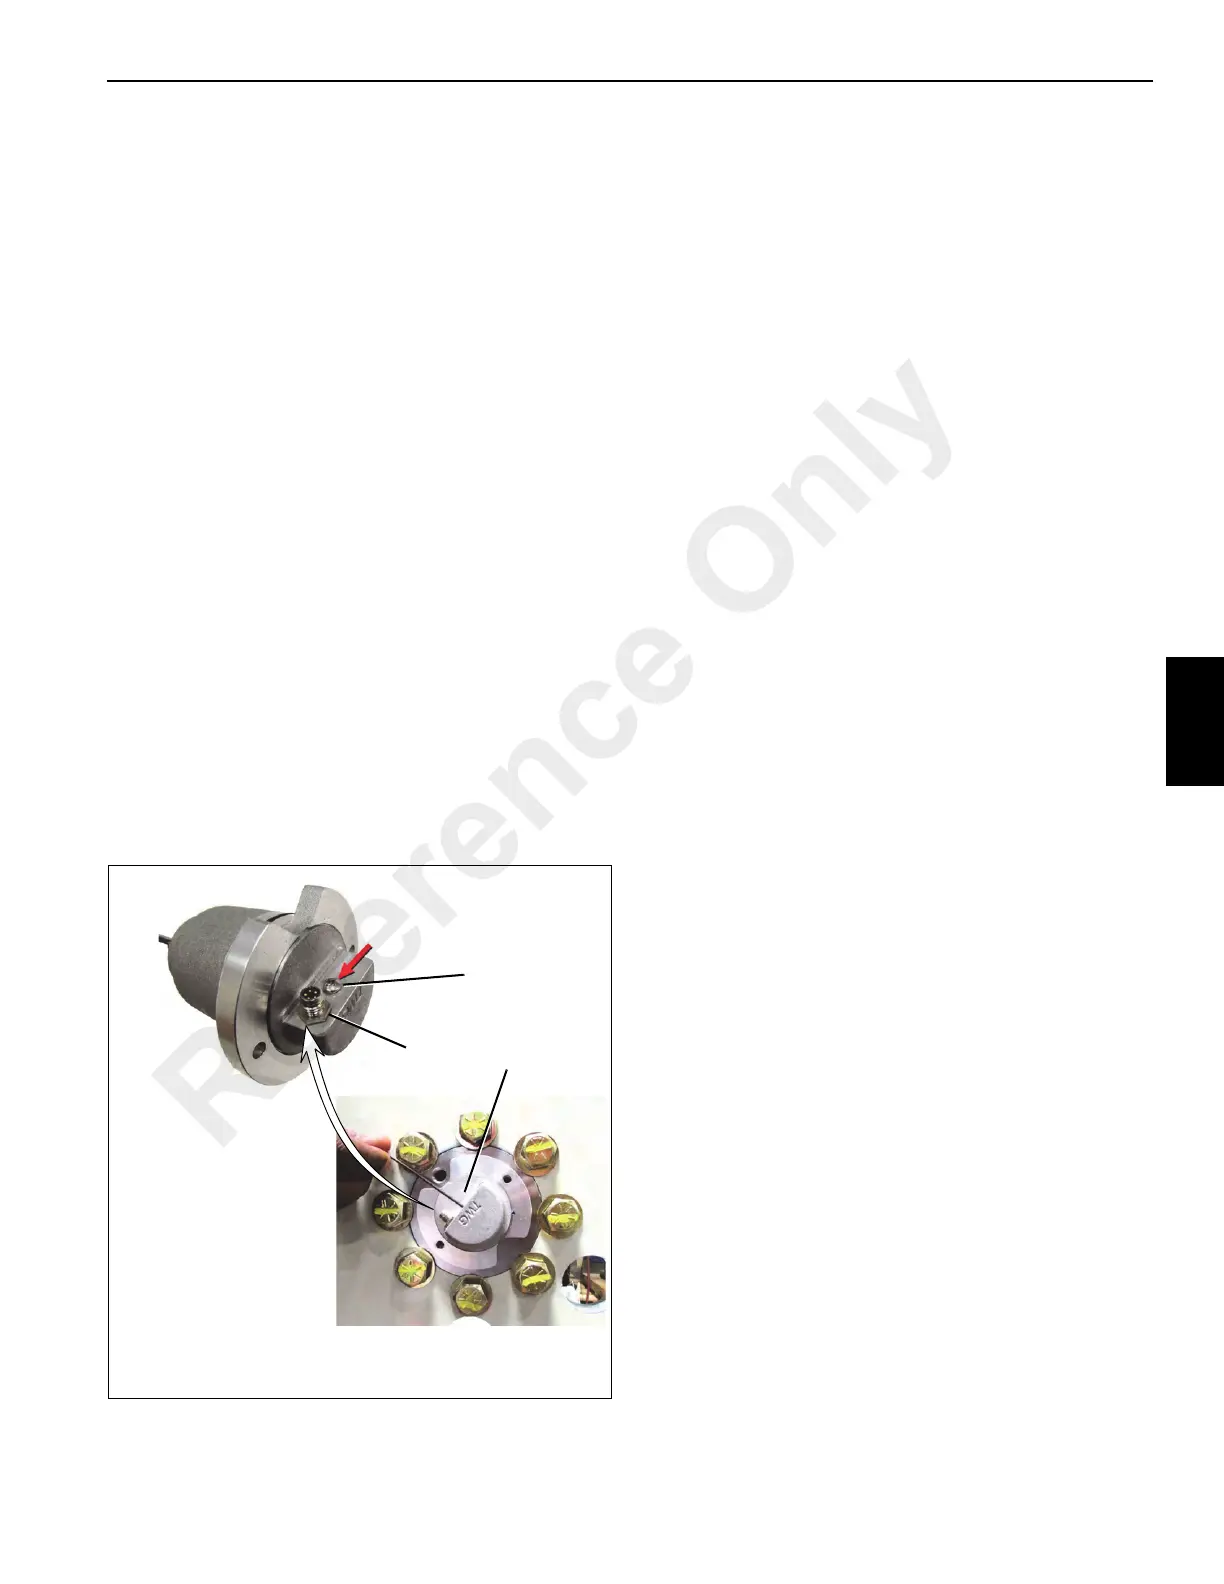
4. Push and gently hold the programming button (3,
Figure 5-9) and return power to the MWI by
reconnecting the DRI cable.
NOTE: Use an Allen Wrench or other small tool with a flat,
blunt end approximately 1.5mm or (1/16") in width
and at least 76 mm (3") in length. Use of a pointed
or sharp tool can cause faulty setting or damage to
the HMS. Excess force can damage the HMS
operation.
5. Hold the programming button for at least 2 seconds, but
less than 15 seconds, after power is applied and
release.
NOTE: Holding the button for longer than 15 seconds puts
the HMS into Shipping Mode. See Shipping Mode
for more information.
6. Run the winch to the second set point.
NOTE: It is recommended to transition to the second layer
as the second set point.
7. Gently press and hold the programming button for 1-2
seconds, then release.
8. Replace the MWI/HMS programming screw. Tighten to 7
in-lbs.
NOTE: Failure to replace the programming screw (1,
Figure 5-9) could effect the operation of the MWI.
9. The MWI setup routine is complete.
Shipping Mode
If the programming button is held down for more than 15
seconds, the HMS will enter "Shipping Mode." The HMS
rapidly pulses the "Warning" output indicating the HMS is
entering or exiting "Shipping Mode." While in "Shipping
Mode", the HMS will pulse the "Warning" output two times
with a 30 second pause.
Shipping Mode allows the OEM to set the set points on the
cable before shipping to a job site. This prevents the need to
recalibrate the set points when the winch is installed on the
machine.
NOTE: The drum rotation indication, commonly a thumper
handle, remains operational while the HMS is in
shipping mode.
To use Shipping Mode:
1. Install the wire rope on the drum. Refer to the
appropriate winch manual for more information.
2. See MWI Setup to set the end points.
3. Remove the programming button cover screw (1,
Figure 5-9).
4. Press and gently hold the programming button for at
least 15 seconds. The HMS rapidly pulses the “Warning”
output to confirm the HMS has entered Shipping Mode.
The set points remain saved in the HMS
.
NOTE: Excess force can damage the programming button
and affect MWI/HMS operation.
5. This allows the winch to rotate without the count or set
points being disturbed.
6. When the winch is installed on the machine and the wire
rope is installed to the same length as the original setup,
press and hold the programming button for more than 15
seconds. The HMS rapidly pulses the "Warning" output
to confirm the HMS is no longer in Shipping Mode.
7. The HMS is now ready for use.
HOIST REPAIR
Disassembly
Refer to Figure 5-10 and the Hoist Parts List on page 5-10 to
disassembly the hoist.
1. Drain the oil from the gearbox and brake sections using
the instructions In the Operator’s Manual.
2. Stand the hoist on its end with the motor pointing up.
3. Disconnect the tubing (Item 22) connected to the brake
housing (Item 21). Remove the motor and
counterbalance valve assembly from the hoist by
FIGURE 5-9
2
3
1
8640-5
8640-6
Reference Only

 Loading...