TRANSMISSION SYSTEM
Reassembling
the
speed change
shifter
(1) Insert speed change lever
into
cover,
attach
spring, and position
bracket
in place.
Put
on
stopper
washer and tighten the bracket
securing bolts to the
torque
value indicated
below, and lock the bolts by bending the
stopper
washer.
Tightening
torque
2.5
~
3.0
kg-m
(18
~
22 ft-lb)
(2) Insert
stopper
springs and steel balls
into
the
two shifter forks.
(3) Grease
"0"
ring and fit
it
to
shifter shaft.
5-24
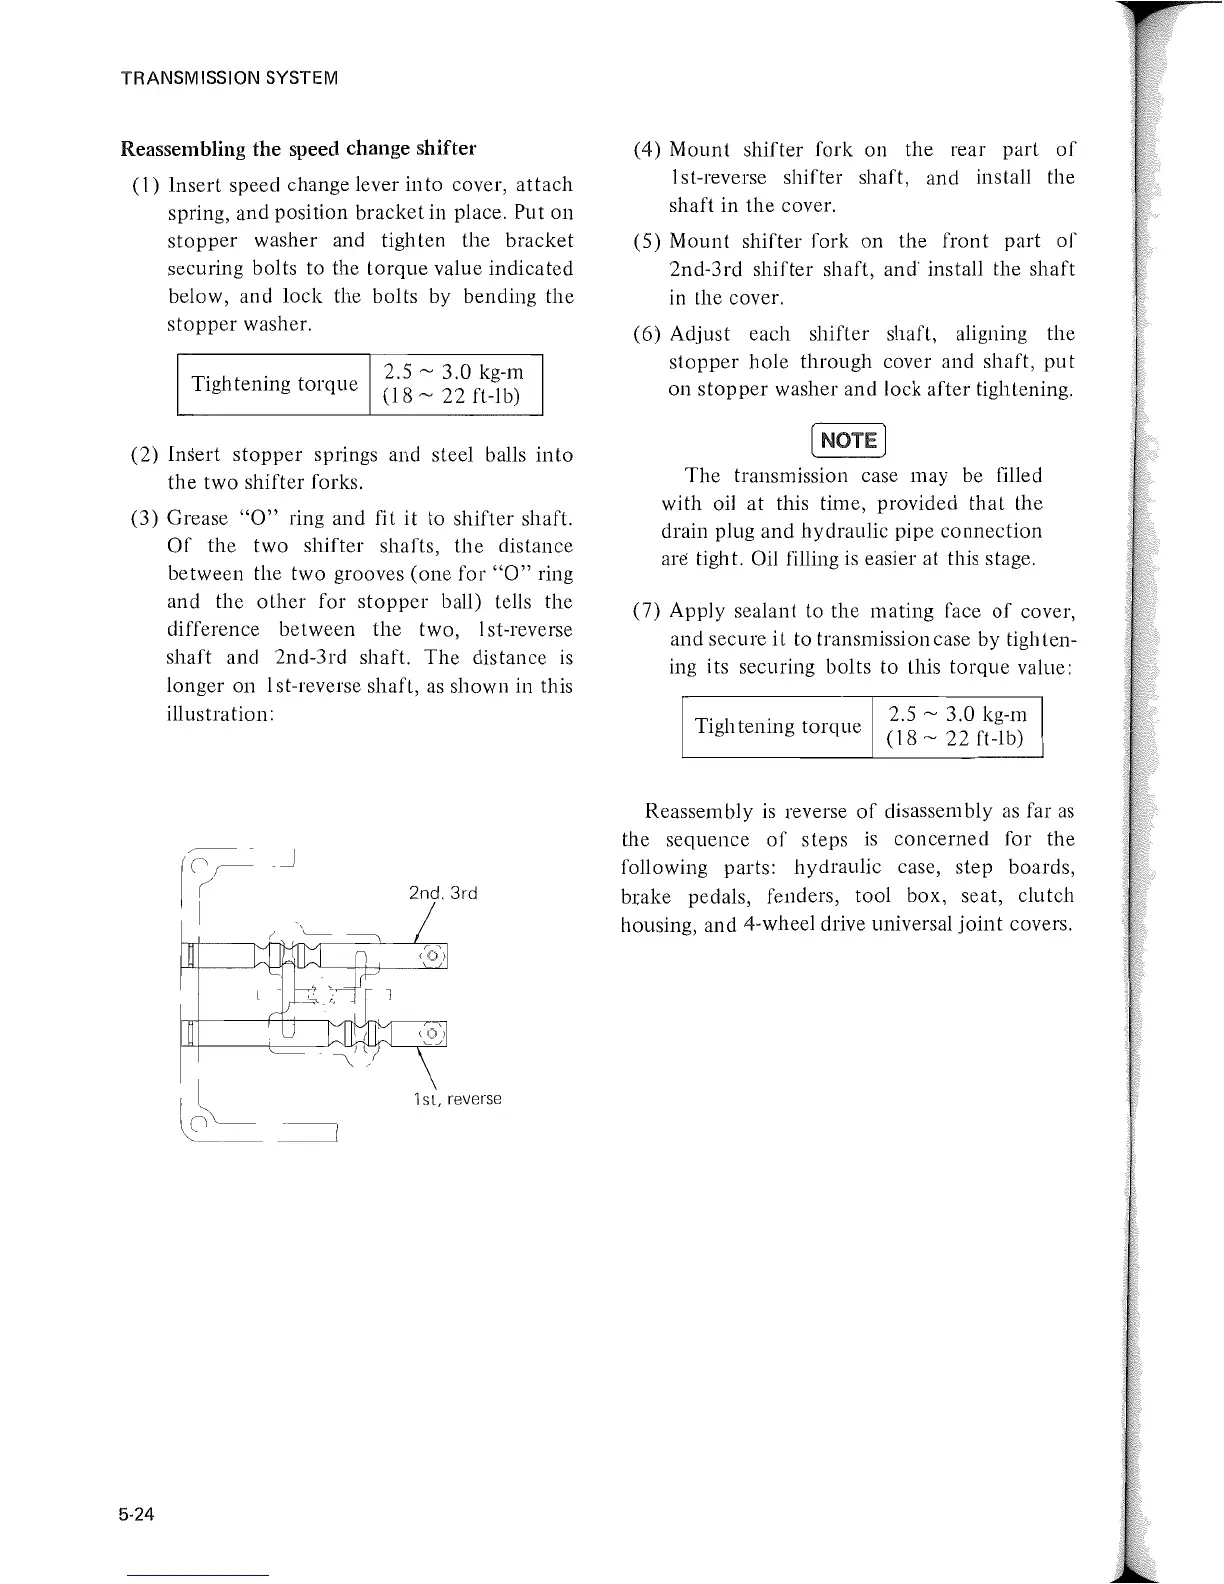
Of
the
two
shifter shafts,
the
distance
between the two grooves (one for
"0"
ring
and the
other
for
stopper
ball) tells the
difference be tween
the
two, 1 st -reverse
shaft and 2nd-3rd shaft.
The
distance is
longer on 1st-reverse shaft,
as
shown in this
illustration:
-~
2nd.3rd
1 s t, reverse
(4)
Mount
shifter fork on
the
rear part
of
1st-reverse shifter shaft, and install the
shaft in
the
cover.
(5)
Mount
shifter fork on the
front
part
of
2nd-3rd shifter shaft, and' install the shaft
in the cover.
(6) Adjust each shifter shaft, aligning the
stopper
hole through cover and shaft,
put
on
stopper
washer and lock after tightening.
[NOTE]
The
transmission case may be
f1lled
with oil at this time, provided
that
the
drain plug and hydraulic pipe
connection
are tight. Oil filling is easier at this stage.
(7)
Apply sealant to the mating face
of
cover,
and secure
it
to transmission case by tighten-
ing its securing bolts to this
torque
value:
Tightening
torque
2.5
~
3.0 kg-m
(18
~
22 ft-lb)
Reassembly
is
reverse
of
disassembly
as
far
as
the
sequence
of
steps
is
concerned for the
following parts: hydraulic case, step boards,
brake pedals, fenders, tool box, seat, clutch
housing, and 4-wheel drive universal
joint
covers.
 Loading...