»
c
.-+
o
~
o
0-
m
The flash
has
a range
of
approx. 0.5-7.0 m
(1
ft.
8 in.-23 ft.)
when
the
camera
is
zoomed
out
all
the
way. With
maximum
optical zoom applied,
the
range
is
approx.
0.5-4.0 m
(1
ft. 8 in.-13
ft.
1 in.).
The
following
flash modes are available. Note
that
when
using easy
auto
mode
([IJ
18),
only Auto (default setting) and
Off
are available.
tIIJTD
Auto
Flash
fires automatically
when
lighting
is
poor.
In
t]
(easy
auto)
mode
(OJ
18),
the
camera will determine the flash
mode
automatically according
to
the scene.
t@
Auto with red-eye reduction
Reduces "red-eye" in portraits
(OJ
29).
~
Off
Flash
will
not
fire even
when
lighting
is
poor.
Fill
flash
Flash
fires
when
a picture
is
taken.
Use
to "fill-in" (illuminate) shadows and back-lit
subjects.
t91
Slow
sync
Auto flash
mode
is
combined
with
slow shutter speed.
Flash
illuminates main subject; slow shutter speeds
are
used
to
capture background
at
night
or under
dim
light.
28
Setting
the
Flash
Mode
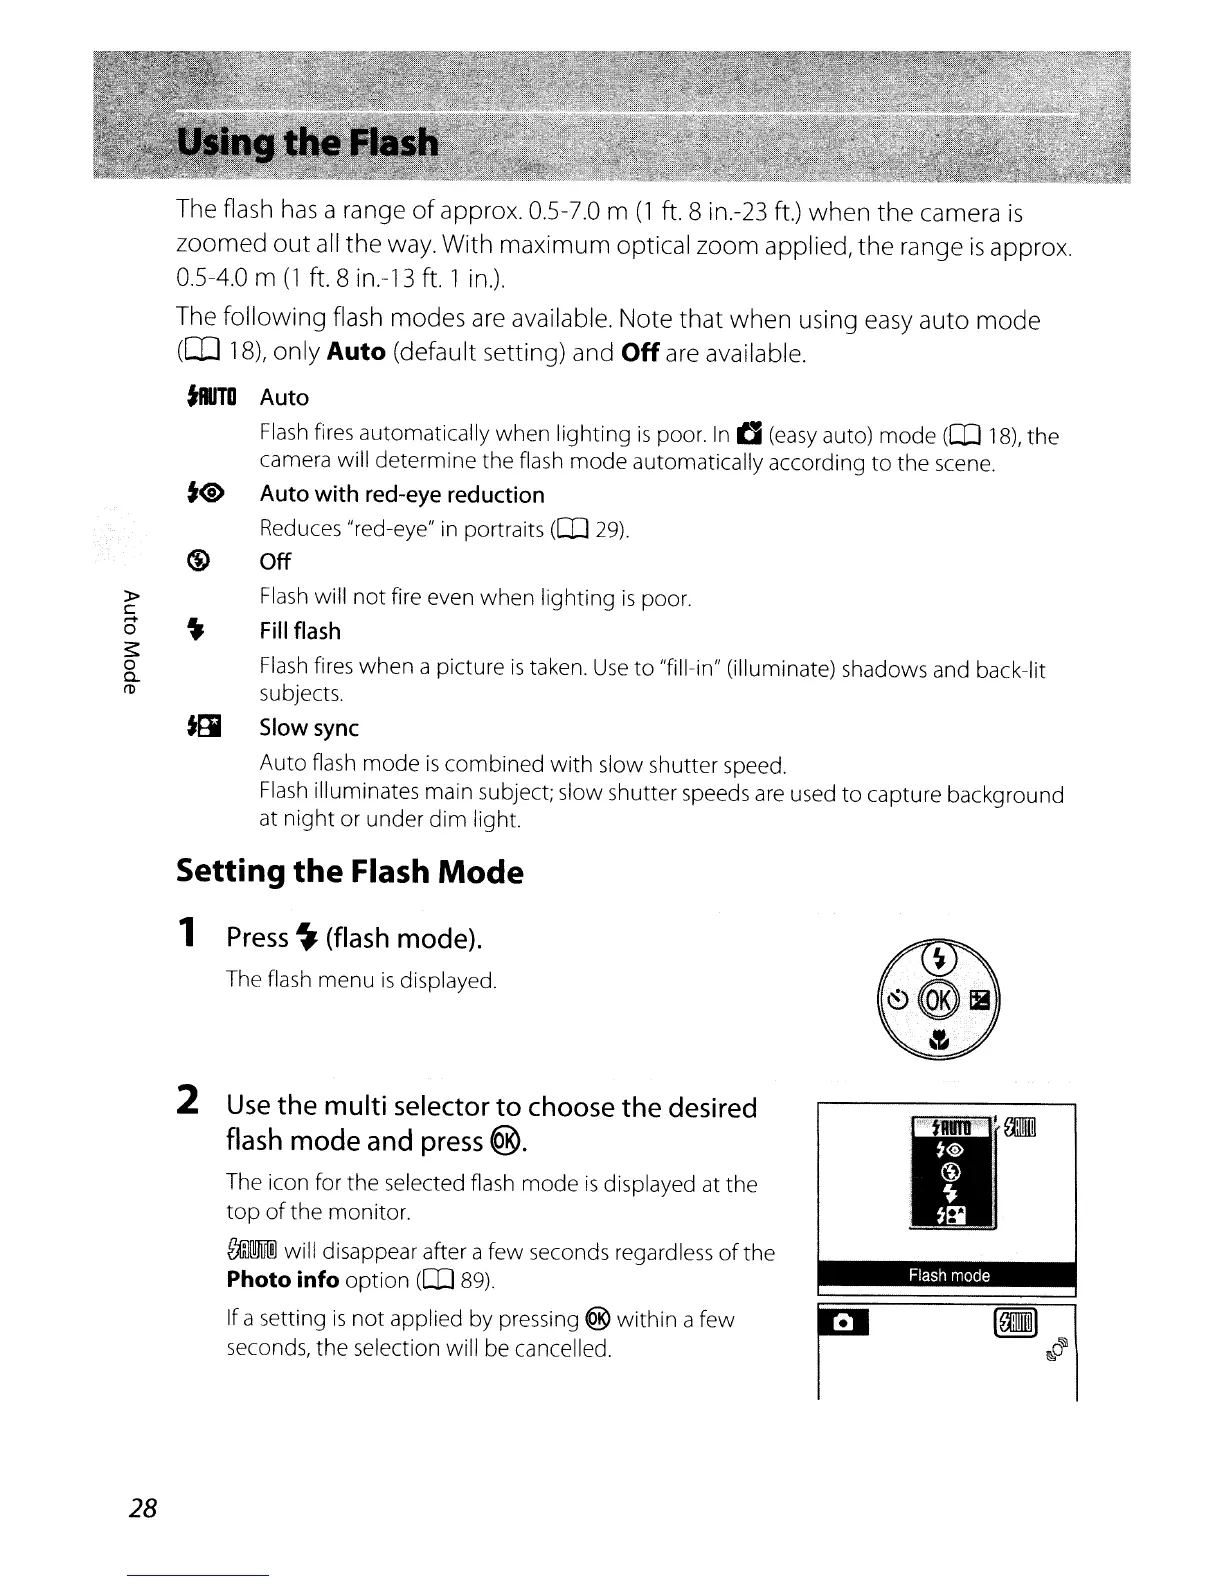
1
Press
~
(flash
mode).
The flash menu
is
displayed.
2
Use
the multi
selector
to
choose
the
desired
flash
mode
and
press
@.
The icon for
the
selected flash
mode
is
displayed at the
top
of
the
monitor.
~
will disappear after a few seconds regardless
of
the
Photo info option
(OJ
89).
If a setting
is
not
applied by pressing ® within a few
seconds, the selection will be cancelled.
.•.....
4.
1ftI11I..
..
lW3
•.•.•.
'
rAm
•
.
0.
.
t}
•
:
~*
Flash
mode