MFP overview > 13
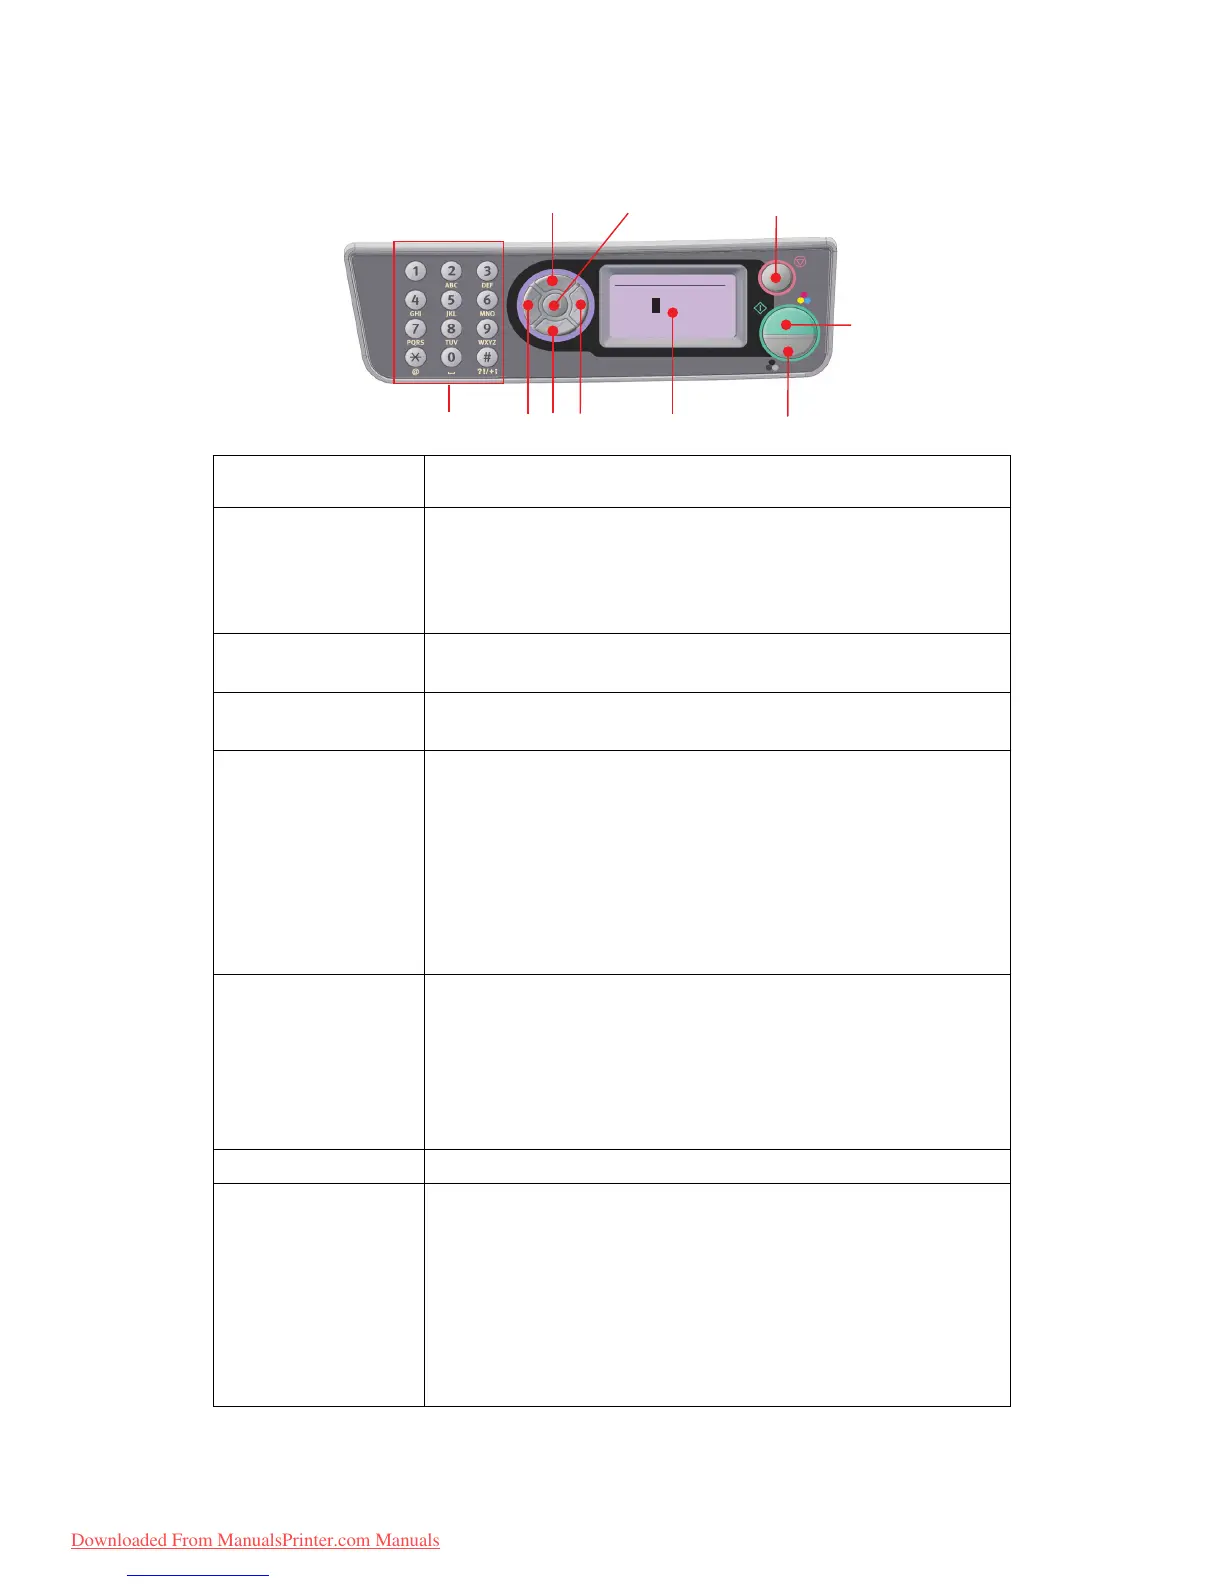
C
ONTROL
PANEL
1. Keypad Used to enter numbers, upper-case/lower-case letters and symbols in the
Entry Line. Refer to “Character switching” on page 14 for further details.
2. LEFT key When in switching Mode:
Returns the display to the Function Selection screen or Scan Sub Function
Selection screen from the Stand-by screen.
When Setting up:
Increments the value of the tree structure.
3. UP Key When setting up or in switching Mode:
Moves the cursor UP.
4. DOWN Key When setting up or in switching Mode:
Moves the cursor DOWN.
5. ENTER Key When switching Mode:
Used to confirm the Mode selected.
Used to start Push Scan (If Push Scan is selected, the Executing Push Scan
screen appears).
When Setting up:
Decrements the value of the tree structure.
Increments the value of the tree structure as the set value is confirmed.
When entering PIN ID:
Used to confirm the PIN ID entered.
6. RIGHT Key When in switching Mode:
Used to confirm the Mode selected.
Used to start Push Scan (If Push Scan is selected, the Executing Push Scan
screen appears).
When Setting up:
Decrements the value of the tree structure.
Increments the value of the tree structure as the set value is confirmed.
7. LCD display 128 x 64 dot.
8. START Key
(a = colour;
b= monochrome)
When entering PIN ID, used to confirm the PIN ID entered.
Executes the function selected.
Executes Copy.
Executes Scan to E-mail/ USB Memory/ Network PC.
Executes Fax Send.
Executes Fax Manual Receive.
Recovery from Error/Warning states.
When pressed from the Screen Entry screen, confirms the characters or
functions selected.
1
2
3
4
5
6
8b
9
8a
Done
abcd@d
a b c d e f g h i
j k l m n o p q r
s t u v w x y z
7
Downloaded From ManualsPrinter.com Manuals
 Loading...