Paper handling > 32
11. Push both paper guide locking levers (6) upward into the locked position.
12. Push the paper set lever gently backward into the SET position.
13. Attach the front sheet support (3).
L
OADING
THE
OPTIONAL
ROLL
PAPER
STAND
(ML5720/ML5790)
1. Set the Paper Type Lever to RPS.
2. Open the Top Cover and adjust the Paper Thickness Lever to suit the paper. See
“Setting the Paper Thickness lever” on page 33.
3. Open the paper separator all the way.
4. Remove the paper roller.
Note that there is a disk on the left end of the roller.
5. Slide the roller into a tube of paper.
Ensure the disk is on the left side and paper must roll up from the bottom.
6. Replace the paper roller back into the stand, with the disc on the left side.
CAUTION!
Ensure that the paper set lever is closed (towards the SET position)
before printing with the CSF. If it is left open, the friction rollers
will not be able to feed the paper, and the printer will print on the
platen and may damage the printhead and platen.
NOTE
For installation instructions, see “Installing the Roll paper stand (ML5720/
ML5790)” on page 75.
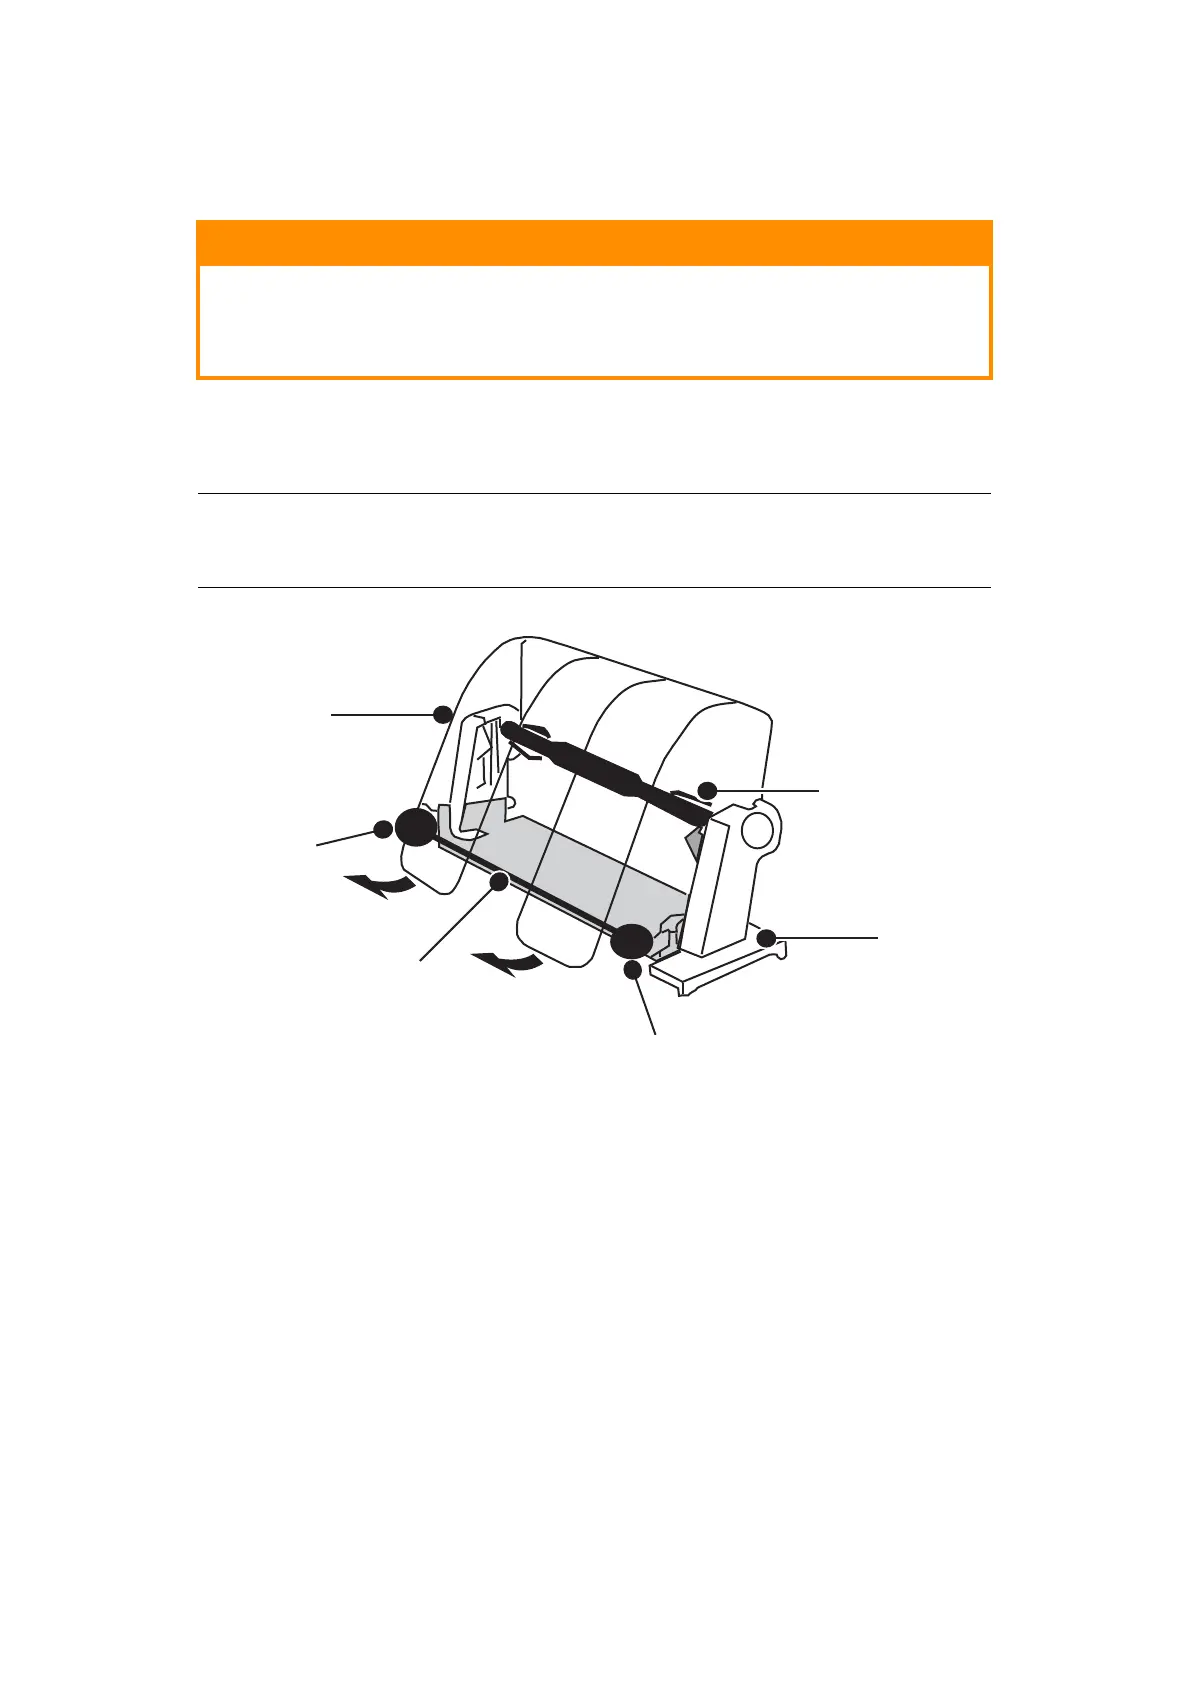
1. Roll Paper Stand
2. Paper Shaft
3. Paper Separator
4. Tension Bar
5. Paper Guide
1
2
3
4
5
5
 Loading...


