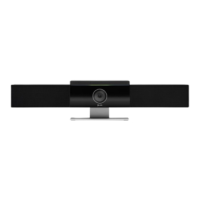
Configuring Audio Settings
You can enhance the Poly Studio USB device audio experience. For example, to enable audio stereo or
boost the bass.
Configure Polycom NoiseBlock
When you enable Polycom NoiseBlock, the Poly Studio USB device automatically senses the ambient
noise in the room and prevents the noise from transmitting to the far-end during video conferences.
Procedure
1. Connect the Poly Studio USB device to your computer, then select the Poly Studio USB video bar
tile from your Polycom Companion.
2. Go to User Settings > Audio Settings.
3. Set the option Polycom NoiseBlock to On.
Configure Audio Stereo
When you enable Stereo, the Poly Studio USB device uses two audio channels to provide stereo sound
in a conference.
Procedure
1. Connect the Poly Studio USB device to your computer, then select the Poly Studio USB video bar
tile from your Polycom Companion.
2. Go to User Settings > Audio Settings.
3. Set the option Stereo to On.
Configure Audio Bass Boost
Enables this feature to amplify low frequencies in the audio.
Procedure
1. Connect the Poly Studio USB device to your computer, then select the Poly Studio USB video bar
tile from your Polycom Companion.
2. Go to User Settings > Audio Settings.
3. Set the option Bass Boost to On.
Configure Acoustic Fence
You can enable and configure the Polycom Acoustic Fence feature to help define the audio fence around
the system.
Polycom Acoustic Fence technology creates a virtual audio fence that blocks sounds from outside the
fence. It suppresses background noise during calls to enhance audio quality for call participants. The Poly
Studio USB device defines the audio fence zone in a beam shape with three width options. The system
picks up sounds within the beam region and sends only those sounds to the far end.
Procedure
1. Connect the Poly Studio USB device to your computer, then select the Poly Studio USB video bar
tile from your Polycom Companion.
2. Go to User Settings > Audio Settings.
Configuring Poly Studio Using Polycom Companion
18

 Loading...