12
WARRANTY
CENTER
C
E
R
T
I
F
I
E
D
SECTION 1.8 – Electronics & Controllers
C-Monster 2.0 Motor Assembly Installation
REMOVAL:
STEP 1 Disconnect the RED 12V (+) wire from the Battery Source
or remove the Inline Fuse.
STEP 2 Remove the Pump Cap by pulling on the Tab and lifting
up on the Cap. FIG 1
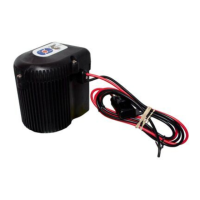
STEP 3 Unplug the Power Cord from the Motor Assembly by
pulling it downward.
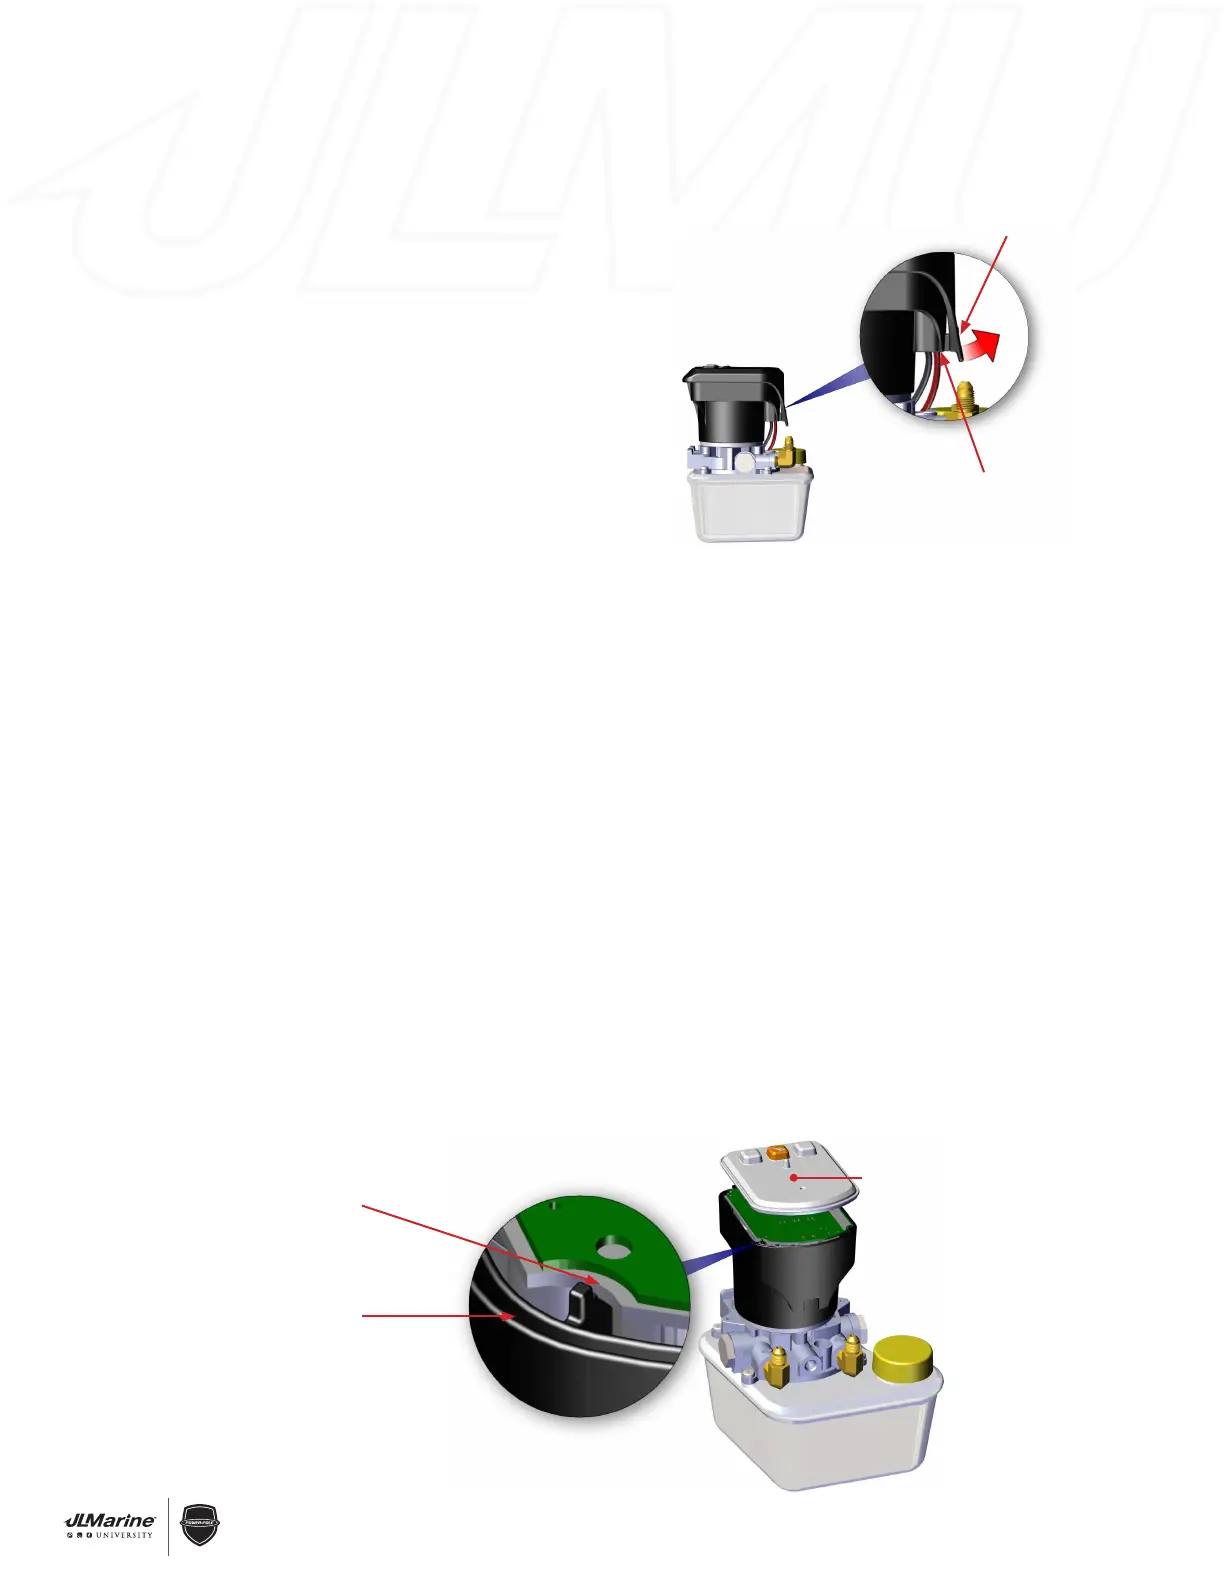
STEP 4 Remove the Circuit Board Membrane. FIG 2
STEP 5 Pry the front of the Circuit Board up using the Pump Cap
and remove it. FIG 3
IMPORTANT! Be careful not to touch the antenna as this could
damage it. FIG. 4
STEP 6 Loosen the two Phillips Head Motor Bolts that hold the Brushless Motor to the Pump Base
approximately 5/8”. FIG 6
STEP 7 Lift the Motor Assembly off of the pump base.
NOTE: Be careful not to lose or damage the Rubber Seal. FIG 6
INSTALLATION:
STEP 1 Remove the Retaining Nuts and Spacers on the bottom of replacement Motor.
STEP 2 Using a flat-bladed screwdriver, line the Pump Coupler up with the two Motor Bolt Holes in the Pump
Base FIG. 5
STEP 3 Turn the Motor Shaft by hand until it lines up with the two Motor Bolts. FIG 6
IMPORTANT! Ensure that the Rubber Seal is installed between the Brushless Motor and Pump Base. FIG 6
STEP 4 Install the Motor Assembly onto the Pump Base and tighten the Motor Bolts snug. FIG 6
STEP 5 Place the new DESI PAK flat on the top of the Motor Assembly. FIG 7
STEP 6 Install the Circuit Board into the Motor Assembly so that it is flush with the top edge. FIG 2
STEP 7 Install the Circuit Board Membrane so the edge seated completely in the Motor Casing Groove.
FIG 2
STEP 8 Plug the Power Cord back into the Pump and reinstall the Pump Cap.
STEP 9 Reconnect the RED 12V (+) wire to the battery source and make sure the 40 Amp inline fuse is installed.
IMPORTANT: If buttons stick and cause the Power-Pole to auto run remove the cap and reinstall the circuit board
membrane.
Figure 2
Circuit board fully
seated and flush with
motor casing at all four
Motor casing groove
for circuit board
membrane
Circuit board membrane
Figure 1
Pump Cap Tab
Power Cord
(Pull Down Firmly)
 Loading...