36
WARRANTY
CENTER
C
E
R
T
I
F
I
E
D
SECTION 2.5 – Hydraulic Systems
INSTALLATION TOOLS:
• 5/8” Wrench
• 9/16” Wrench
• 7/16” Wrench
• 11/16” Wrench
• 1/4” Wrench (CM1 Only)
• Safety Glasses
• Phillips-Head Screwdriver
• Clean Rags or Towels
• Green Marine™ ISO 32 Hydraulic Fluid (If Needed)
• Funnel (If Replacing Fluid)
PRESSURE RELIEF:
IMPORTANT: Pressure must be relieved before proceeding
STEP 1 Lower the Power-Pole Anchor down so the Everflex™ spike is touching the ground.
WARNING: Do not touch Spike with bare hands.
STEP 2 Manually push the anchor into closed position, relieving pressure. Manually lower the anchor back to the
ground.
REPLACE PUMP VALVES:
STEP 1 Disconnect the Pump from power source.
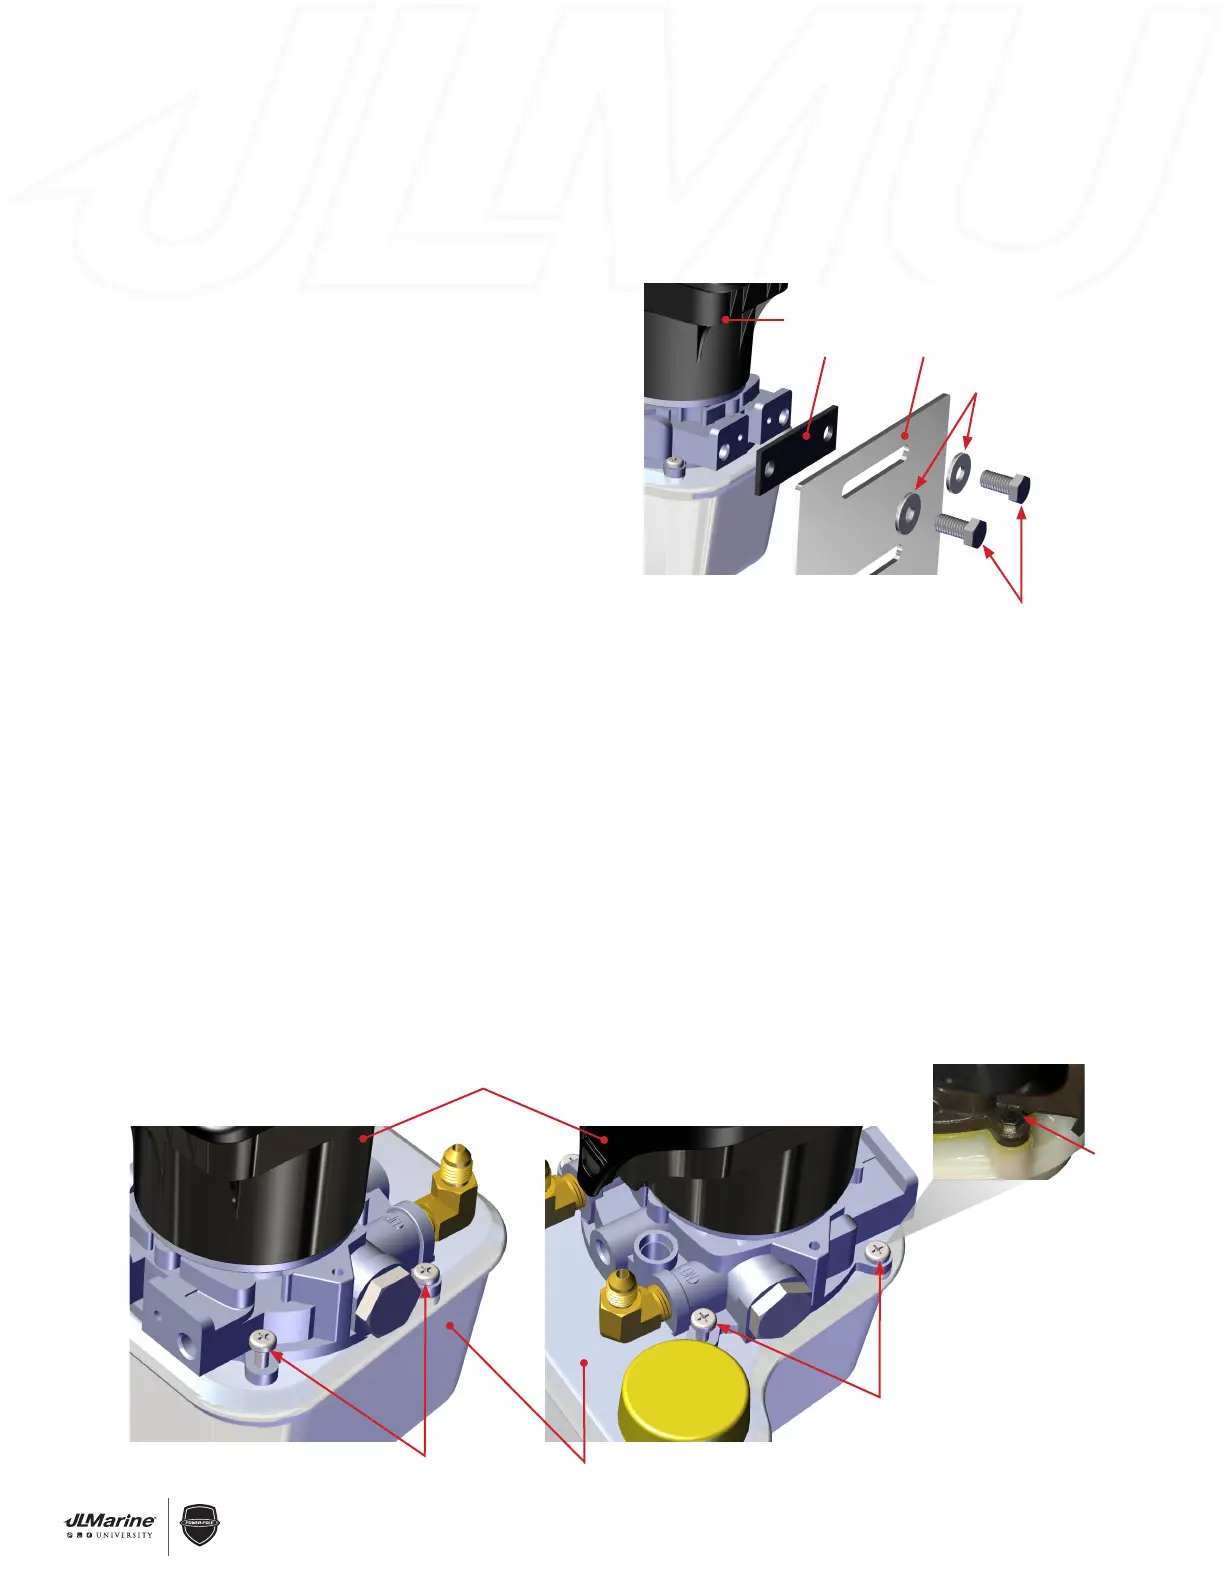
STEP 2 Using a 9/16” Wrench, remove the two Bolts, two Washers, and Rubber Gasket that attach the Pump
Assembly to the Mounting Bracket. FIG 1
STEP 3 Loosen and remove the hoses/tubing from the Pump (5/8” wrench for CM2 Hoses; 1/2” & 9/16” wrenches
for CM1 Tubing).
IMPORTANT: Cover all exposed hose/fitting ends to keep contaminants out of pump.
STEP 4 CM2: Using a Phillips Screwdriver, remove the four bolts that hold HPU to Reservoir. FIG 2 & 3
CM1: Remove three Phillips-Head Bolts with screwdriver and Hex Head Bolt with 1/4” Wrench.
FIG 3a
Figure 1
Pump Assembly
Rubber Gasket Mounting Bracket
Washers
Bolts (9/16” Wrench)
Pump Valve Replacement
CM1 & CM2 Pumps
Remove Bolts
Remove Bolts
HPU
Reservoir
Figure 2 Figure 3
Hex Head Bolt
(CM1)
Figure 3a
 Loading...