18 | MOVE ZR Installation & Owner’s Guide
INSTALL AND CONNECT DISPLAY
(If Installing Wire Through Boat)
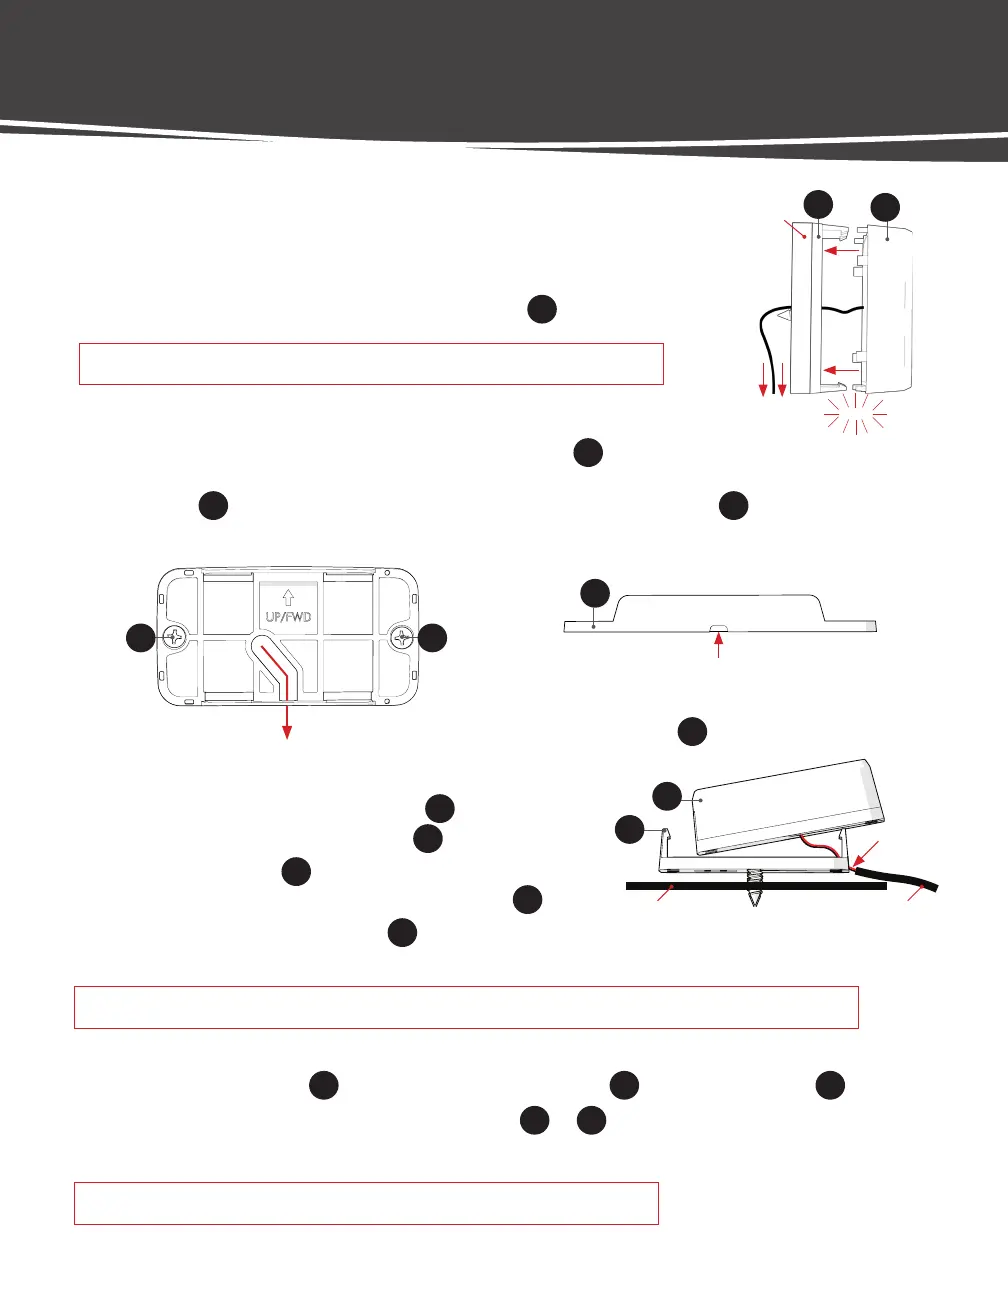
Route wire through hole and snap the Info Display Assembly
14
into place.
To Power Supply
CLICK
Mounting
Surface
INSTALLING THE INFO DISPLAY
CONNECT TO POWER
NOTICE: Follow Appendix B (p. 41) for proper ring terminal and butt connector installation procedures.
STEP 1 Route wire to power.
STEP 2 Attach the Fuse Holder
19
to the positive lead from the Display
14
using Butt Connector
18
.
STEP 3 Depending on post size, attach either Ring Terminals
16
or
17
and connect to power, connecting
the positive (+) lead to the positive post and negative (-) lead to the negative post.
ALTERNATE ROUTING (Routing Wire out of Base)
STEP 1 Using a #2 Phillips Head Screwdriver, install (2) Screws
15
around halfway, so that you can still slightly
pick up the base. FIG 1
STEP 2 Lift Base
13
and route the display wire through the hole in the bottom of the Base
13
. FIG 1/2
Wire Routing
Figure 1
Hole for Wire
Base
13
(Bottom View)
Wire Routing
Unsheathed
Wire
Mounting
Surface
Mounting
Surface
Sheath
Figure 3
STEP 3 Pull the wire all the way through the Base
13
so the end of
the sheath is completely out of the Base
13
. FIG 3
STEP 4 Fully tighten Screws
15
snug, ensuring the sheath does not
get pinched between the Mounting Surface and Base
13
.
STEP 5 Snap the Info Display Assembly
14
into place.
NOTICE: All Move accessories are compatible with 12v, 24v, and 36v systems.
13
14
15 15
13
Figure 2
13
14
IMPORTANT! Once Display is snapped into place, it cannot be disassembled.
 Loading...