Changing Tray Paper Settings
This section explains how to specify the size and type of the paper that is loaded in the source tray.
For an overview of the paper settings and how to register a custom paper, see page 17 "Registering
Custom Paper".
Accessing Tray Paper Settings
If the specified size differs from the actual size of the paper loaded in the paper tray, a misfeed might
occur because the correct paper size is not detected.
• If the specified paper type differs from the actual type of paper that is loaded in the paper tray, the
paper might misfeed, the toner might not fuse properly, or the print quality might be reduced.
Specifying a Custom Paper
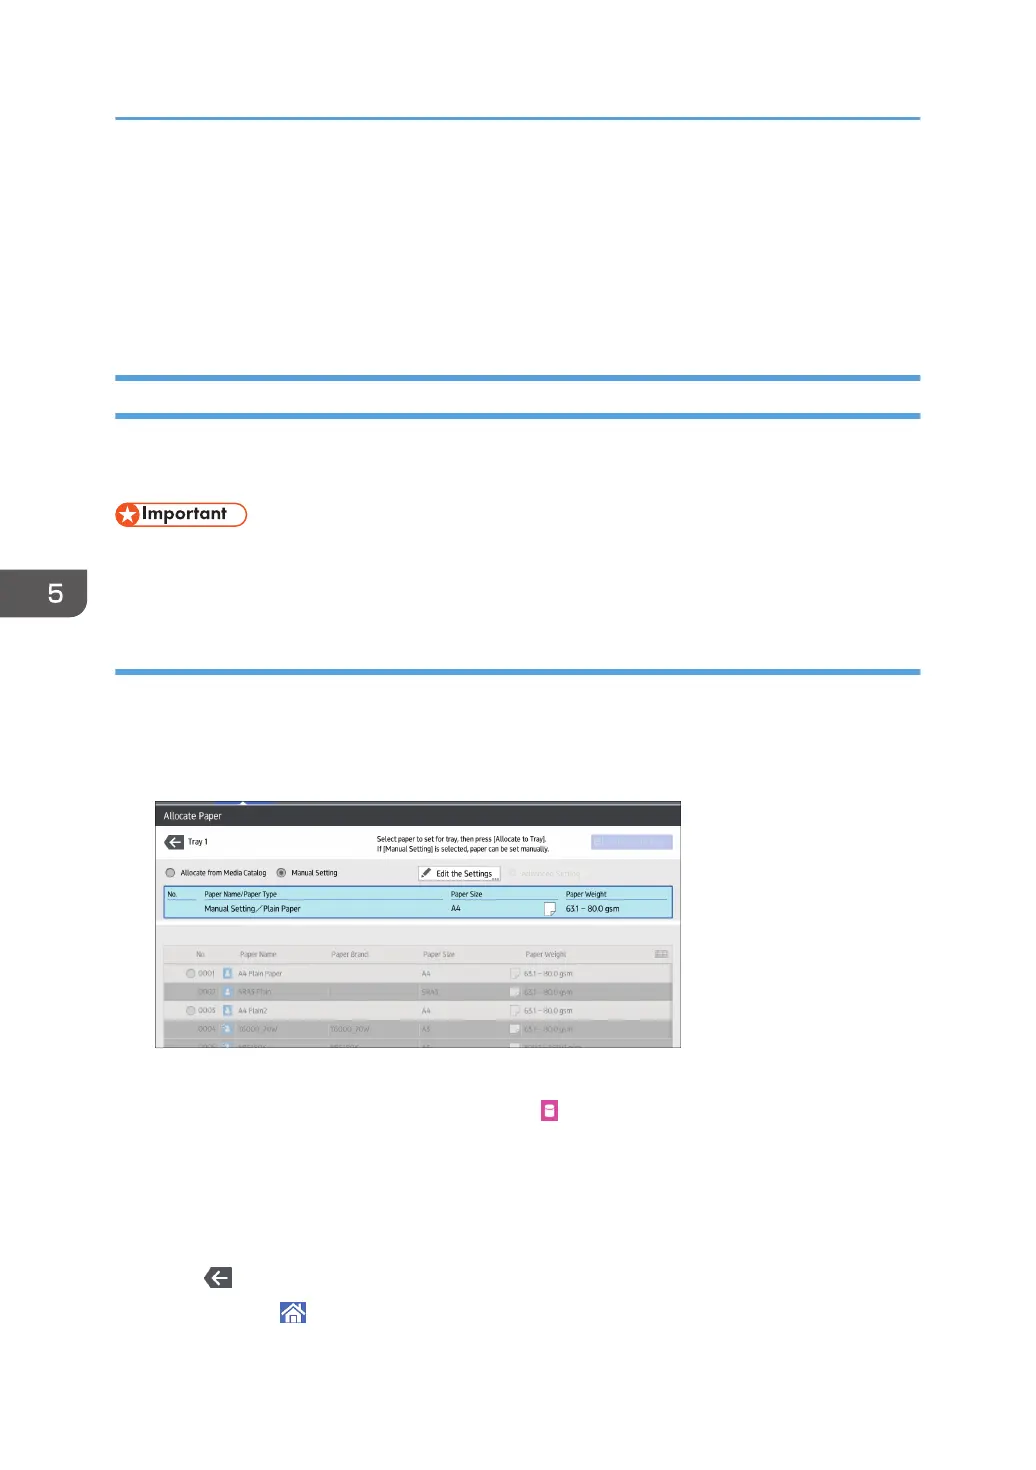
1. Press [Tray Paper Settings] in the upper left corner of the screen.
2. Select the tray to specify the paper settings.
3. Select [Allocate from Media Catalog].
The custom papers that can be used in the selected tray appear.
The Master Library information is indicated by the icon.
If the paper you want to select is not displayed, use [Jump to Row], or scroll through the screen until
the desired item is displayed.
4. Select the custom paper that you want to use, and then press [Allocate to Tray].
After selecting a custom paper, you can check its type and color by pressing [Check Settings].
5. Press .
6. Press [Home] ( ) at the bottom of the screen in the center.
5. Paper Specifications and Adding Paper
138
 Loading...