RIGOL
© 2006 RIGOL Technologies, Inc.
User‟s Guide for DS1000 Series
To Trigger the Oscilloscope
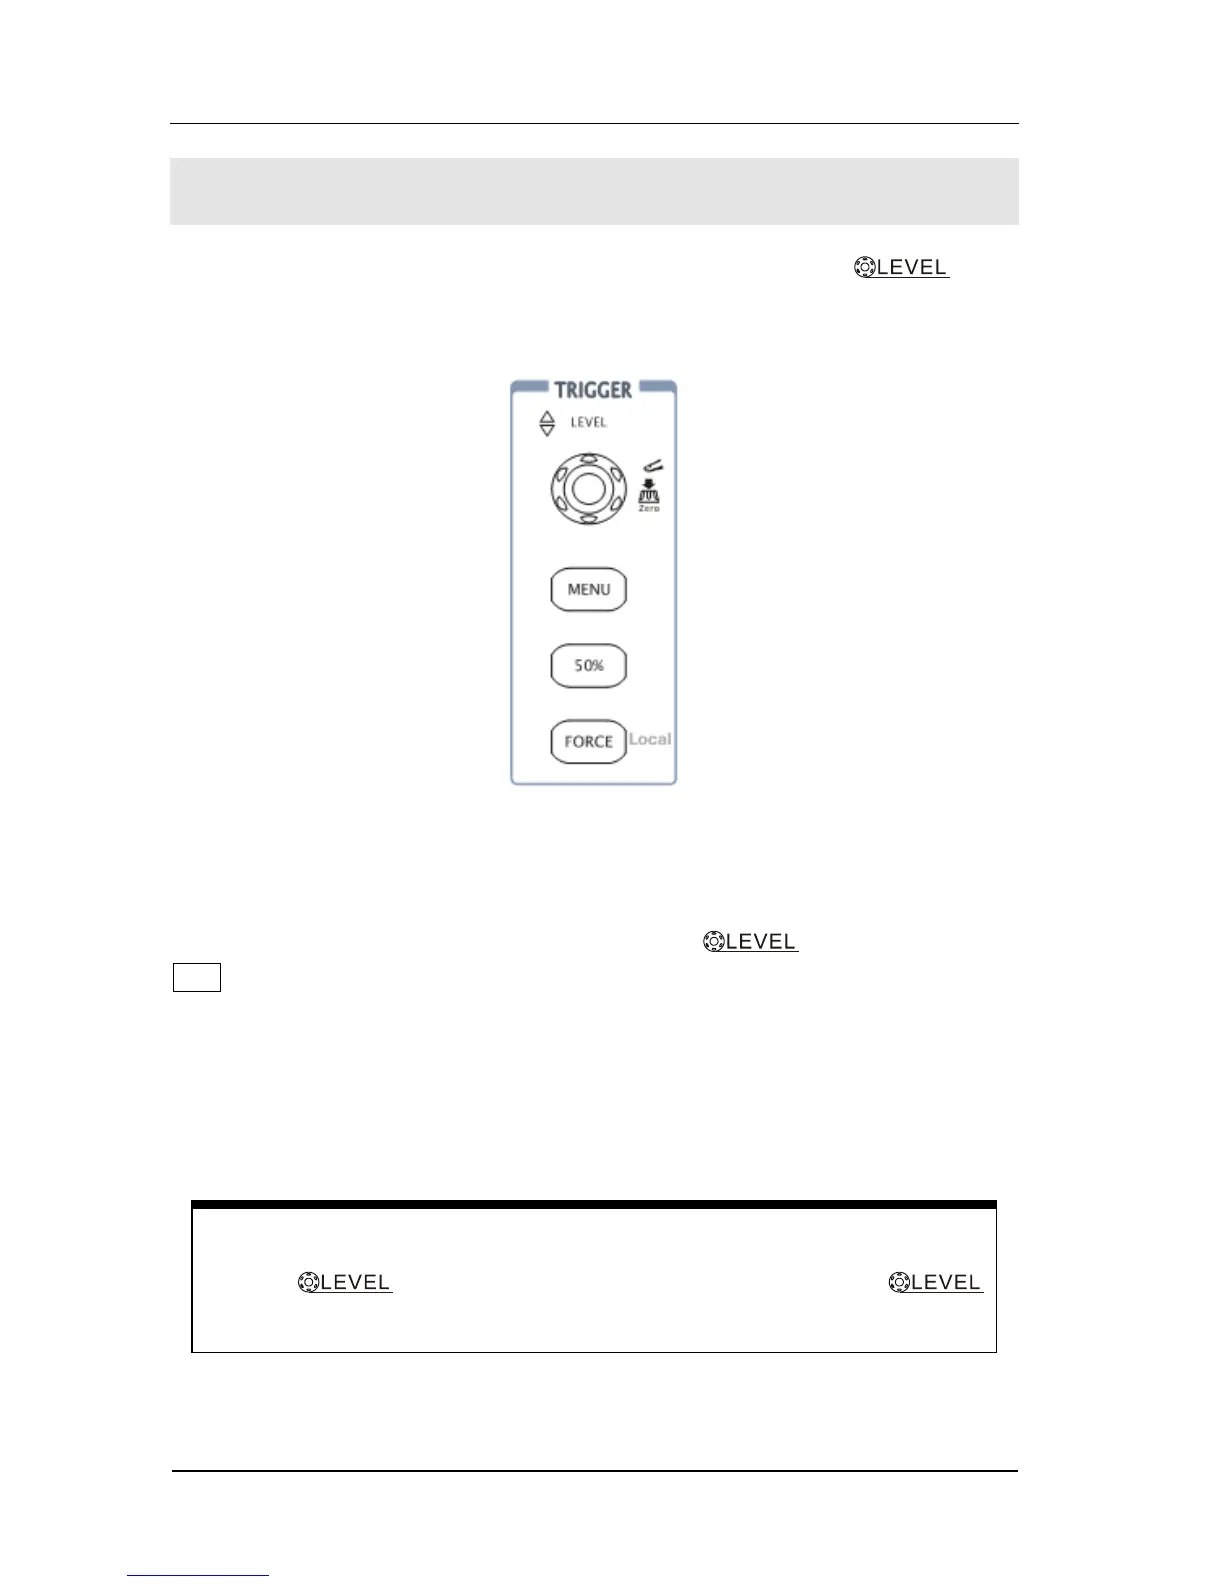
Figure 1-16 shows the trigger control: MENU, 50%, FORCE and a trigger
level knob. Following the exercise to familiarize with the buttons, trigger level knob
and status bar.
Figure 1-16
The trigger control window
1. Turn the trigger Level knob and notice the changes on the display.
On the DS1000 series oscilloscopes, as you turn the knob or pressing the
50% button, two things will happen on the display for a short time.
First, the trigger level value is displayed at the bottom-left of the screen. If the
trigger is DC coupled, it is displayed as a voltage value. If the trigger is AC
coupled or LF reject, it is displayed as a percentage of the trigger range.
Second, a line is displayed showing the location of the trigger level (as long as AC
coupling or low frequency reject are not selected).
双 Trigger Level to 0 Shortcut key
Turn the knob to change trigger level value and press the
knob to set trigger level back to 0 as a shortcut key.
 Loading...