16
3 Preparing the CX-24/12
2
3
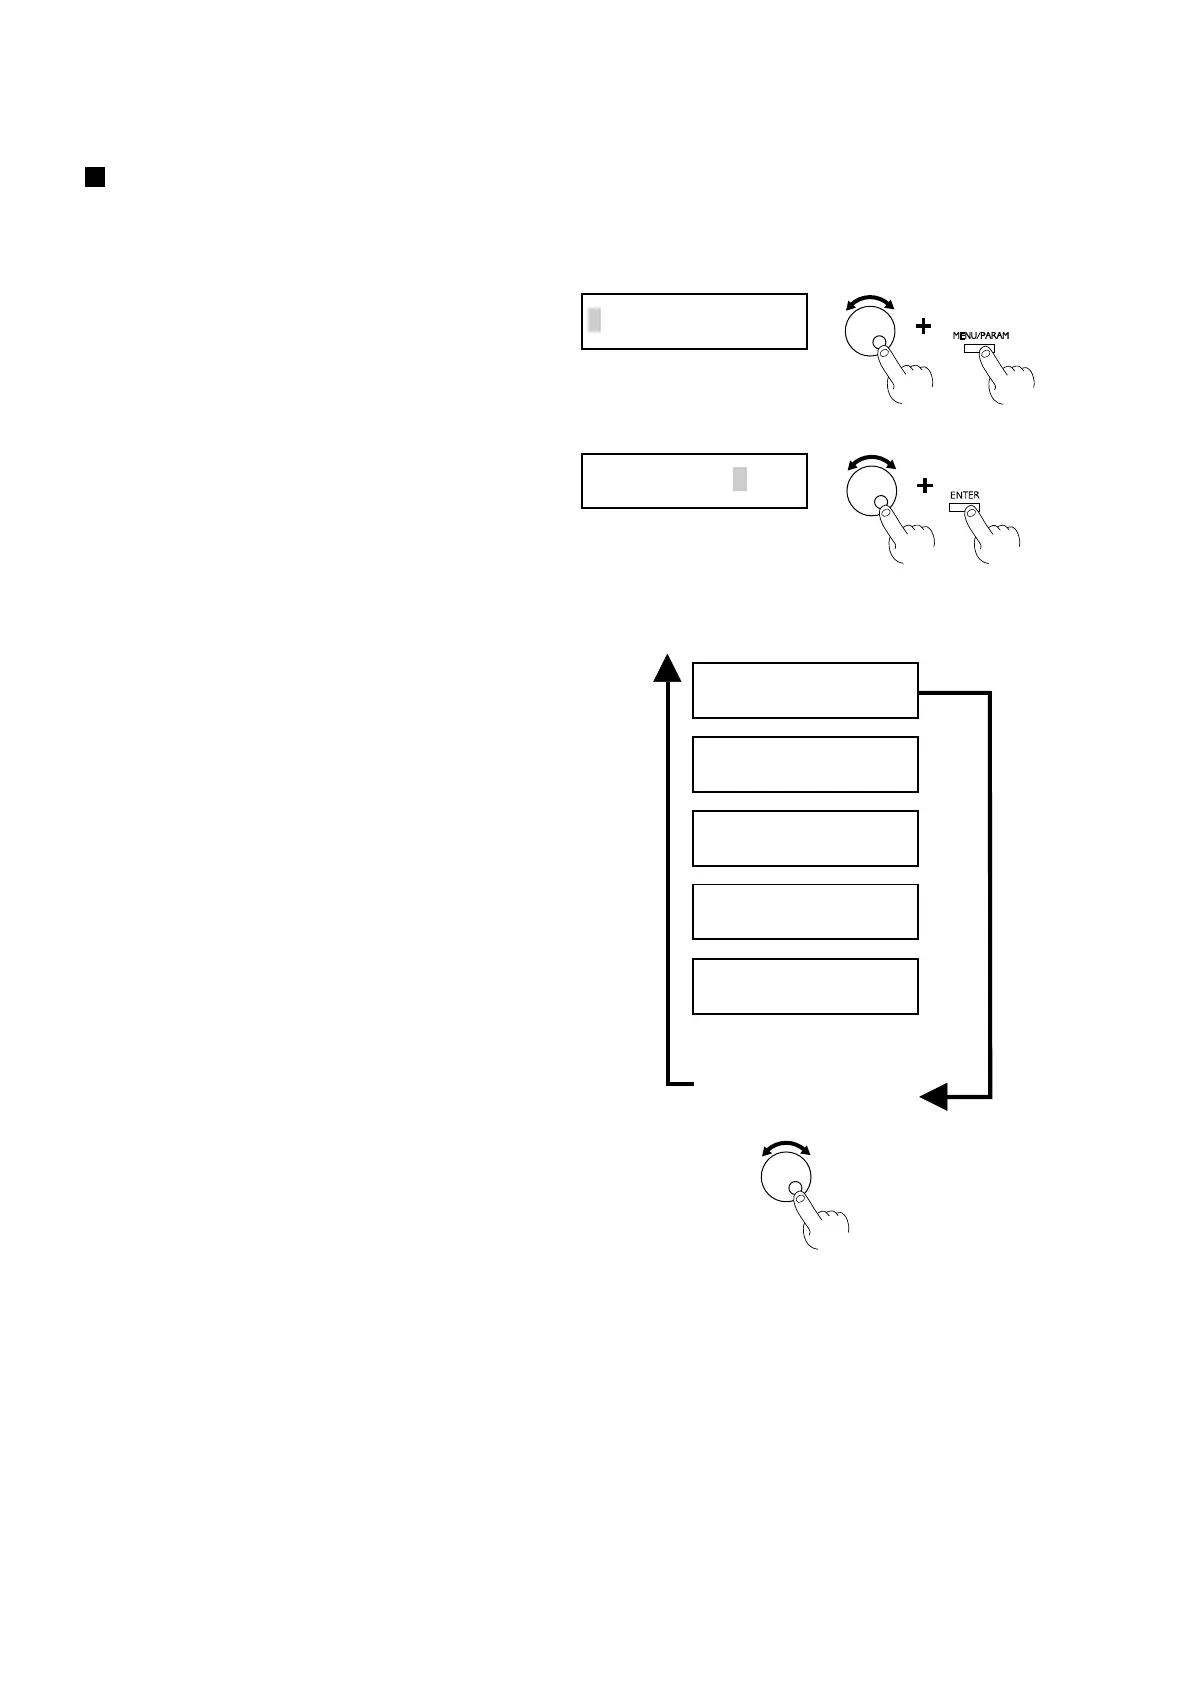
Turn the dial to display the port where the cable is
connected, then press the [ENTER] key to confirm
the setting.
If you chose [SERIAL] in step 2, the screen for
setting the bit rate appears.
Turning the dial clockwise successively displays the
screens for setting the bit rate, data bit, stop bit, parity
checking, and hardware handshaking (flow control).
Turning the dial counterclockwise returns to the menu
in step 1 without making any changes.
At the screen where the setting items are displayed,
you can change the setting values by pressing the
[MENU/PARAM] key and turning the dial.
For more information about how to make settings, see
"4-3 Switching On the Power - Making Menu
Settings with the Control Panel."
Turned
clockwise
Turned coun-
terclockwise
Back to the screen in step 1
#BAUD.| <9600>
#DATA.| <8>
#STOP.| <1>
#PARITY| <NONE>
I/O | <AUTO>
#HANDS.|<H-WIRE>
1
Making the Settings from the Menu on the CX-24/12
The display menu can only be used to make settings when material is loaded and set up. Before attempting to make menu settings, refer
I/O | <AUTO>
to "4-3 Turning on the Power" and put the CX-24/12
in a set-up state.
Turn the dial to display the screen shown at right.
Press the [MENU/PARAM] key.
 Loading...