29
4 Basic Operation
4
5
6
3
In the [Printers] dialog box, click [OK].
In the program window, lay out the cutting data so
that it fits within the displayed cutting range.
Send the cutting data from the program to the CX-24/
12.
Pausing Cutting Operations
Pressing the [ENTER] key displays a screen like the one shown below and pauses cutting.
- To resume cutting without change
Press the [PAUSE] key again.
PAUSE | <CONT.>
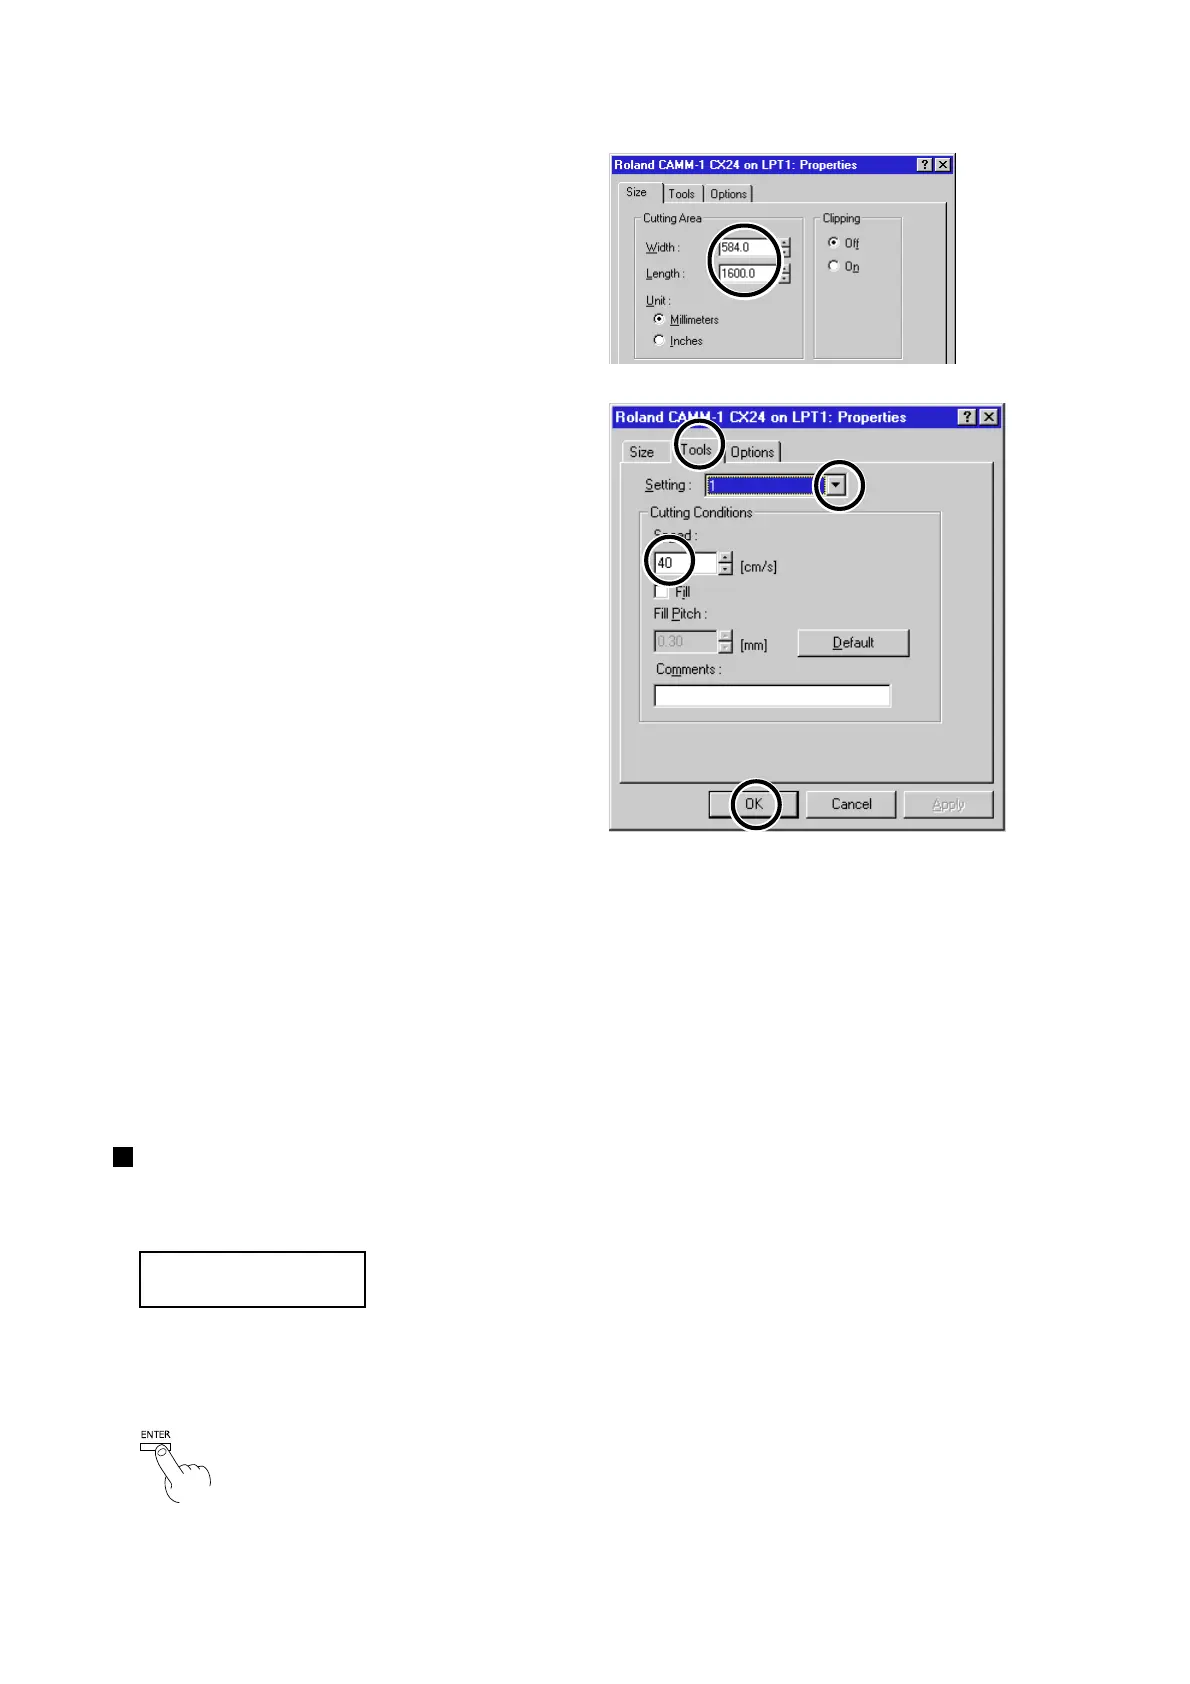
Click the [Size] tab and make the settings for the
cutting range at the screen shown at right.
Click the [Tools] tab.
Clicking the drop-down arrow displays the numerals
[1] through [8] and the [Machine Settings] selections.
To specify the speed for performing cutting using the
driver, choose a number from [1] to [8] and enter the
cutting conditions. The values you set here do not
change until you register a new setting. Entering
conditions that you use often enables you to make the
settings you want by simply choosing the correspond-
ing number. When you do this, the machine settings
for the CX-24/12 are disabled.
To perform cutting using the conditions set with the
CX-24/12, choose [Machine Settings].
Click [OK].
* When you are performing cutting, clear the selection for [Fill Pitch].

 Loading...