8
3. Wiring the Receiver Unit
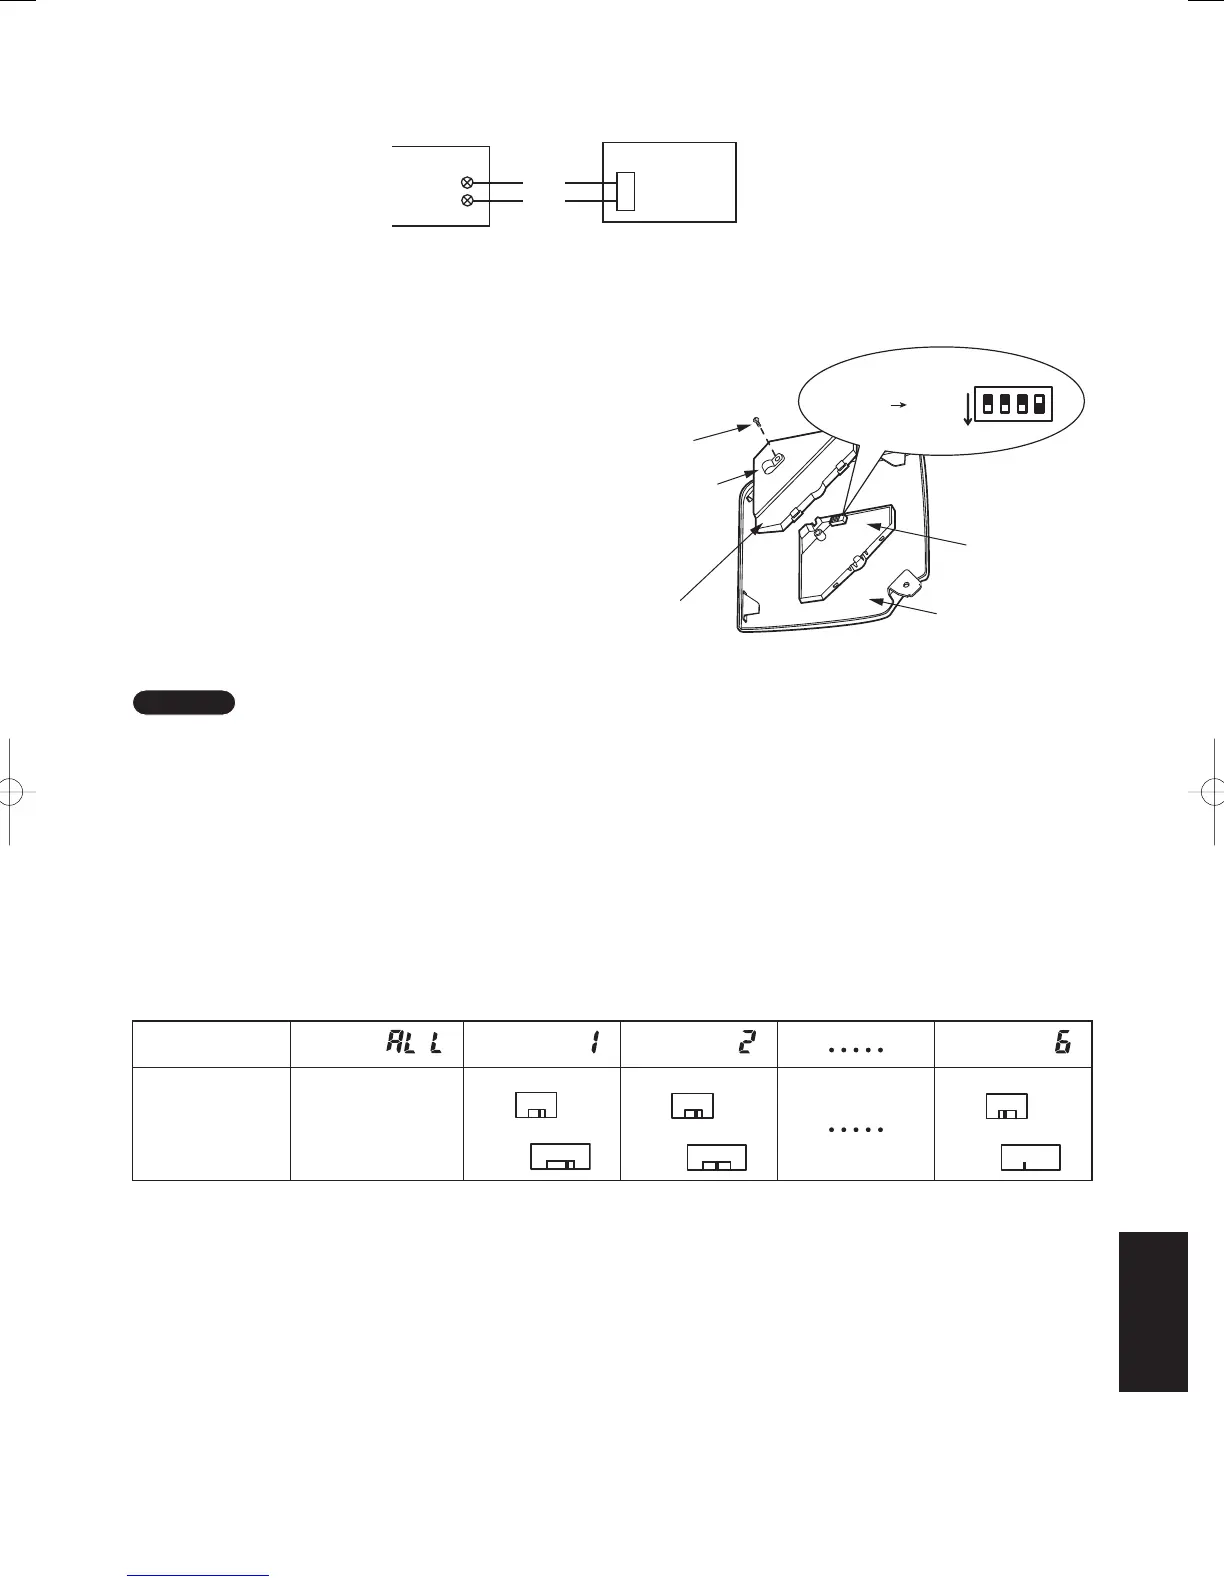
• Wiring Diagram
• Connections
Connect the wires from the receiver to the remote control terminal strip on the indoor unit. (Polarity does not
matter.)
4. Test Operation
1. Turn the #1 DIP switch [S003] on the receiver PCB
from OFF to ON and operate the wireless remote
control with its Start/Stop button.
2. During a test run, all display lamps on the display will
light up.
3. During a test run, it is not possible to adjust the
temperature.
4. After completing a test run, be absolutely sure to turn
the #1 DIP switch from ON to OFF and make sure
none of the display lamps are blinking. Also, replace
the PCB cover back as it was and fasten it; while
holding the wiring with the cable clamp, tighten its
screw.
NOTE
(1) This is hard on the device, so only use this for the test run.
(2) After turning on the power, the unit will not receive any
commands from the remote control for about 1 minute. This
is not an error. (In fact it does receive signals, but they are
cancelled.)
5. Setting Address Switches
• When more than one receiver and remote control are installed in the same room, setting up addresses allows
them to avoid interfering with each other.
• Refer to the Users Manual for information on how to change the addresses of the remote controls.
• Changing the address of a receiver can be done after removing the screw to the receiver PCB cover. Once
the change is complete, put the cover back in place; while holding the wiring with the cable clamp, tighten its
screw.
Address Display on
the Remote Control
Position of the
Receiver’s
Address Switch
It doesn’t matter
where the Receiver’s
Address Switch is.
4-6
S001
S002
1-3
3
6
2
54
1
4-6
S001
1-3
S002
3
6
2
54
1
4-6
S001
1-3
S002
3
6
2
54
1
CN001
2
3
White
Black
S003
Bit 1: OFF ON
ON
1
2
3
4
Fig. 8-5
Screw
Cable clamp
PCB Cover
Adjustable
Corner Cap
Receiver PCB
Indoor Unit
Receiver PCB
Terminal Strip for
Wiring Remote
Controls
8-13
SM830160-03ClassicPAC-iA4.ind1313SM830160-03ClassicPAC-iA4.ind1313 2010/02/1610:31:192010/02/1610:31:19

 Loading...


