7
E
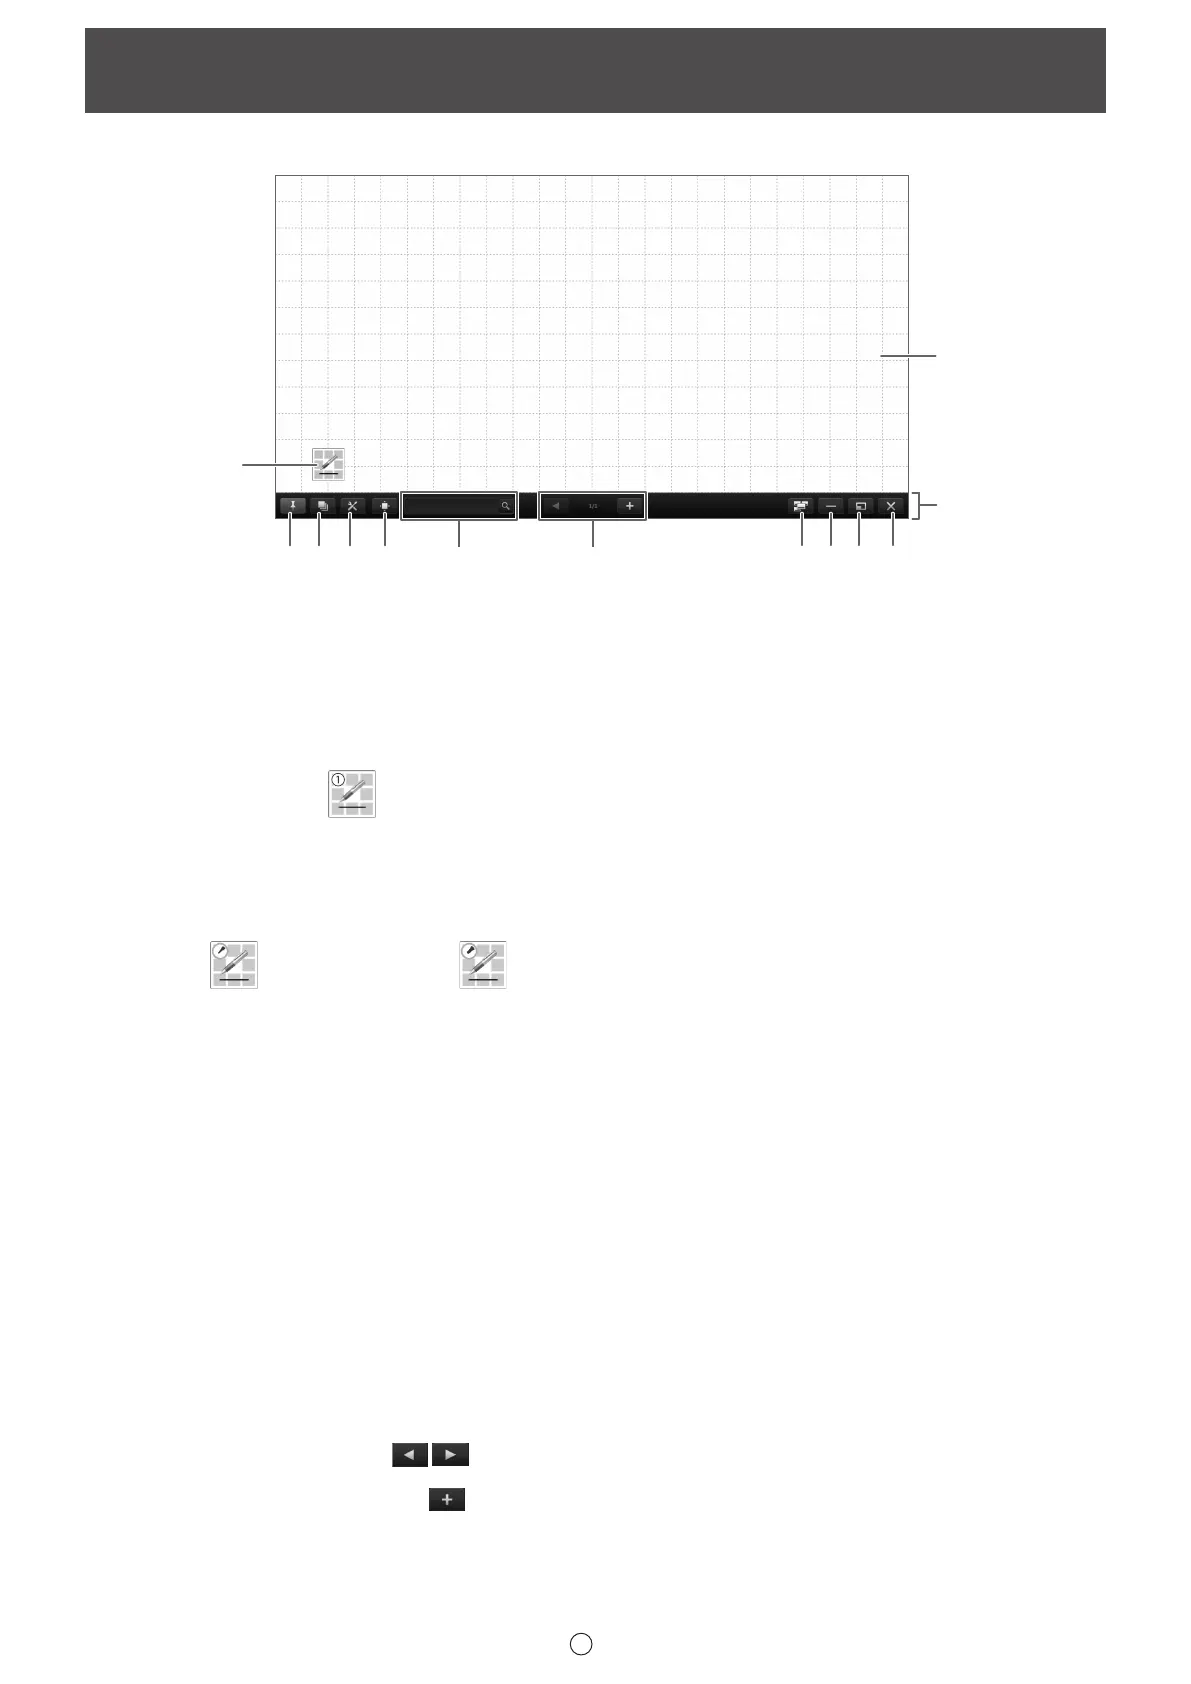
Screen example: Whiteboard mode
(2)
(1)
(3) (4)
(6)
(7)
(8)
(9)(10)
(11)
(12)
(13)
(5)
(1) Indicator
Touch the icon to launch the square menu. (Page 11)
• To use multiple 3 button pens/pointer pens, set as indicated below.
- When using Touch Pen Utility: Set “Input mode” to “Standard”
When using Touch pen Management Tool: Set “Touch Operation Mode Setting” to “Standard Touch Mode”
- Set “Finger can draw” to “Disable” in the Pen Software
When these settings are congured, a number of indicators equal to the number of 3 button pens/pointer pens appears
(maximum of 4). The registration number of the 3 button pen/pointer pen appears in the indicator.
Example: Pen Number 1
• To use passive pen 2, set as indicated below.
- Set “Touch Operation Mode Setting” to “Standard Touch Mode” in the Touch pen Management Tool
- Set “Finger can draw” to “Disable” in the Pen Software
On passive pen 2, the software distinguishes which side of the pen is used, allowing you to use the two sides as different
pens. The indicators are also distinguished.
Thin side:
Thick side:
(2) “Pin” button
Touch to switch between the pin / unpin settings.
If you want to always display the toolbar on the screen, pin button should be selected.
When set to the pin setting, the button is blue.
If you only want to display the toolbar when the menu is displayed, select the unpin setting.
(3) Sheet list
Touch this tab to display the list of sheets shown as thumbnail images. (Page 23)
(4) Settings
Displays the Pen Software settings screen. (Page 56)
(5) Navigation window
Touch to show/hide the navigation window. (Page 43)
(6) Search box
You can search for text and handwritten characters in the box. (Page 33)
(7) Sheet navigation buttons/Page No.
Touch the sheet navigation button (
) to change the displayed sheet. (Page 21)
The number shown at the center is the page No. of the current sheet.
When the last sheet is displayed, press
to add a sheet at the end.
Layout of Basic Screen
 Loading...