20
GB
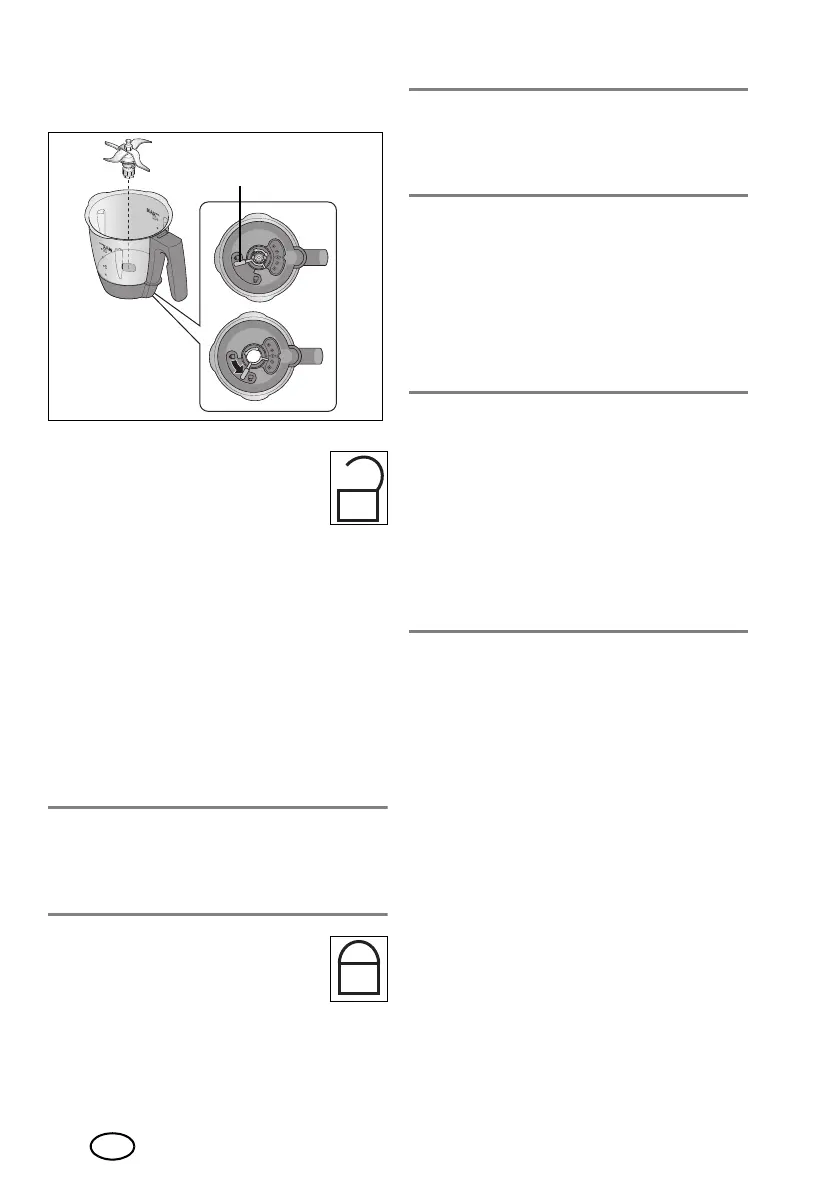
In order to remove the blade assembly29,
proceed as follows:
1. Position the blender jug5 horizontally.
2. Press the unlocking lever37
on the underside of the blender
jug5 so that it points to the
open lock symbol.
3. Pull out the blade assembly29 carefully
towards the top.
In order to insert the blade assembly29,
proceed as follows:
4. Position the blender jug5 horizontally.
5. Insert the blade assembly29 from the
top.
Please take note that the two cams at
the bottom of the blade assembly29
must be pushed through the two recess-
es in the underside of the blender jug5.
CAUTION:
~ Ensure that the seal28 for the blade as-
sembly29 is positioned correctly, since
otherwise the content may escape.
6. In order to lock the blade as-
sembly29, move the unlock-
ing lever37 on the underside
of the blender jug5 so that it
points to the closed lock symbol.
NOTE: chop large pieces into smaller ones
with an edge length of approx. 3 - 4 cm.
Otherwise larger pieces might get stuck in
the blades.
10.4 Insert blender jug
1. Place the blender jug
5
into the socket
9
.
2. Press the blender jug5 downwards
gently until the flower-shaped hub of the
blade assembly29 engages with the
blade socket10.
NOTES:
• If the blender jug5 cannot be pressed
downwards, you need to “wobble” it
slightly so that the flower-shaped hub of
the blade assembly29 in the blender
jug5 engages with the blade sock-
et10.
• Should the blender jug5 not be posi-
tioned correctly, a safety mechanism
prevents the functioning of the device.
__317553_MC_plus_GR_CY.book Seite 20 Freitag, 12. April 2019 10:00 10

 Loading...