12 Singer Quantum Stylist
TM
9960
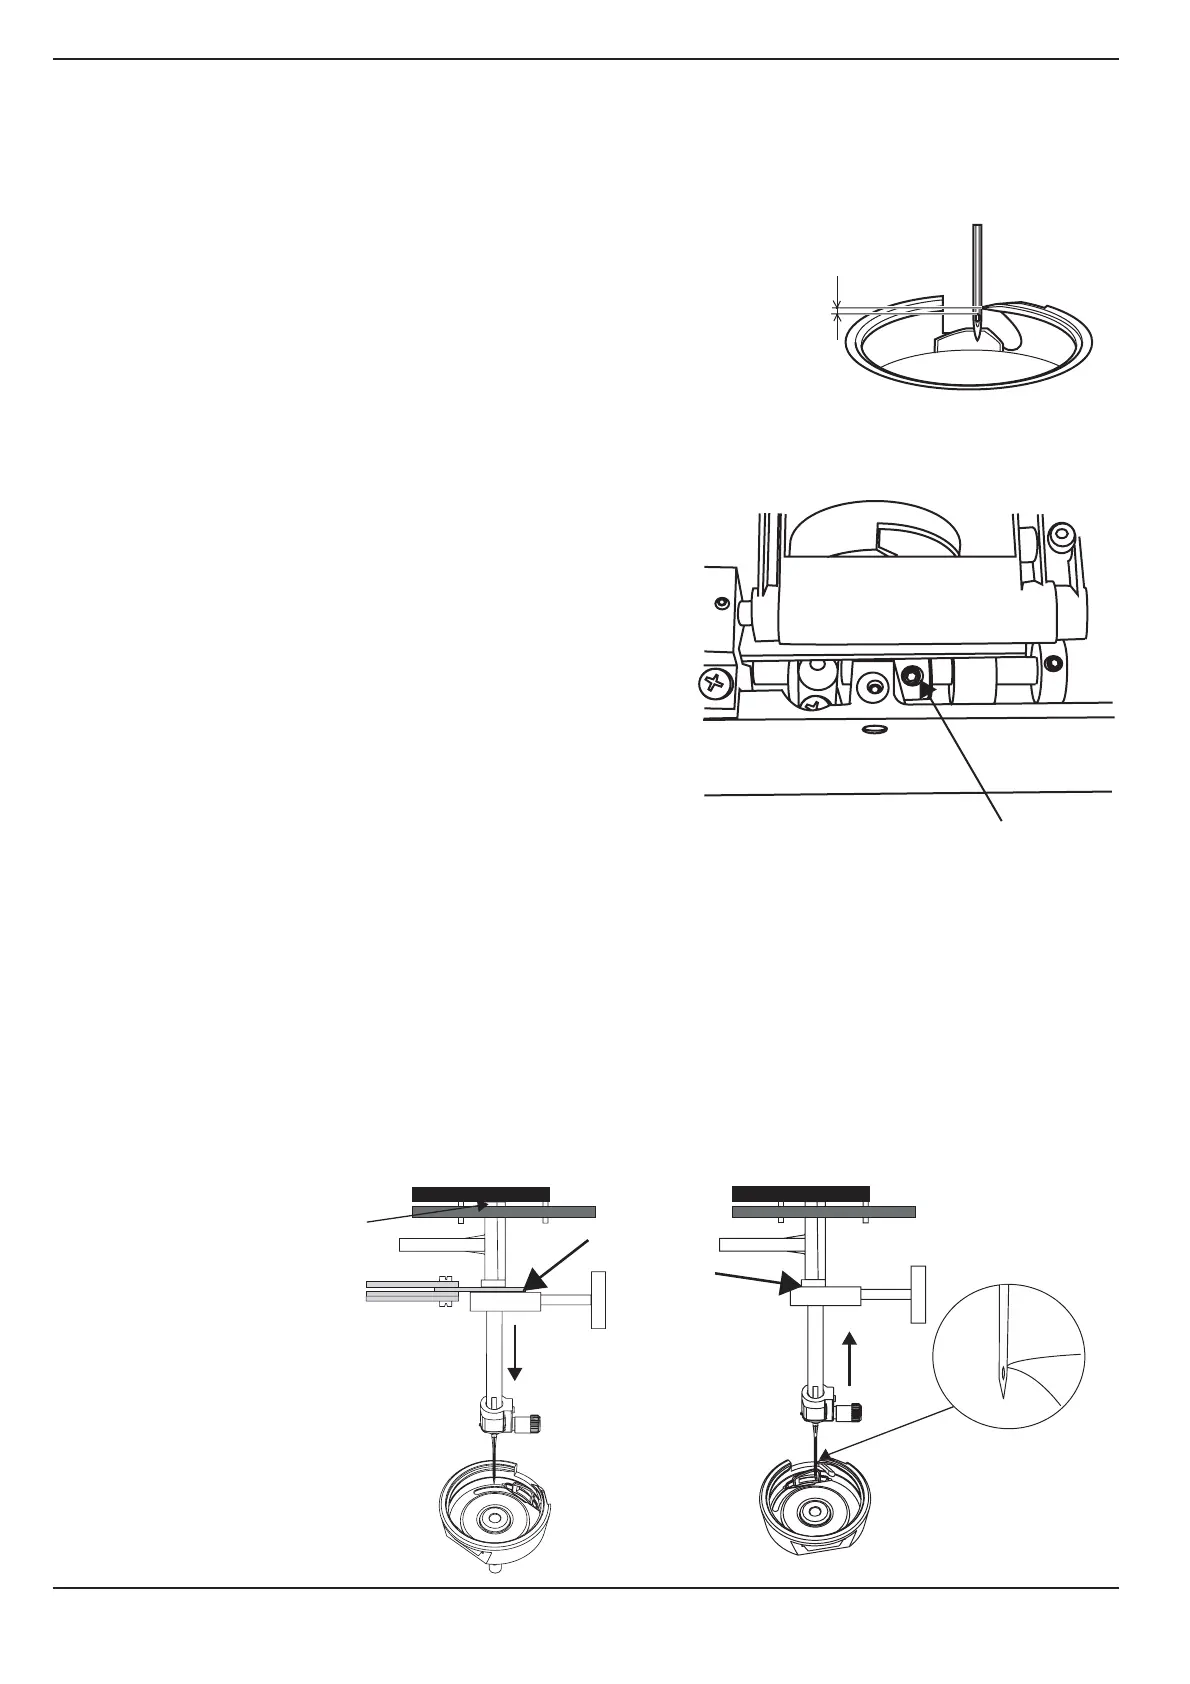
8. Needle timing to Hook
Check
1. Always check “Timing of the upper and lower shaft ”and “Needle height” before ”Needle timing to
hook” is checked.
2. Insert a new #90 needle in the machine.
3. Remove the needle plate, bobbin case holder and the bobbin
case.
4. Set machine at straight stitch.
5. Set the needle in its lowest turning position.
6. Turn the hand wheel in the sewing direction and as the needle
is moving upwards, the tip of the hook should pass behind the
centre of the needle, when the needle is 2.5 mm above its lower turning position.
Check with setting gauge, Ref. No: 63-102600-18/000 Spacer, Ref. No: 61-111600-
02/000 Feeler gauge 2.5, Ref. No: 413 10 22-01
Needle clamp
1. Set the machine at straight stitch so the needle is in its cen-
tre position against the presser foot ”A”.
2. Turn the hand wheel until the needle is at its lower turning
position.
3. Put the spacer onto the needle bar and push it upwards
against the needle bar frame (C).
4. Take then the timing clamp and put it on the needle bar
and tighten its screw lightly.
5. Take the 2.5 mm feeler gauge and put its cutout on the
needle bar, above the clamp.
6. Loosen the clamp a little and push both feeler gauge and
clamp upwards against the spacer.
7. Tighten the screw on the timing clamp.
8. Remove the 2.5 mm feeler gauge.
9. Turn the hand wheel, in the sewing direction, until the timing clamp stops against the spacer.
10. The tip of the hook should now be behind the centre line of the needle.
Adjustment
1. Loosen the 2 screws (D) in the hook wheel of the lower shaft.
2. Make sure that the feed dog is in its down stroke position.
3. Repeat checking points 1 to 9 with the setting gauges.
4. Hold the turn the hook gear until its tip arrives behind the centre line of the needle.
5. Hold the hook in position with the left hand and tighten one of the screws (D).
6. Check.
7. Tighten all the
screws (D).
A
A
C
D
2.5 mm
 Loading...