EasyManua.ls Logo

Sony DVCAM DSR-PD170P User Manual

Sony DVCAM DSR-PD170P
176 pages
To Next Page IconTo Next Page
To Previous Page IconTo Previous Page
Page #34 background imageLoading...
Page #34 background image
34
— Advanced Recording Operations —
Recording a still image on a tape – Tape Photo recording
You can record still images on tapes with all the pixels in the progressive recording
mode. See page 35 for details. This mode is useful when you print images using a video
printer (optional).
Besides the operation described here, your camcorder can record still images on a
“Memory Stick” (p. 118).
(1) In standby mode, keep pressing PHOTO lightly until a picture freezes. The
CAPTURE indicator appears. Recording does not start yet.
To change the image, release PHOTO, select an image again, and then press
and hold PHOTO lightly.
(2) Press PHOTO deeper.
The still image on the LCD screen or in the viewfinder is recorded for about
seven seconds. The sound during those seven seconds is also recorded.
The still image is displayed on the LCD screen or in the viewfinder until
recording is completed.
The number of still images recordable on a cassette
You can record about 340 images in the DVCAM format on a 40-minute DVCAM
cassette and about 510 images in the DV format on a 60-minute DV cassette.
Notes
During tape photo recording, you cannot change the mode or setting.
The PHOTO button does not work:
While the fader function is set or in use.
While the digital effect function is set or in use.
Do not shake the camcorder during tape photo recording, the recorded image may be
blurred.
To do tape photo recording using the Remote Commander
Press PHOTO on the Remote Commander. Your camcorder immediately records an
image on the LCD screen or in the viewfinder.
When you do tape photo recording during normal CAMERA recording
You cannot check an image on the LCD screen or in the viewfinder by pressing PHOTO
lightly. Press PHOTO deeper. The still image is then recorded for about seven seconds
and your camcorder returns to standby mode.
When shooting a moving object in Tape Photo recording
When playing back the image by another unit, the image may be blurred. This is not a
malfunction.
1
•••••••
2
CAPTURE
PHOTO
PHOTO

Table of Contents

Other manuals for Sony DVCAM DSR-PD170P

Question and Answer IconNeed help?

Do you have a question about the Sony DVCAM DSR-PD170P and is the answer not in the manual?

Sony DVCAM DSR-PD170P Specifications

General IconGeneral
BrandSony
ModelDVCAM DSR-PD170P
CategoryCamcorder
LanguageEnglish

Summary

Operating Instructions

Getting Started

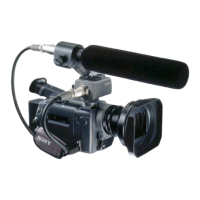
Basic setup steps for the camcorder, including microphone installation and power connection.

Recording – Basics

Fundamental techniques for capturing video, covering recording a picture and usable cassettes.

Playback – Basics

Instructions on how to review recorded video content, including playing back a tape.

Advanced Recording Operations

Recording a still image on a tape – Tape Photo recording

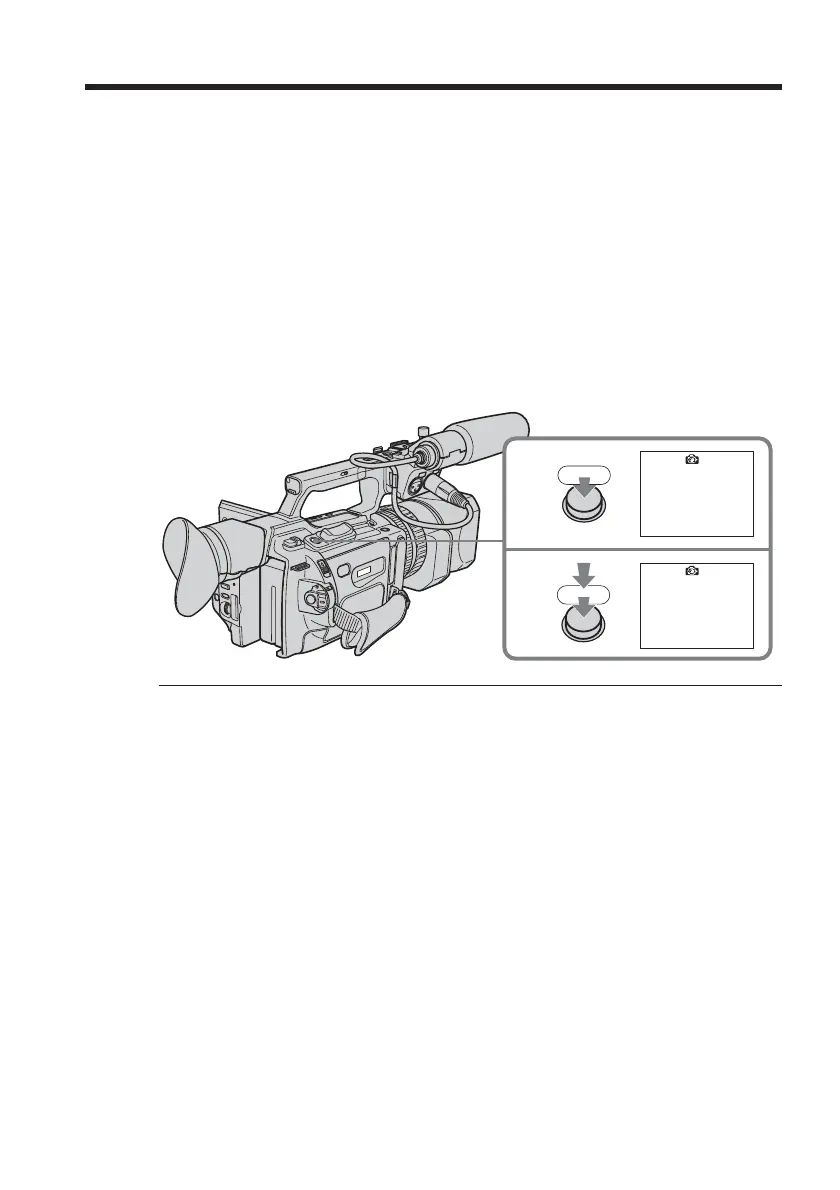
Capturing still images onto a tape, useful for printing via video printer.

Shooting with manual adjustment

Fine-tuning camera settings like iris, gain, and shutter speed for optimal recording.

Advanced Playback Operations

Searching for a recording by index – Index search

Locating recorded scenes using index marks for easy searching.

Searching a recording by date – Date search

Finding recorded content based on the date it was captured.

Editing

Dubbing a tape

Copying video content from one tape to another using A/V or i.LINK connections.

Audio dubbing

Adding or replacing audio tracks on recorded tapes.

Setting time values

Setting the time code value

Configuring time code recording methods for shooting conditions.

Customizing Your Camcorder

Changing the menu settings

Adjusting various camcorder functions and modes via the menu system.

“Memory Stick” Operations

Using a “Memory Stick” – introduction

Overview of Memory Stick types, formats, and basic usage.

Recording still images on a “Memory Stick” – Memory Photo recording

Capturing still images onto a Memory Stick for later use.

Viewing a still picture – Memory Photo playback

Reviewing still images stored on a Memory Stick.

Preventing accidental erasure – Image protection

Safeguarding important images on a Memory Stick from accidental deletion.

Troubleshooting

In the recording mode

Solutions for common problems encountered during recording.

In the playback mode

Solutions for common problems encountered during playback.

Maintenance information and precautions

Moisture condensation

Addressing and preventing issues caused by moisture condensation.

Cleaning the video head

Procedures for cleaning video heads to ensure picture quality.

Specifications

Quick Reference

Identifying the parts and controls

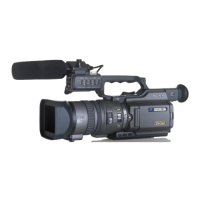
Visual guide to the camcorder's buttons, connectors, and features.

Related product manuals