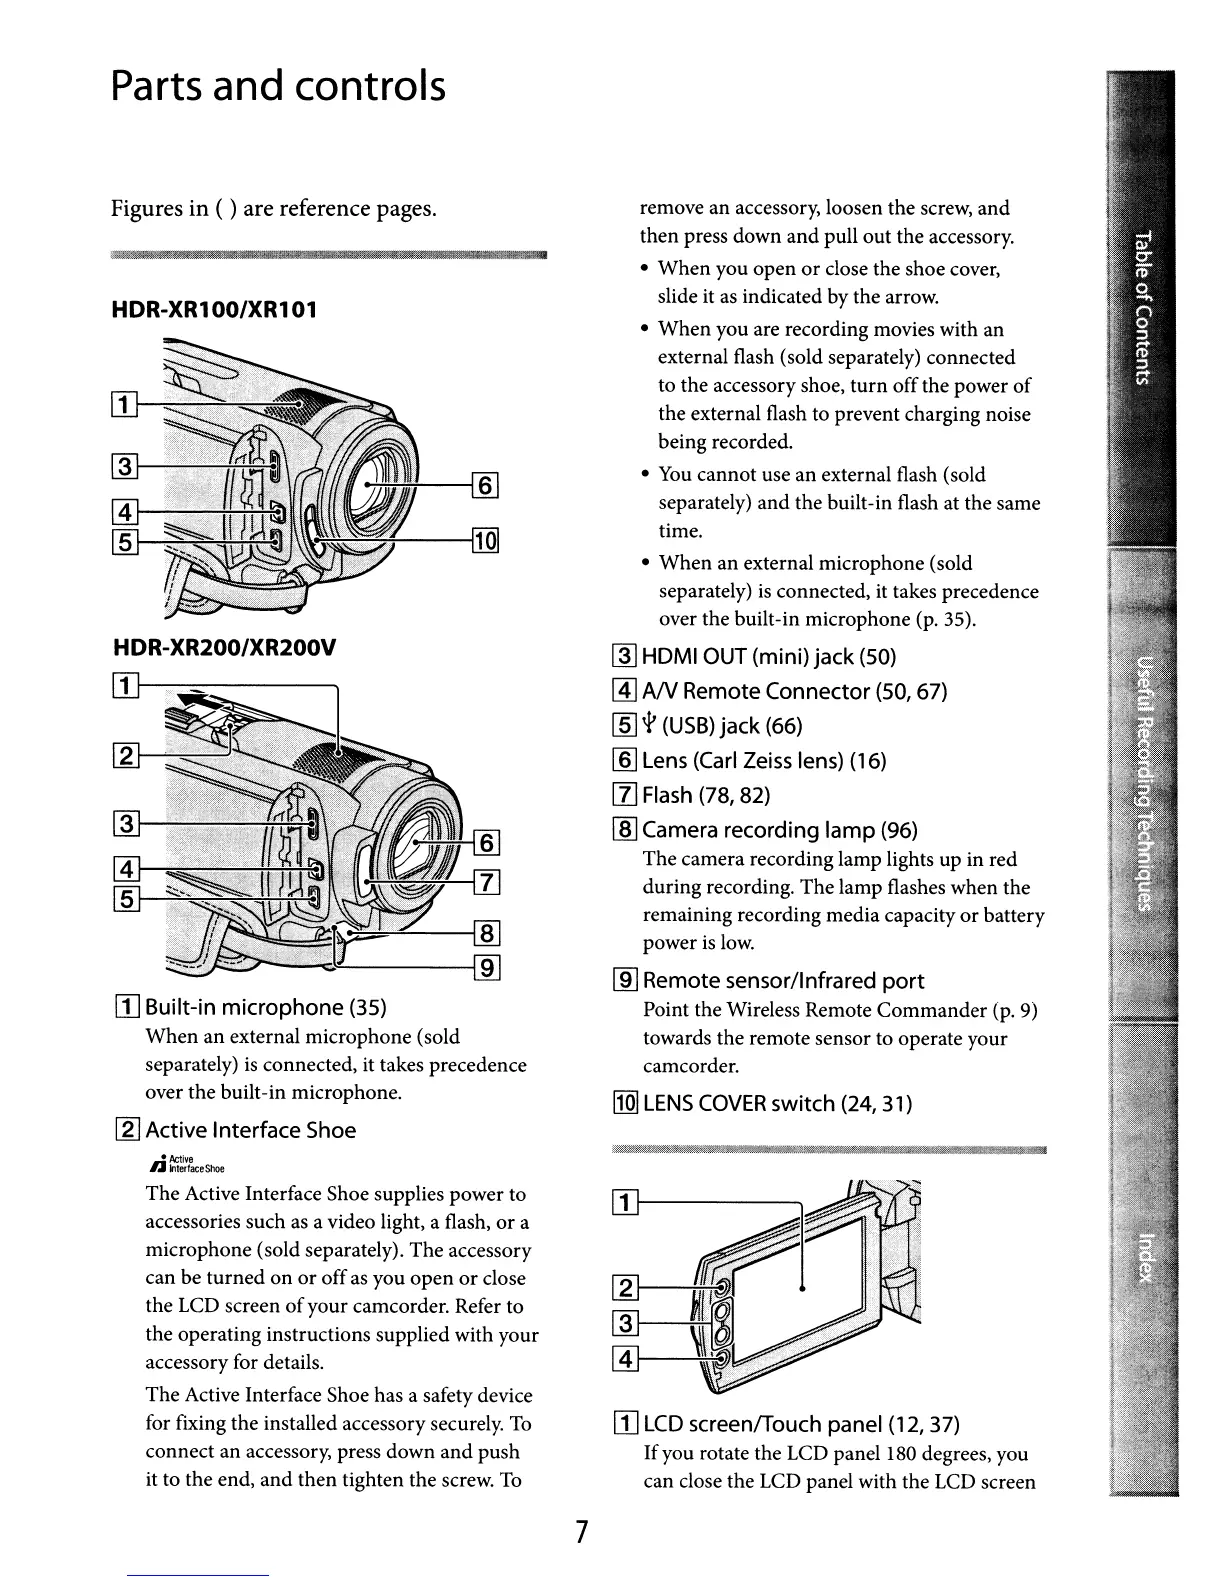
1
1--------.,
[I]
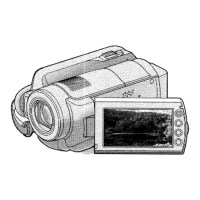
LCD
screenlTouch panel (12,37)
Ifyou rotate the LCD panel
180
degrees, you
can close the LCD panel with the
LCD
screen
I1Q]
LENS
COVER
switch
(24, 31)
remove an accessory, loosen the screw, and
then press down and pull out the accessory.
• When you open
or
close the shoe cover,
slide it
as
indicated by the arrow.
• When you are recording movies with an
external flash (sold separately) connected
to the accessory shoe, turn offthe power
of
the external flash to prevent charging noise
being recorded.
•
You
cannot use an external flash (sold
separately) and the built-in flash at the same
time.
• When an external microphone (sold
separately)
is
connected, it takes precedence
over the built-in microphone
(p.
35).
~
HOMI OUT (mini)
jack
(50)
@]
AN
Remote
Connector
(50, 67)
[[]
'1'
(USB)
jack
(66)
[ID
Lens (Carl Zeiss lens) (16)
[1]
Flash (78, 82)
[ID
Camera
recording
lamp
(96)
The camera recording lamp lights up in red
during recording. The lamp flashes when the
remaining recording media capacity or battery
power
is
low.
[ID
Remote sensor/Infrared
port
Point the Wireless Remote Commander
(p.
9)
towards the remote sensor to operate your
camcorder.
• ,
mE
~~---I[ID
~------i9
The Active Interface Shoe supplies power to
accessories such
as
a video light, a flash,
or
a
microphone (sold separately). The accessory
can be turned on or off
as
you open
or
close
the
LCD
screen
of
your camcorder. Refer to
the operating instructions supplied with your
accessory for details.
The Active Interface Shoe has a safety device
for fixing the installed accessory securely.
To
connect an accessory, press down and push
it to the end, and then tighten the screw.
To
[I]
Built-in
microphone
(35)
When an external microphone (sold
separately)
is
connected, it takes precedence
over the built-in microphone.
[2J
Active
Interface
Shoe
HDR-XR200/XR200V
[I]I---=---~
HDR-XR1 00/XR1
01
Figures
in
( ) are reference pages.
Parts
and
controls
7
 Loading...