Parts Identifications
19
Overview
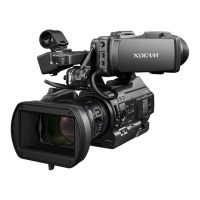
Controls on the grip
76. REC START/STOP button (page 37)
77. RELEASE (grip release) button (page 29)
78. REC REVIEW button (page 60)
79. EXPANDED FOCUS button (page 51)
80. Servo zoom lever (page 49)
81. LENS REMOTE connector (page 50)
Bottom
82. ZOOM switch (page 49)
83. Tripod receptacle
Check that the size of the hole matches the
screw of the tripod. If they do not match, the
camcorder cannot be attached to the tripod
securely.
84. Backup battery holder (page 125)
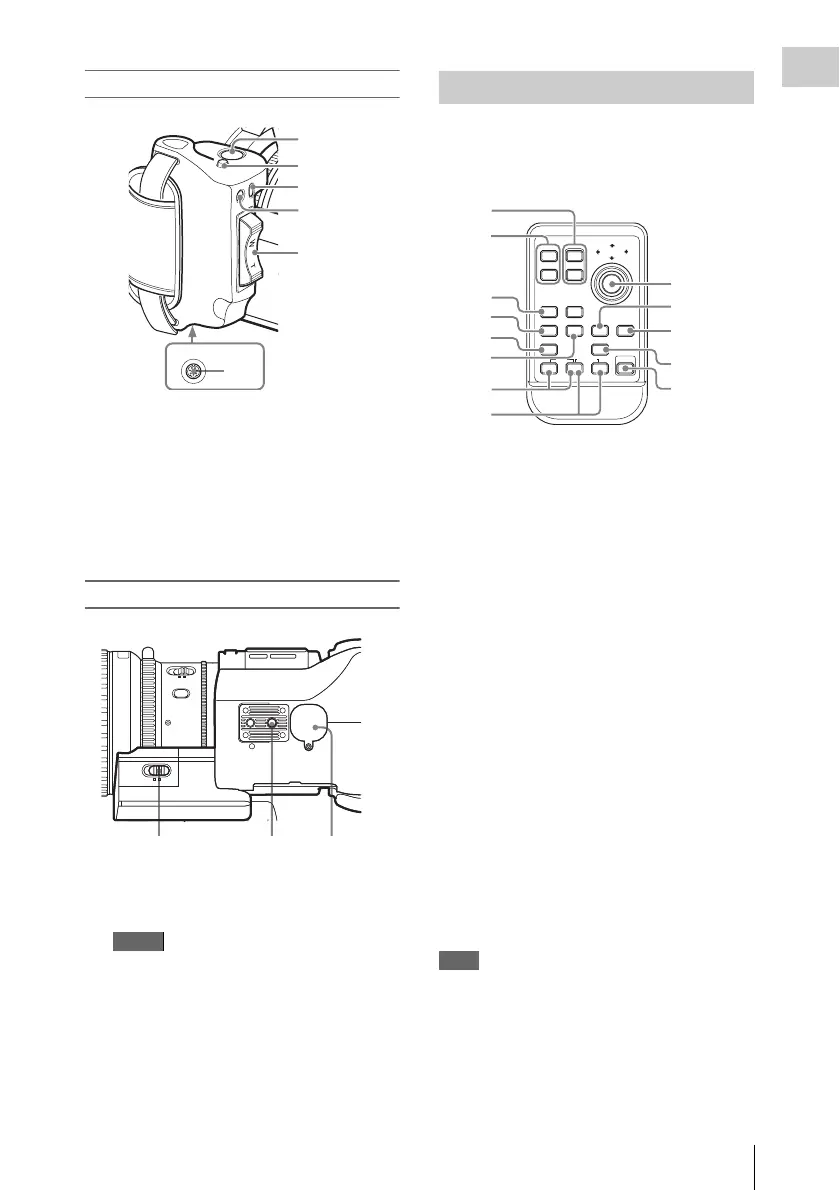
The buttons without remarks can be used in the
same manner as the corresponding buttons on the
camcorder.
1. ZOOM T/W (telephoto/wide-angle)
button
2. SHOTMARK 1 and 2 buttons (page 60,
page 91)
3. THUMBNAIL button
4. PREV (previous clip jump) button
5. F REV (fast reverse) button
6. PLAY/PAUSE button
7. REC (record) buttons
Press the z button together with the unmarked
button (safety button) to start recording.
8. REC PAUSE buttons
Press the X button together with the unmarked
button (safety button) to pause recording.
9. PUSH SET button (four-way arrow key)
It functions the same as the SEL/SET button
(joystick) on the camcorder.
10. NEXT button
11. STOP button
12. F FWD (fast forward) button
13. PUSH AF button
Note
The SUB CLIP button does not function with this
camcorder.
When you use the remote commander, see “Using the
IR Remote Commander” on page 30.
Note
C
O
M
P
O
N
E
N
T
O
U
T
E
X
P
A
N
D
E
D
F
O
C
U
S
R
E
C
R
E
V
IE
W
R
E
LE
A
S
E
START/
STOP
LENS
REMOTE
81
76
77
78
79
80
MANU AUTO
FOCUS
MANU SERVO
ZOOM
PUSH AF
MANU SERVO
ZOOM
82 83 84
IR Remote Commander (Supplied)
1
2
T
ZOOM
PUSH SET
SHOTMARK
SUB CLIP
THUMBNAIL
PLAY/PAUSE
STOP
PUSH AFREC PAUSE
REC
W
.
m
z
>
M
X
xu
FFWDFREV
PREV NEXT
1
2
3
4
5
6
7
8
9
10
11
12
13

 Loading...