Operation Manual 6. LCD Menu Operation
25
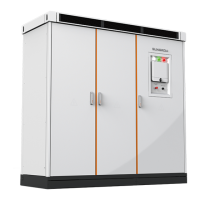
6.9 History Information Checking
The storage time of the history data is 15-60 minutes (settable).
The history data contains the related electrical parameters of the inverter. Proceed as
follows to check the history data.
Step 1 Tap "Function" from the default menu.
Step 2 Tap "His-data".
Step 3 The system will enter the history data interface after inputting the correct password. You
can check the history information of the corresponding inversion units by switching
between INV1 and INV2. The default display is the INV1 data.
You can check the running state information of unit 1 and unit 2 in this interface. Check the
information on different date by clicking A marked in the figure above and move the slider
marked by B in the figure above to check more information.
Follow the same steps to check the running state information of unit 2.
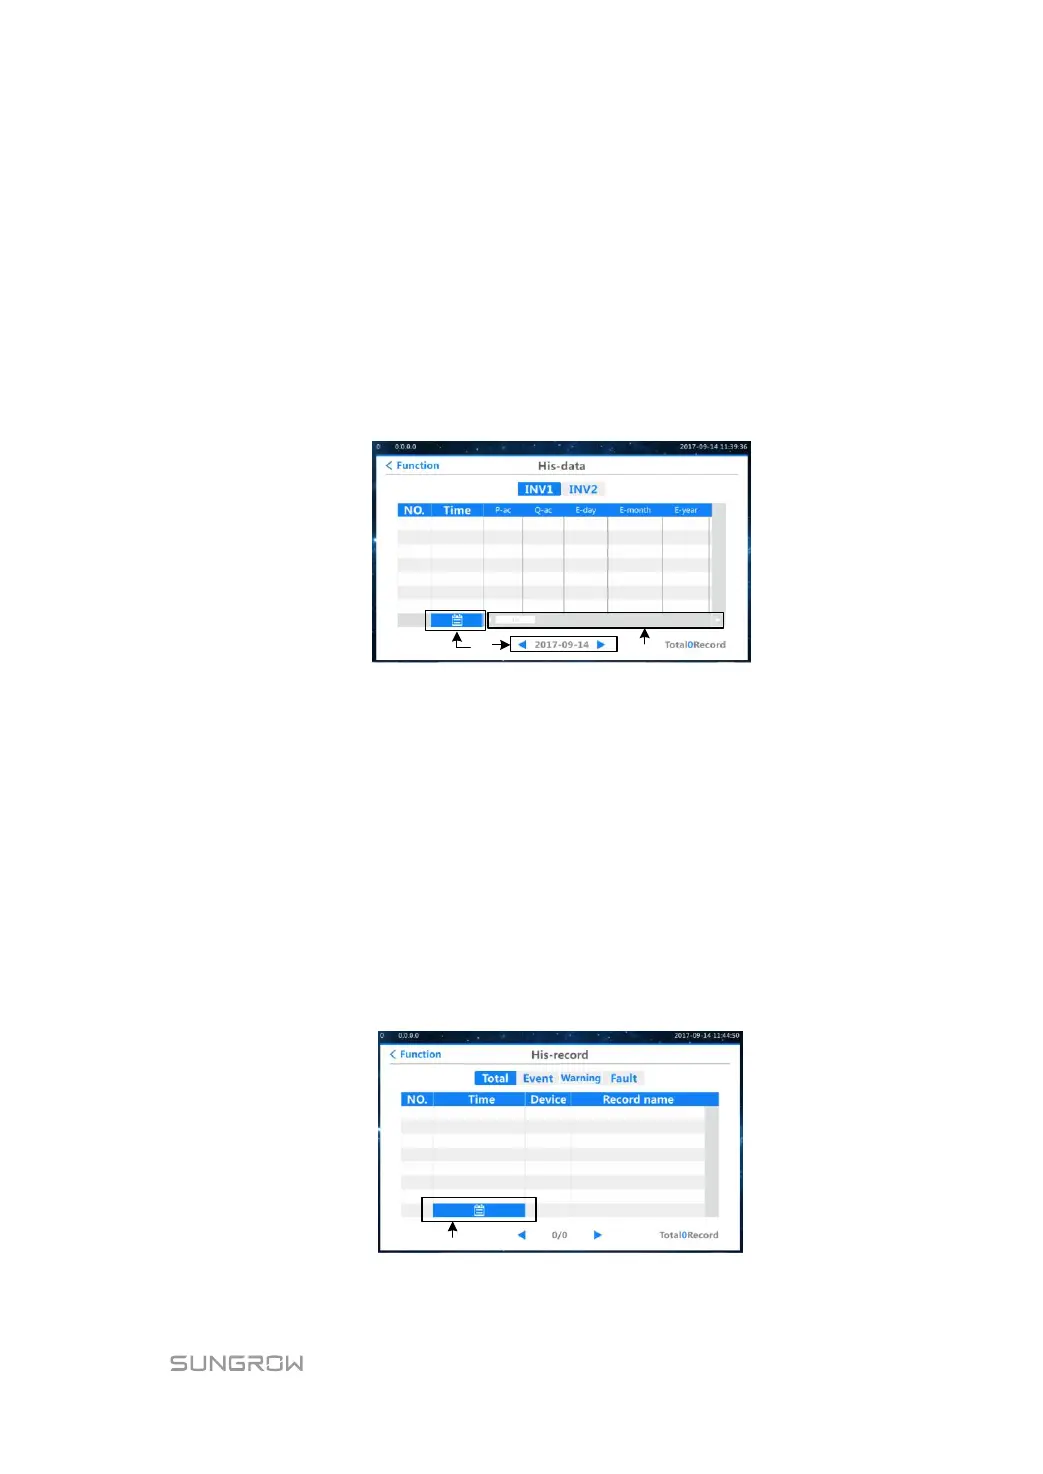
6.10 History Record Checking
When a fault occurs to the inverter, you can check the present fault information and the
history fault record from the LCD interface as follows.
Step 1 Tap "Function" from the default menu.
Step 2 Tap "His-record".
Step 3 The system will enter the history record interface after inputting the correct password. You
can switch among the total, event, warning and fault interfaces to check the corresponding
history record. The default display is the total history record.
You can check the latest fault information in this interface with 35 pieces in one page. The
total fault numbers can be found in the lower right corner of the fault table. By clicking the
area marked by A in the figure above to set the date. You can check the device running
 Loading...