32
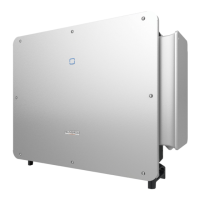
Step 3 Insert the expansion bolts into the holes and secure them with a rubber hammer. Fasten the
nut with a wrench to expand the bolt. Remove the nut, spring washer, and flat washer, and
store them properly.
After removing the nut, spring washer, and flat washer, level the front of the expan-
sion tube with the wall. Otherwise, the mounting brackets will not stay steady on
the wall.
Step 4 Install the mounting-bracket to the wall with the expansion bolts with the expansion bolts.
No.
Components Description
A Wall
–
B
Expansion bolt
Fastening the bolt in the sequence of nut, spring wash-
er, slat washer
C
Mounting-bracket
–
- - End
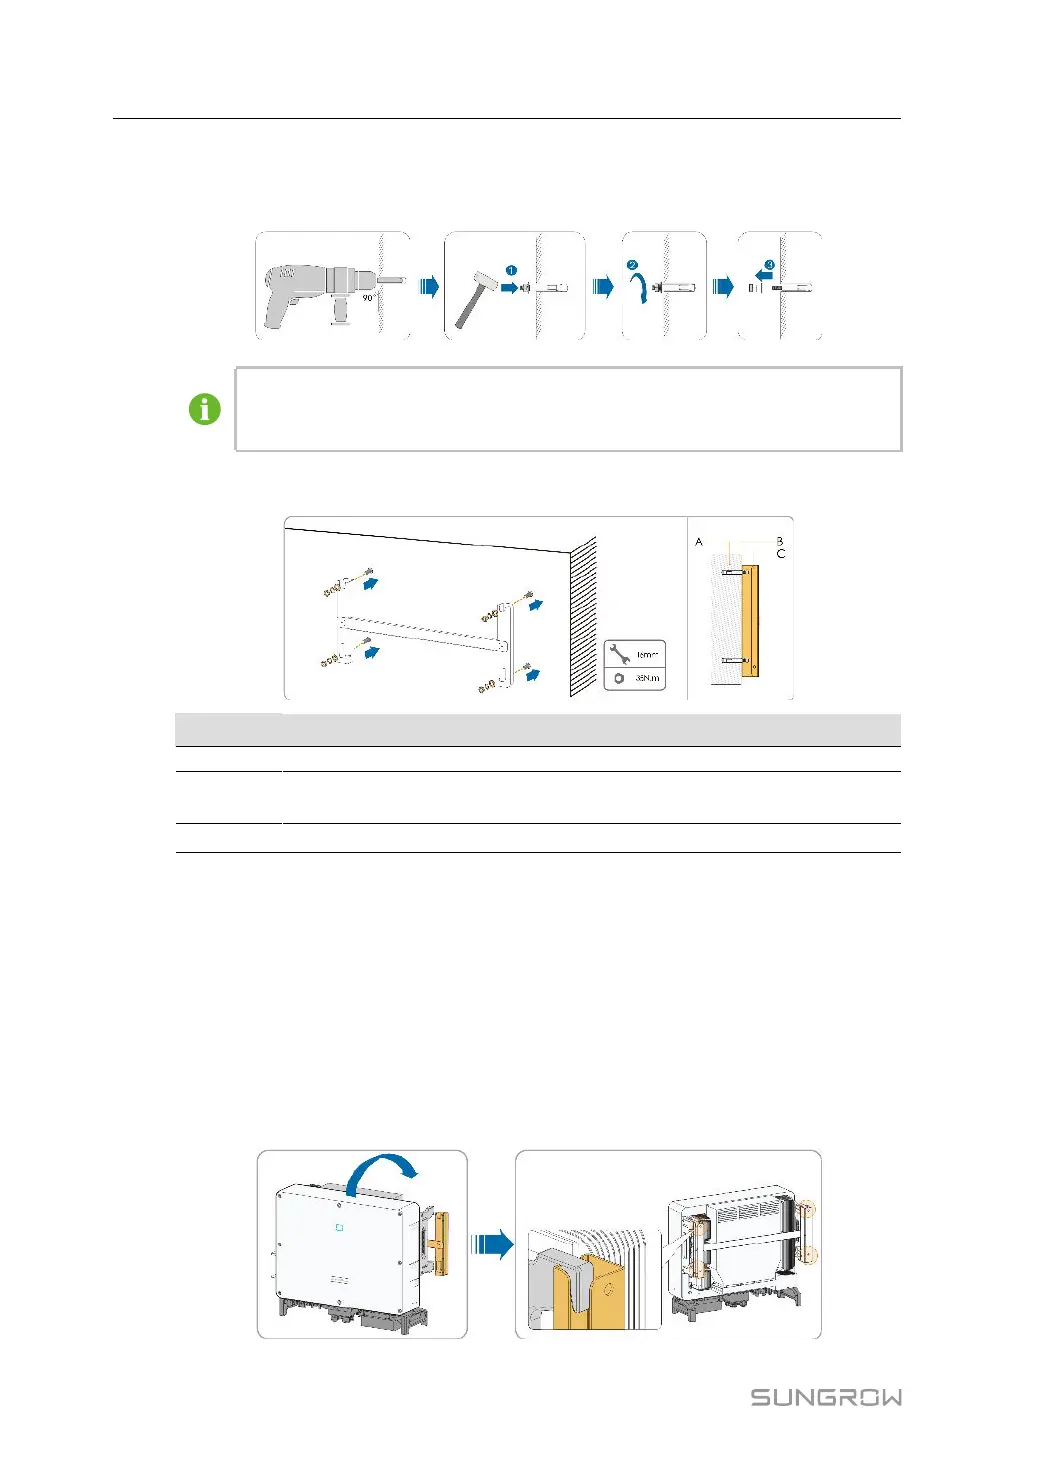
4.6 Installing the Inverter
Step 1 Take out the inverter from the packing case.
Step 2 If the installation position is high, hoist the inverter to the position (refer to "
"4.4.2 Hoisting
Transport"
"). Otherwise, skip this step.
Step 3 Hang the inverter to the mounting-bracket and ensure that the mounting ears perfectly en-
gage with the mounting-bracket.
4 Mechanical Mounting User Manual
 Loading...