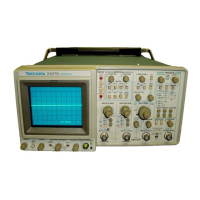
Maintenance—2465B/2467B Service
To prevent damage from electrical arcing, ensure
that circuit boards and components are dry before
applying power to the instrument.
CLEANING. To clean the interior, blow off dust with
dry, low-pressure air (approximately 9 psi). Remove any
remaining dust with a soft brush or a cloth dampened with
a solution of mild detergent and water. A cotton-tipped
applicator is useful for cleaning in narrow spaces and on
circuit boards.
4.
Clean switches with isopropyl alcohol and wait
60 seconds for the majority of the alcohol to
evaporate. Then complete drying with low-
pressure air.
Dry all components and assemblies in an oven or
drying compartment using low-temperature
(125°F to 150°F) circulating air.
LUBRICATION
If these methods do not remove all the dust or dirt, the
instrument may be spray washed using a solution of 5%
mild detergent and 95% water as follows:
There is no periodic lubrication required for this instru-
ment.
Exceptions to the following procedure are the
Attenuator assemblies. Clean these assemblies only
with isopropyl alcohol as described in step 4.
1.
Gain access to the parts to be cleaned by
removing easily accessible shields and panels.
SEMICONDUCTOR CHECKS
Periodic checks of the transistors and other semicon-
ductors in the oscilloscope are not recommended. The
best check of semiconductor performance is actual
operation in the instrument.
2.
Spray wash dirty parts with the detergent-and-
water solution; then use clean water to
thoroughly rinse them.
3. Dry all parts with low-pressure air.
NOTE
Most of the switches used in the instru-
ment are sealed and the contacts are
inaccessible. If cleaning is deemed neces-
sary,
use only isopropyl alcohol.
PERIODIC READJUSTMENT
To ensure accurate measurements, check the perfor-
mance of this instrument every 2000 hours of operation, or
if used infrequently, once each year. In addition, replace-
ment of components may necessitate readjustment of the
affected circuits.
Complete Performance Check and Adjustment instruc-
tions are given in Sections 4 and 5. The Performance
Check Procedure can also be helpful in localizing certain
troubles in the instrument.
6-4

 Loading...