2. Place the blank in the B position.
3. Press Measure Blank to collect the baseline.
When the instrument is finished measuring the
blank, the message disappears.
Note: If you want to switch between tabular and
graphical displays, press Graph or
Tabular.
Measuring the sample
1. If your instrument is equipped with a 6-Position
Cell Holder, be sure to place the unknown in
cell position #1.
Note: The instrument always uses cell position
#1 to measure the sample.
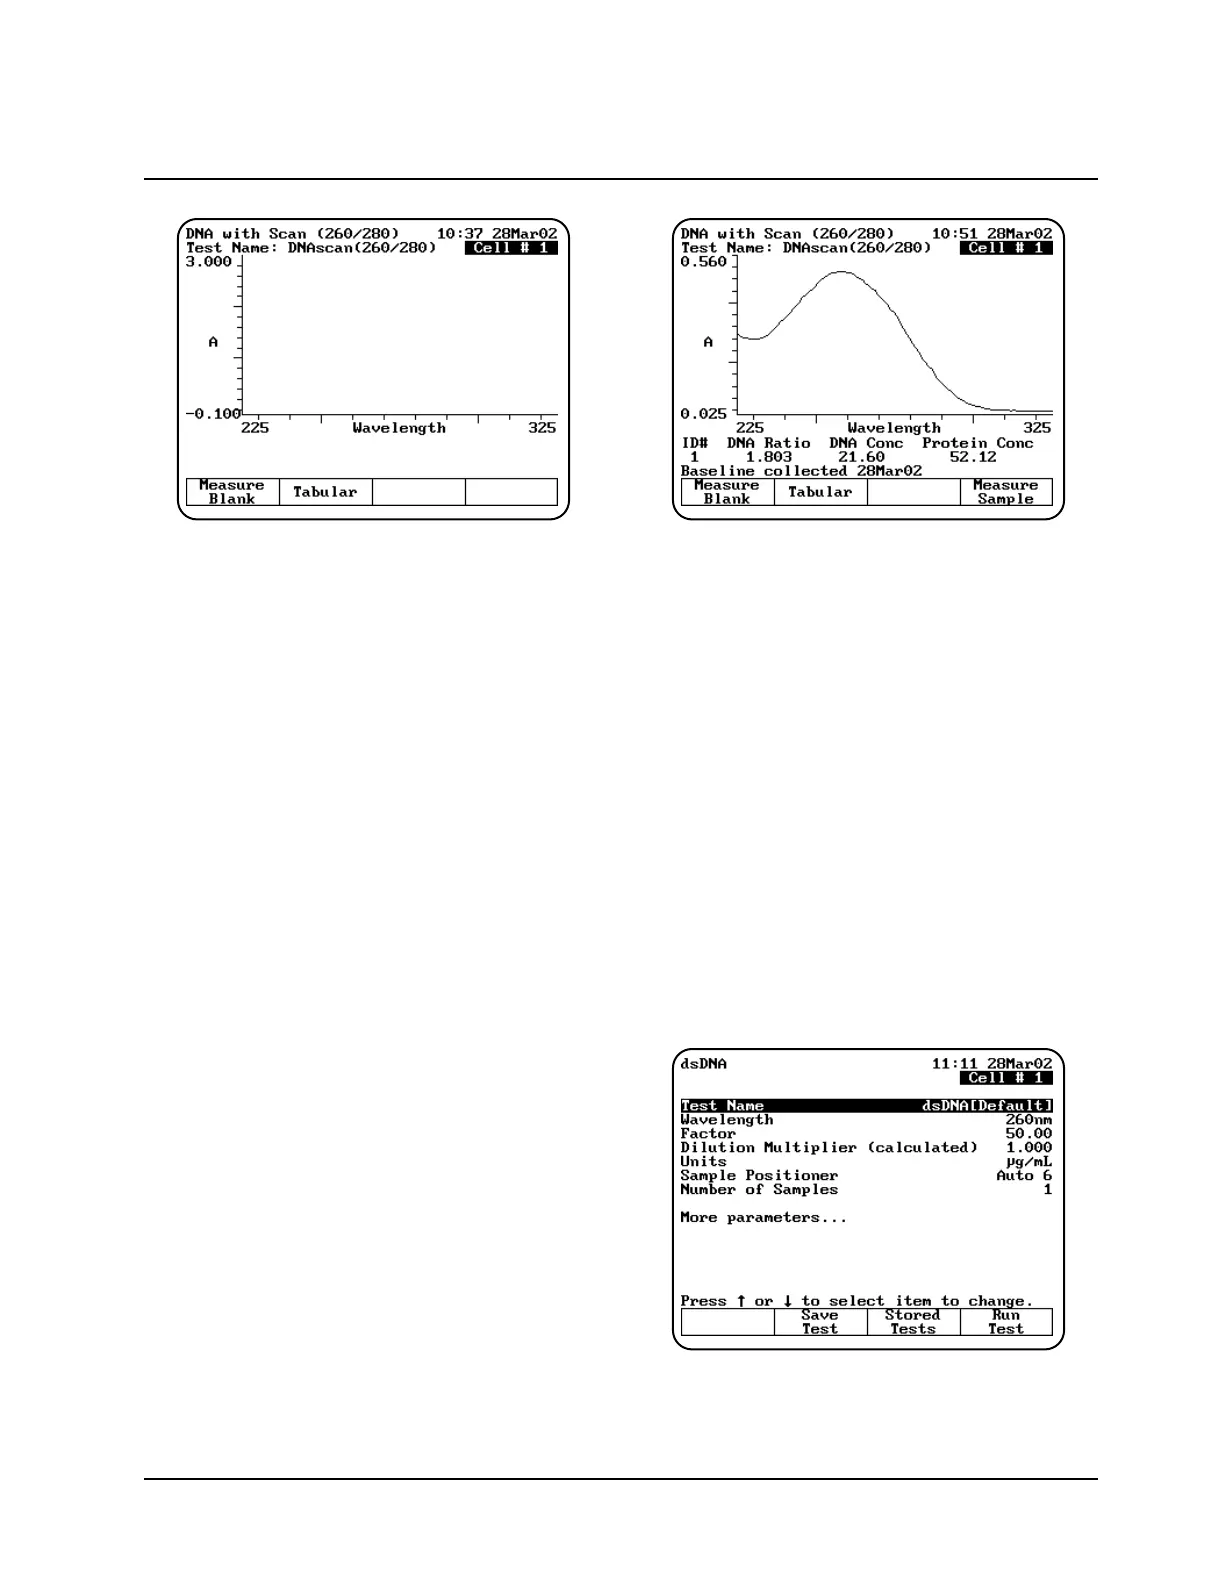
2. With the DNA with Scan measurement screen
displayed, press Measure Sample to measure
the sample. When the instrument is finished
measuring the absorbance scan, it displays a
graph of the scan along with the sample ID#,
DNA ratio, DNA concentration and protein
concentration.
Note: If you want to switch between tabular and
graphical displays, press Graph or
Tabular.
Note: You may need to use the up and down
arrow keys to view all the data for the
screen.
dsDNA, ssDNA, RNA and Oligos (entered
factor) Direct or UV Measurements
These test measurements are all set up and run
using the same types of test parameters. Refer to
Appendix B for a description of the parameters and
Appendix C for the default values.
To get started, with the BioMate Tests screen
displayed, move the arrow keys to highlight
Nucleic Acid Tests and press ENTER. A list of
nucleic acid test appears. Move the arrow keys to
highlight the desired test and press ENTER. The
dsDNA, ssDNA, RNA or Oligos (entered factor)
parameter screen appears.
Note: The following screens show the
parameters for the dsDNA test.
Note: If Cell Correction is ON, you must run the
Setup Correction program before you can
access the Run Test or Measure
Samples keys.
Using “Biotests” Software
2-5 BioMate 3 Operator’s Manual
 Loading...


