SETTING AND COMMISSIONING
117
NG10 - Manual - 04 - 2022
• Press the Enter button; the cursor and the LED TRIP turn off (the LED START keeps flashing),
• Press the Enter button for a few seconds; new message appears: Confirm settings?
• Answer to the message ENTER: YES to confirm changes or RESET: NO to abort.
• The message: password ok >> is displayed
• To exit from password menu use Left or Up keys: if you press the Right button you go back in the
password menu and the password must be entered. The parameter changes are enabled from the
keyboard. After any confirming with (Enter) or abandoning the change (reset button) the password
must be entered again.
• The possibility of modifying the parameters from the keyboard is automatically disabled after about
3 minutes elapsed without pressing any button. If you do not want to wait three minutes of waiting,
it must go back to the password menu and come out without input any data ( Left and Right until the
the message password not ok >> is displayed.
Changing the password
Changing the password is possible only after entering the correct password (password ok
>> message); press the Down key, a new menu is displayed change password that you
access with the Right key. Inside this menu the password can be changed.
• Press the Enter button for a few seconds; the modification in progress status is highlighted by
flashing of the START and TRIP LEDs and by appearance of the pointer on the bottom
• Change the parameters by means the Up (increment) or Down (decrement) buttons,
using the Left
and Right keys to move to the previous or next character
• Press the Enter button; the cursor and the LED TRIP turn off (the LED START keeps flashing),
• Press the Enter button for a few seconds; new message appears: Confirm settings?
• Answer to the message ENTER: YES to confirm changes or RESET: NO to abort.
Lost password
If password is lost the data base of the device must be restored, proceed with the following steps:
• Activate the session level 1
• Send Setdefaultsettings command available inside the Command \ Default settings menu.
Following the Setdefaultsettings command the password is reset to 0000.
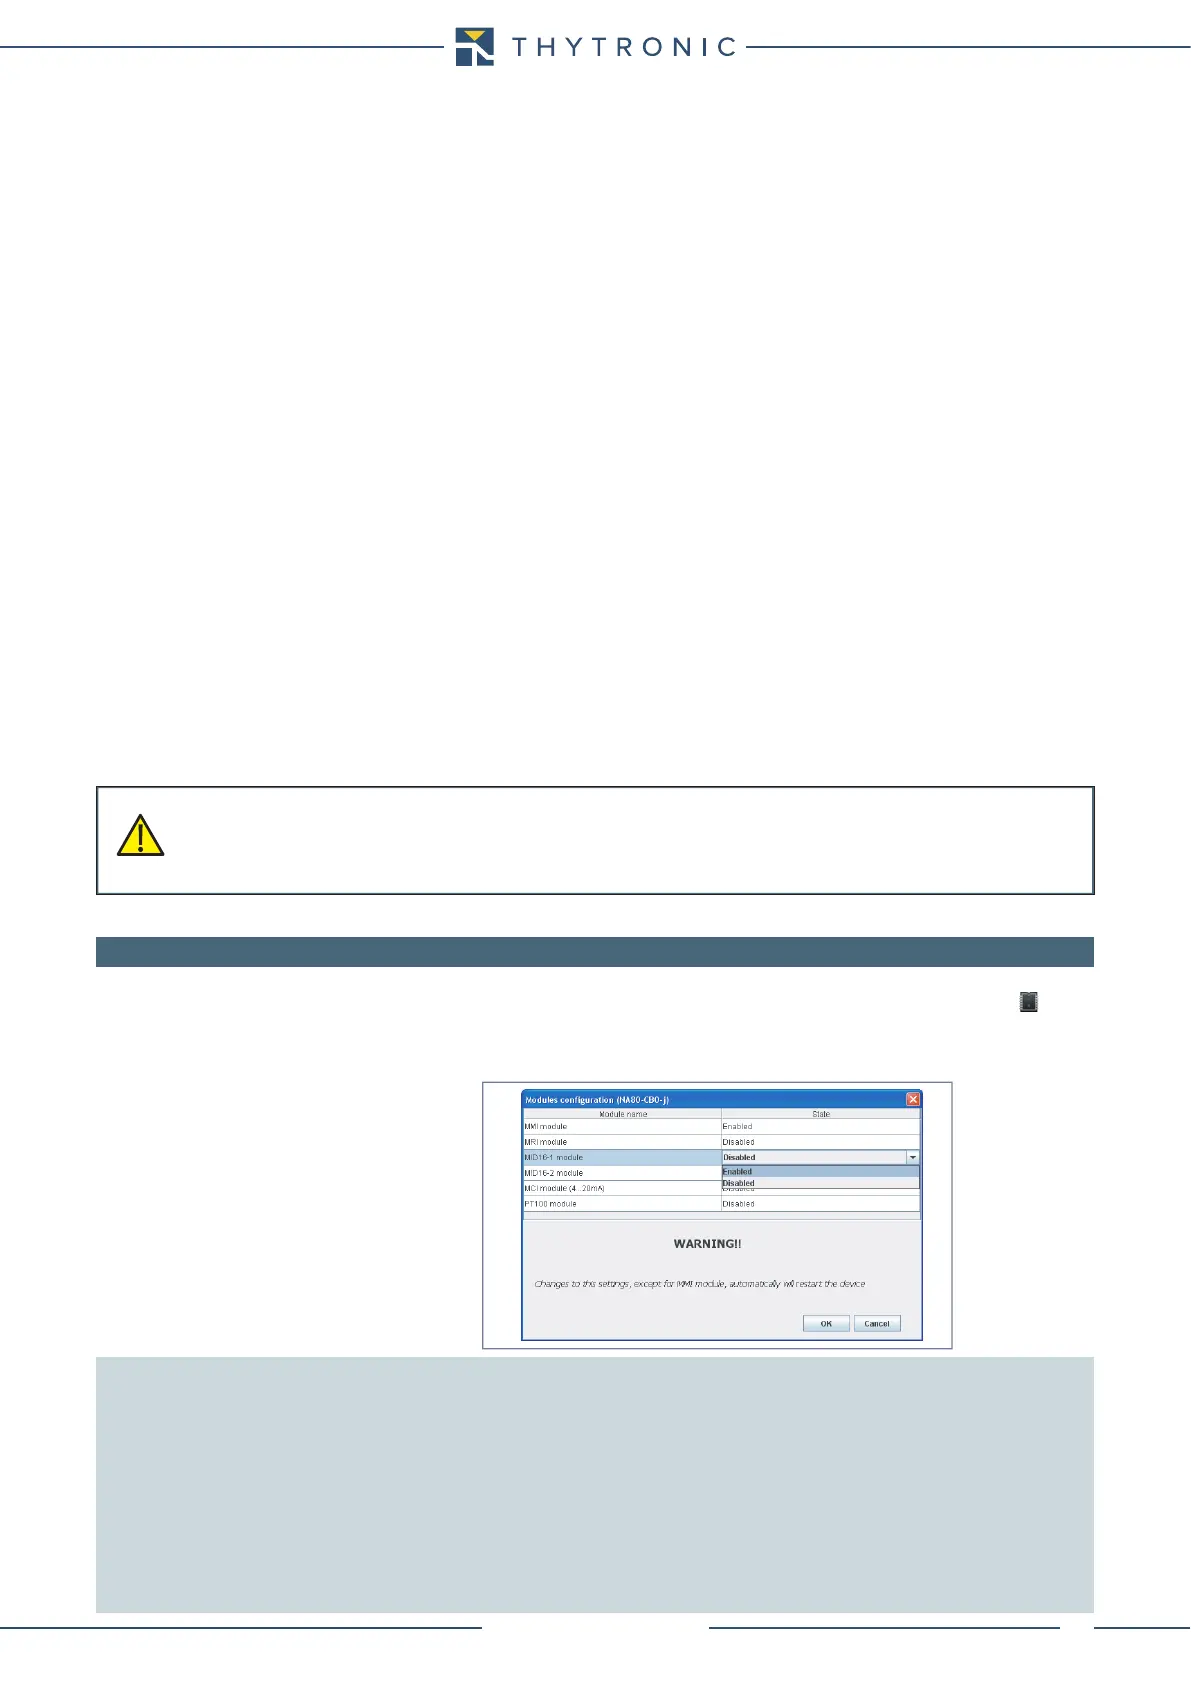
7.3 MODULES MANAGEMENT
After installation, the modules must be enabled (working with level 1 session level).
The Thybus modules may be set inside the Procedure menu (or by means a click on the
icon).
Following up any module configuration an automatic reset is issued and the I/O devices are included
inside the device menu.
[1]
When two MID16 modules are enabled, the hardware address must be
set; the dip-switch layout is showed inside the INSTALLATION section.
Note 1 Binary inputs and output names (ThyVisor):
Binary inputs for devices with two inputs onboard IN1, IN2 on board
IN3...IN10 with MRI module
IN11...IN26 with one MID16 module
IN27...IN42 with two MID16 modules
Binary inputs for devices with five inputs onboard IN1...IN5 on board
IN6...IN13 with MRI module
IN14...IN29 with one MID16 module
IN30...IN45 with two MID16 modules
Output relays K1...K6 on board
K7...K10 with MRI module
LEDs: ON, START, TRIP, L1...L5 on board
L6...L10 with MRI module
WARNING
The command Set default settings restores the factory settings, all user- defined adjustments are cleared.
Be carefully to enter the correct parameter !
The device serial number should be set to avoid IP address conflicts for devices connected to the
Ethernet network.
 Loading...