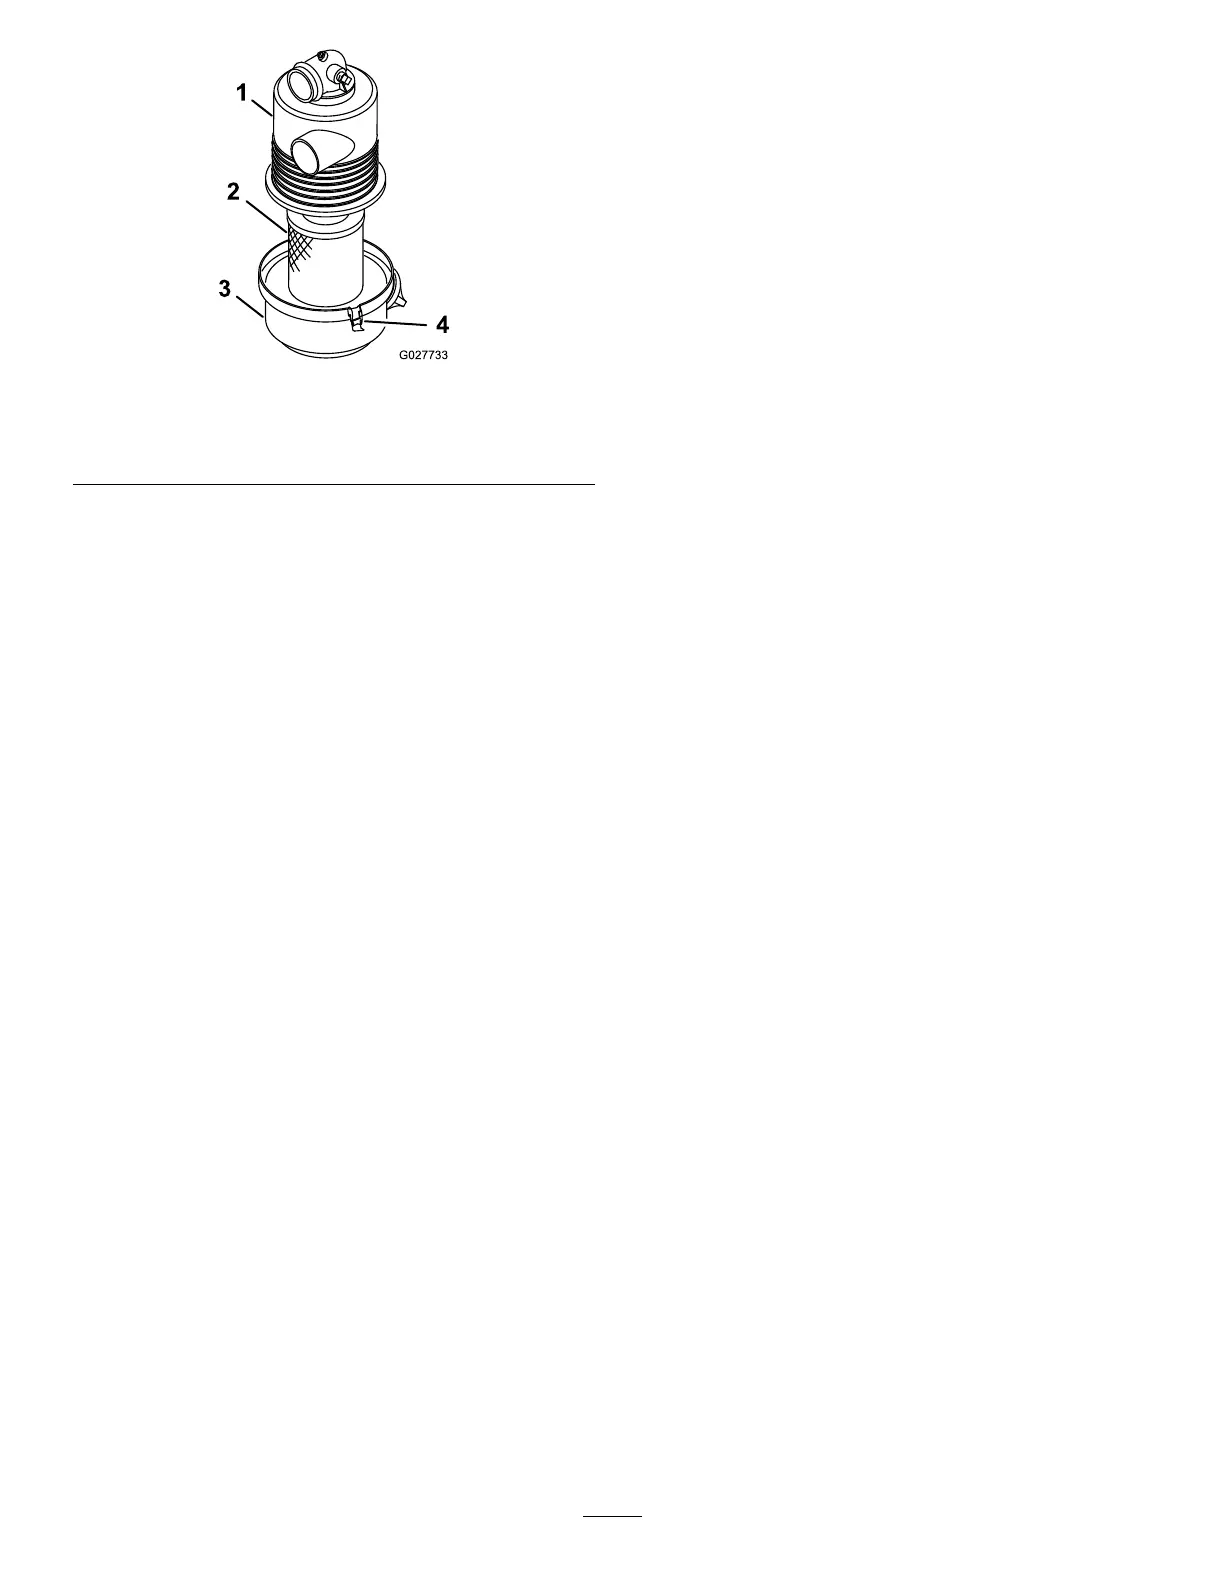
g027733
Figure 30
1. Air-lter housing 3. Air-lter cover
2. Air-lter element
4. Latch
3. Release the latches securing the air-lter cover
to the air-lter housing ( Figure 30 ).
4. Separate the air-lter cover from the air-lter
housing, and clean the inside of the cover
( Figure 30 ).
5. Gently slide the air-lter element out of the lter
housing.
Note: T o reduce the amount of dust dislodged,
avoid knocking the lter against the air-lter
housing.
6. Inspect the air-lter element.
• If the air-lter element is clean, install the
lter element; refer to Installing the Air Filter
( page 34 ) .
• If the air-lter element is damaged, replace
the lter element; refer to Replacing the Air
Filter ( page 34 ) .
Replacing the Air Filter
1. Remove the air-lter element.
2. Inspect the new lter for shipping damage.
Note: Check the sealing end of the lter .
Important: Do not install a damaged lter .
3. Install the new air lter; refer to Installing the Air
Filter ( page 34 ) .
Installing the Air Filter
Important: T o prevent engine damage, always
operate the engine with the complete air cleaner
assembly installed.
Important: Do not use a damaged element.
Note: Cleaning of the used air-lter element is not
recommended due to the possibility of damage to the
lter media.
1. Clean the dirt ejection port located on the
air-lter cover .
2. Remove the rubber outlet valve from the cover ,
clean the cavity , and replace the outlet valve.
3. Insert the air-lter element into air-lter housing
( Figure 30 ).
Note: Ensure that the lter is sealed properly
by applying pressure to the outer rim of the lter
when installing it. Do not press on the exible
center of the lter .
4. Align the air-lter cover with the air-lter housing
( Figure 30 ).
5. Secure the cover to the housing with the latches
( Figure 30 ).
6. Lower the cargo bed.
34

 Loading...