UNT-SVX07B-EN 37
Installation—Mechanical
Duct Connections
Install all air ducts according to National Fire Protection Association standards for the Installation
of Air Conditioning and Ventilating Systems (NFPA 90A and 90B).
Install all air ducts according to the National Fire Protection Association standards for the
“Installation of Air Conditioning and Ventilation Systems other than Residence Type (NFPA 90A)
and Residence Type Warm Air Heating and Air Conditioning Systems (NFPA 90B).
WARNING
Hazardous Voltage w/Capacitors!
Disconnect all electric power, including remote disconnects and discharge all motor start/run
capacitors before servicing. Follow proper lockout/tagout procedures to ensure the power
cannot be inadvertently energized. For variable frequency drives or other energy storing
components provided by Trane or others, refer to the appropriate manufacturer’s literature for
allowable waiting periods for discharge of capacitors. Verify with an appropriate voltmeter that
all capacitors have discharged. Failure to disconnect power and discharge capacitors before
servicing could result in death or serious injury.
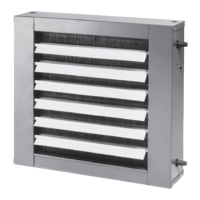
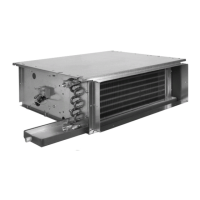
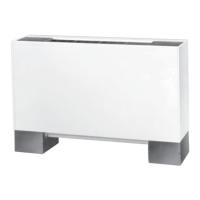
The unit’s airflow configuration varies dependent on the model and options ordered. A one-inch
duct collar is provided on units with a ducted return and/or discharge to attach ductwork to the unit.
Trane recommends using galvanized sheet metal ductwork with fan-coil and cabinet heater units.
Slide the sheetmetal duct over the duct collar flange of the unit, seal the joint and fasten with
sheetmetal screws.
Note: Do not run screws through the removable front panel on concealed units.
Ductwork Recommendations
Follow the general recommendations listed below when installing ductwork for the unit.
1. Discharge ductwork should run in a straight line, unchanged in size or direction, for a minimum
equivalent distance of three fan diameters from the unit (approximately 20 inches).
2. When making duct turns and transitions avoid sharp turns and use proportional splits, turning
vanes, and air scoops when necessary.
3. When possible, construct, and orient supply duct
work turns in the same direction as the fan
rotation.
Piping Considerations
Hydronic Coil Piping
Before installing field piping to the coil, consider the following .
• All coil connections are 5/8-inch O.D. (or 1/2-i
nch nominal) female copper connections.
• The supply and return piping should not interfere with the auxiliary drain pan or condensate
l
ine. See “Connecting the Condensate Drain” section for more detailed information.
• The installer must provide adequate piping system
filtration and water treatment.
• Exterior condensate may be an issu
e (fan-coils only) if field piping does not have a control
valve. Refer to the supply and return header locations in the “Dimensions and Weights” section.
Note: When
using a field supplied piping package in a fan-coil unit, allow sufficient room to install
the auxiliary drain pan. In addition, piping package must not extend over edges of auxiliary
drain pan.
Connecting Field Piping to Coil
1. Remove the auxiliary drain pan, if it is in place, to prevent exposureto dripping solder or
excessive temperatures.
 Loading...