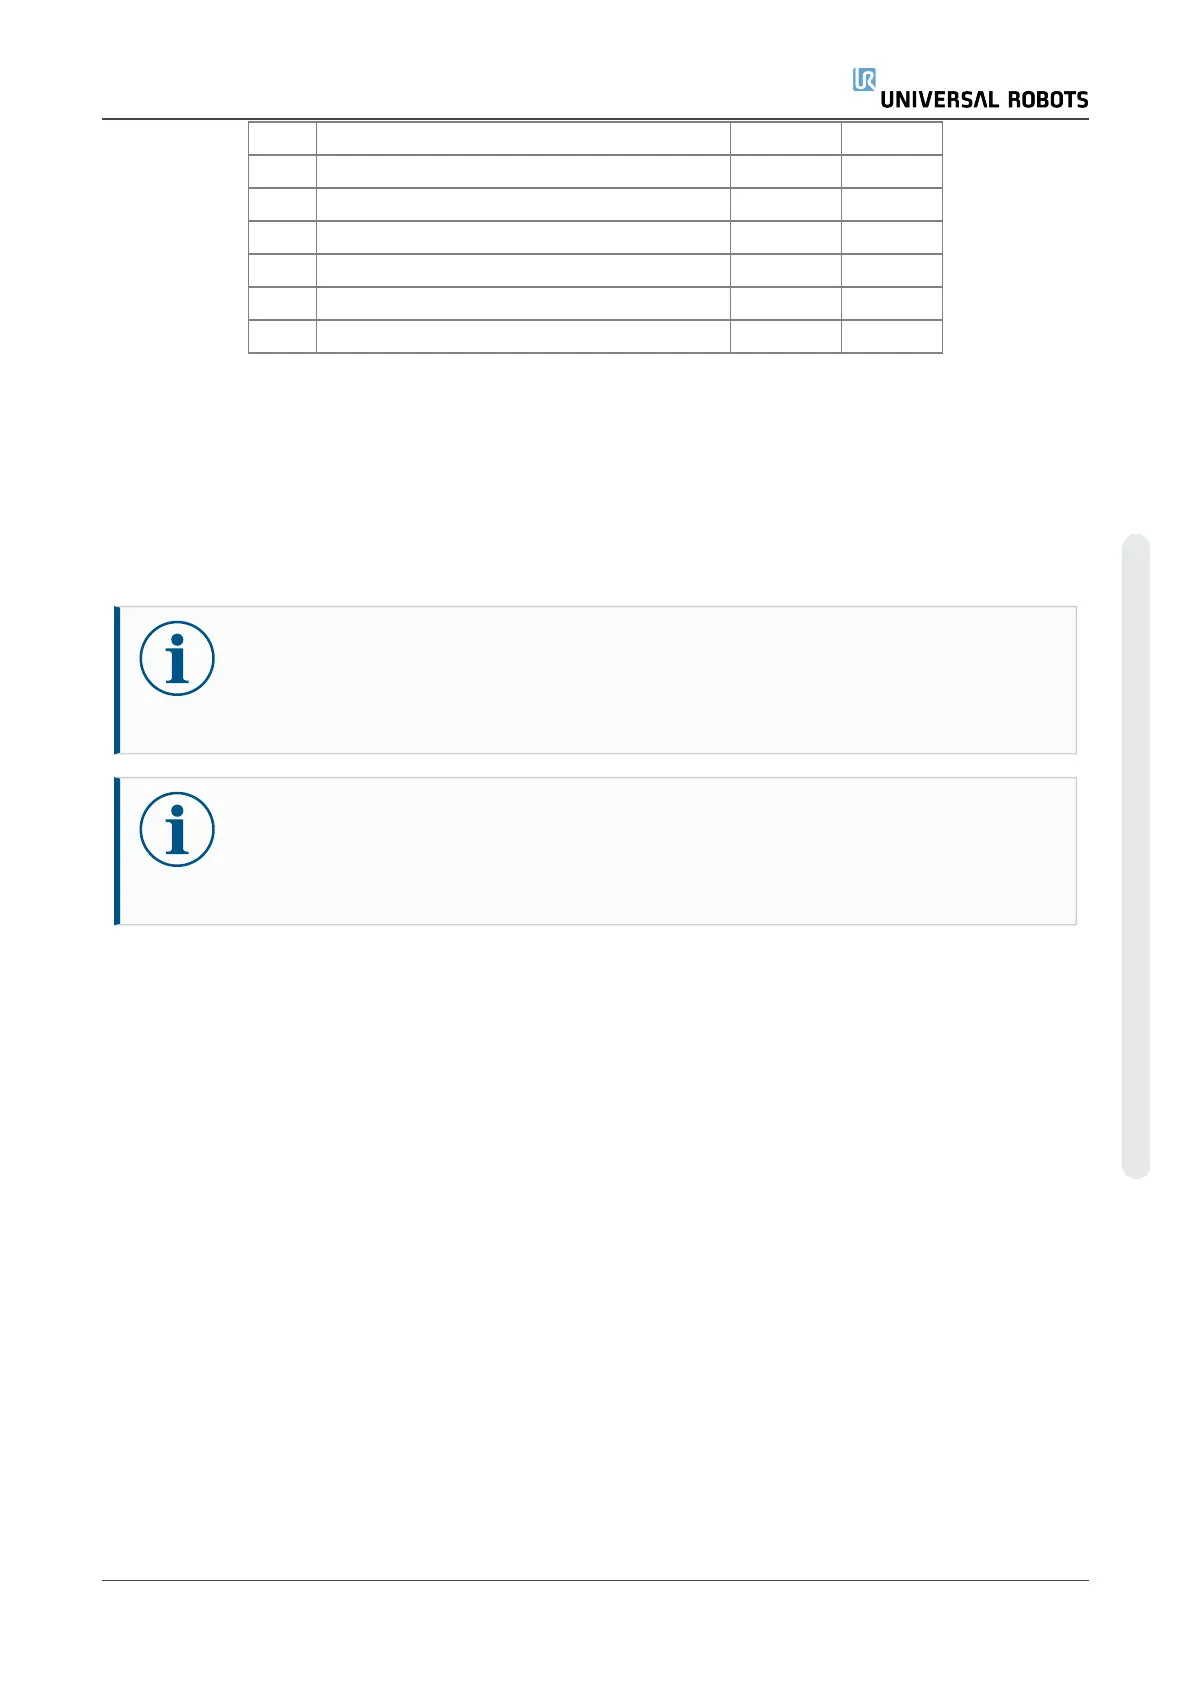
NO. DESCRIPTION Tool size Torque
1 Screw for fan and energy eater assembly Torx T20 0.6Nm
2 Screw for mounting power supply Torx T20 1.0Nm
3 Internal power terminal screws PZ2 1.2Nm
4 External power terminal screws PZ2 1.2Nm
5 Control Board mounting screws Torx T10 0.6Nm
6 Bolt for Control Box handle Hex key 5 4.0Nm
4.3.3. Replacing the 3PE Teach Pendant
This section describes how to replace a Standard Teach Pendant with a 3PE Teach Pendant. For
information on how to remove and replace a Standard Teach Pendant, see Replacing the Teach
Pendant: Standard TP.
NOTICE
Failure to test the 3PE buttons can lead to reduced functionality.
•
When the Teach Pendant is replaced, test the function of the 3PE buttons.
NOTICE
Replacing the Teach Pendant can result in the system reporting a fault on start-up.
•
Always select the correct configuration for the type of Teach Pendant.
To remove:
1. Power down the control box and disconnect the main power cable from the power source.
2. Remove and discard the two cable ties used for mounting the TeachPendant cables.
3. Press in the clips on both sides of the TeachPendantplug, as illustrated, and pull down to
disconnect from the Teach Pendant port.
4. Fully open/loosen the plastic grommet at the bottom of the Control Box and remove the
TeachPendantplug and cable.
5. Gently remove the TeachPendant cable and TeachPendant.
To replace:
1. Place the 3PETeachPendantplug and cable in through the bottom of the control box and
fully close/tighten the plastic grommet.
Service Manual 27 UR20
Copyright © 2009–2023 by UniversalRobotsA/S. All rights reserved.
 Loading...


